SAP IDocs. Preparing HR Master Data for Transfer to Another HR System. Part 1
I will consider this post as the start of a series of articles about working with SAP IDocs.
See: IDoc Interface/ALE
In this post, I would like to review the sequence of actions required to prepare master data for transferring from one HR system to another.
In my example, a single system will be used, but with different clients within it.
I will refer to official reference materials kindly provided by the vendor.
See: ALE QuickStart for Distributed HR
The description of the steps that follows will be fairly brief and condensed — partly due to frugality, and partly due to lack of free time.
0. Scenario
See ALE QuickStart for Distributed HR
Task:
Prepare a record from the HR Administration infotype for transfer to another system (or to another client of the same system) using standard SAP tools.
This task will be broken down into several steps:
- Configuring/preparing the system clients (in my case, clients 800 and 810)
- Assigning logical systems to clients
- Setting up RFC connections between systems (clients)
- Creating and configuring the model view (distribution model)
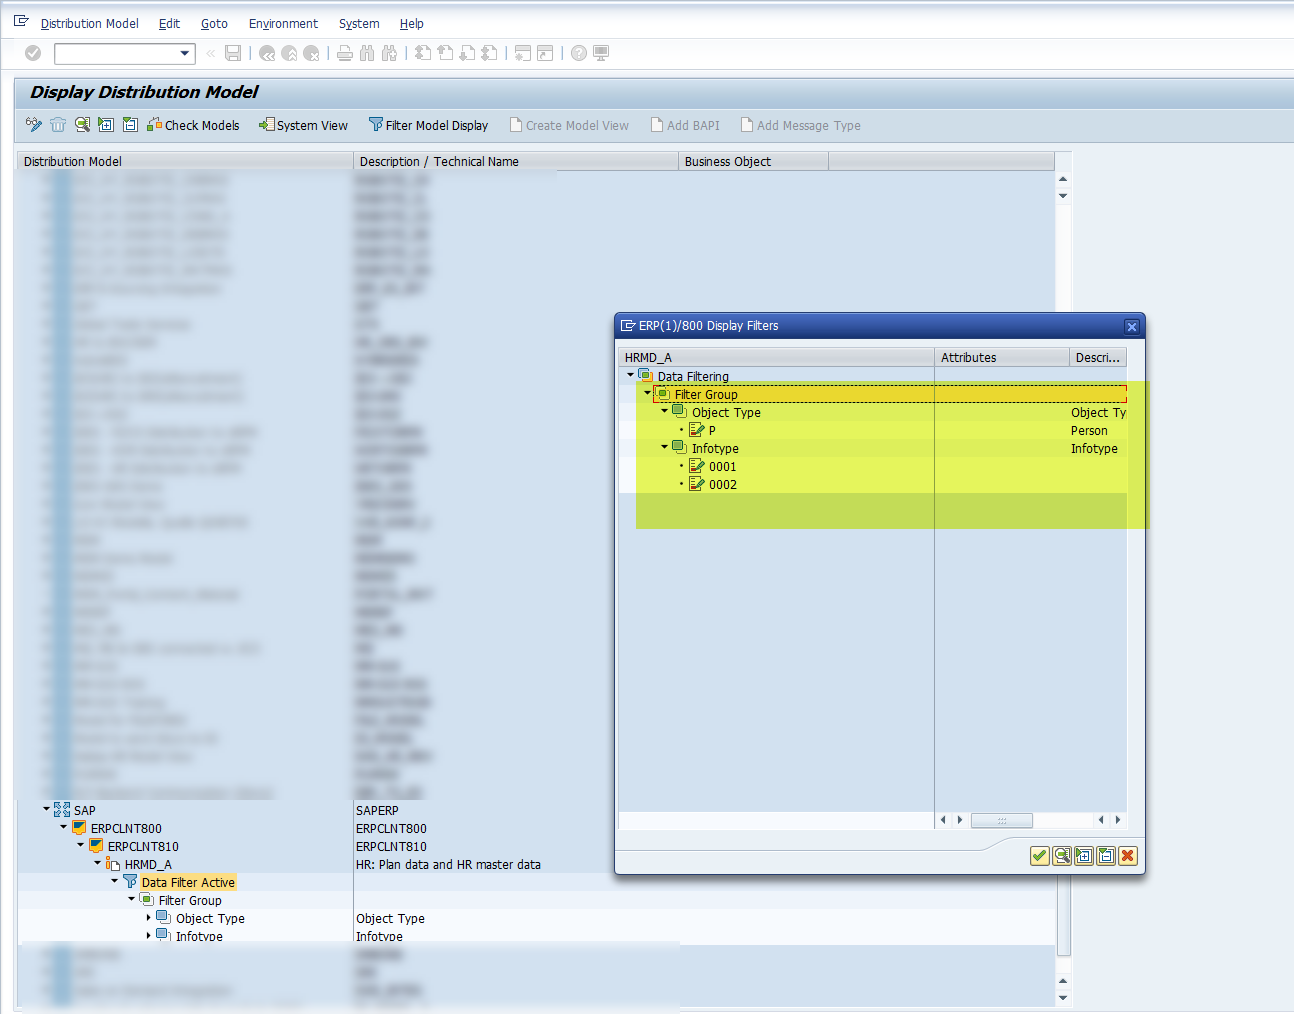
- Setting up the distribution model, including filtering specific infotypes and object types for message type HRMD_A
- Generating partner profile definitions
- Sending data to another HR system (client)
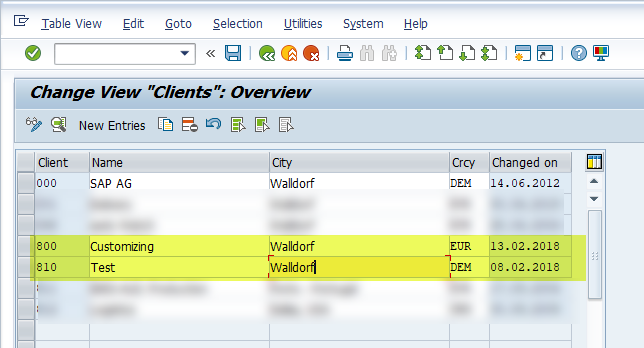
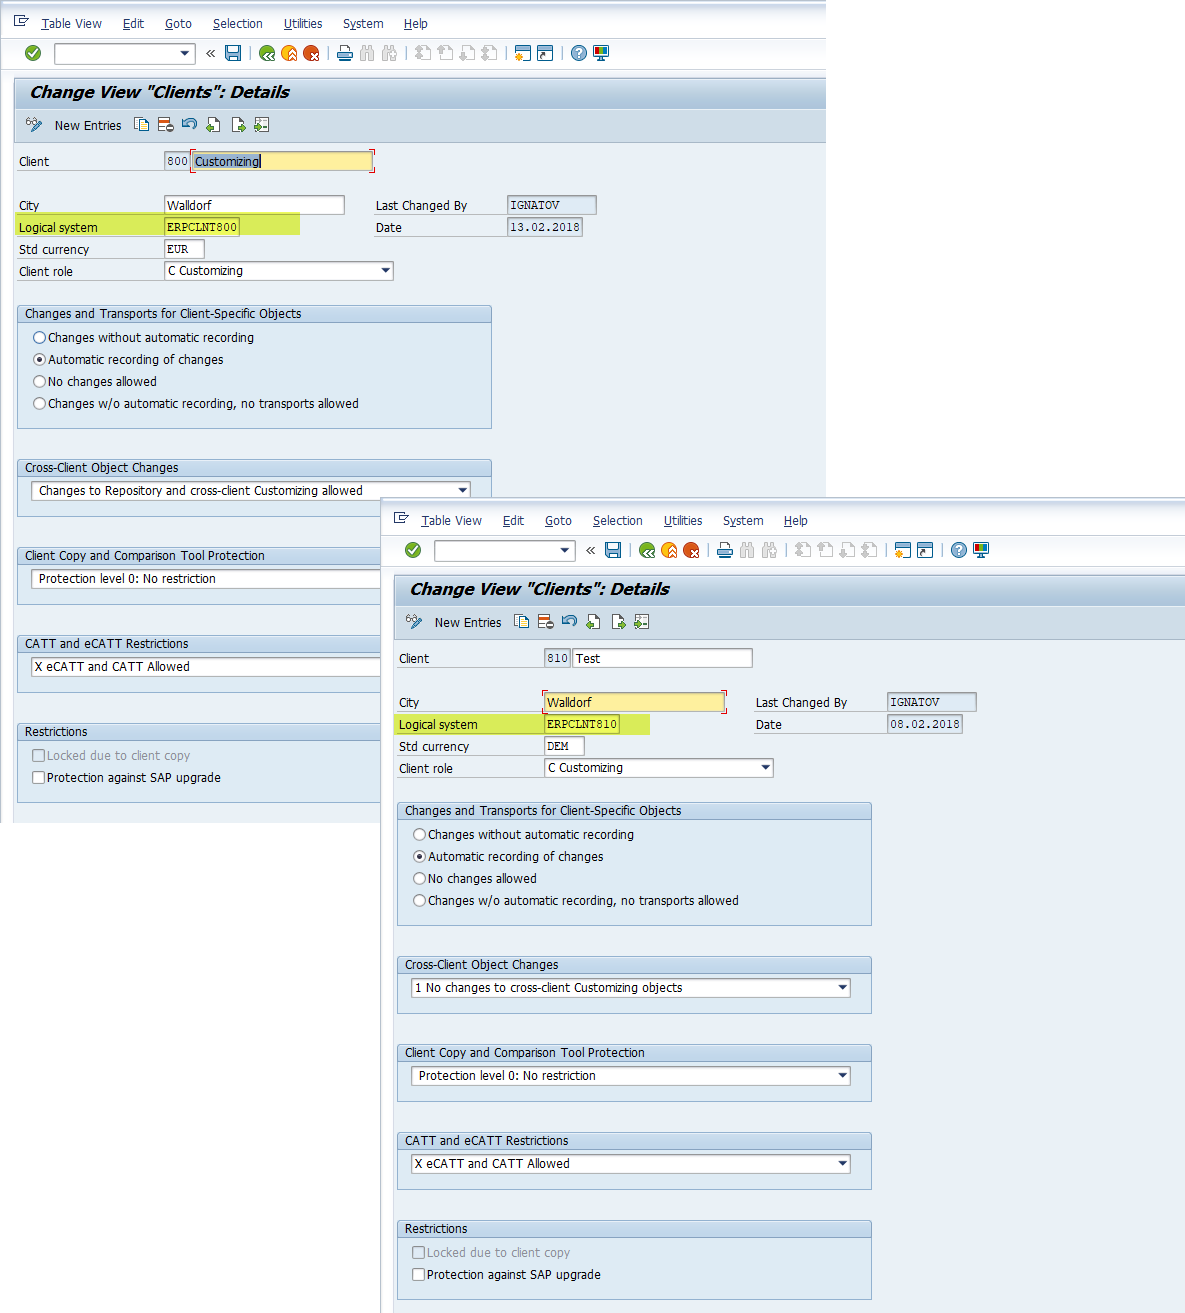
1. Configuring/Preparing System Clients
See: Setting Up Clients
As mentioned earlier, in my case two clients within one system are used.
2. Assigning Logical Systems to Clients
See: Assignment of Logical System to Client
You can also create logical systems via transaction BD54.
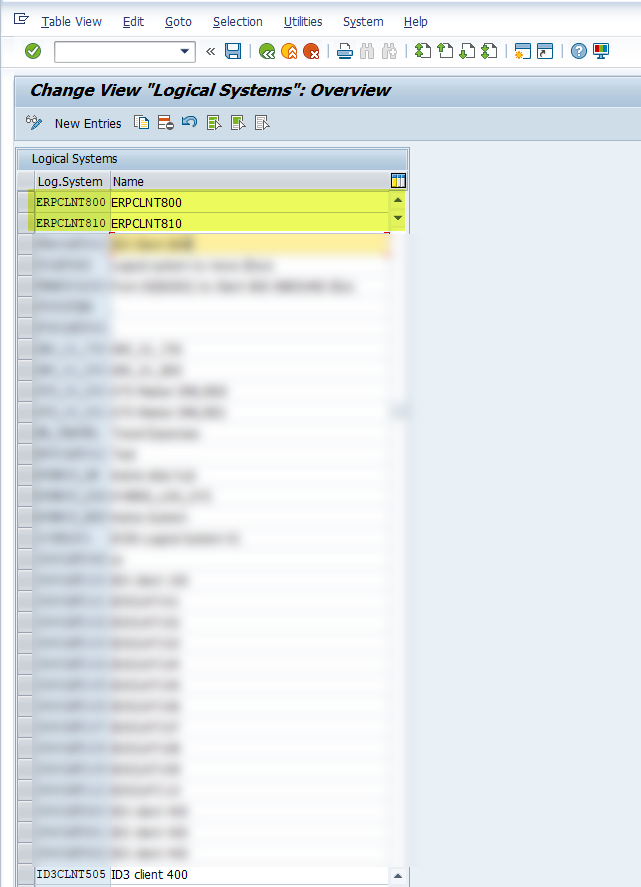
Assignment of logical systems to clients can be performed via transaction SCC4.
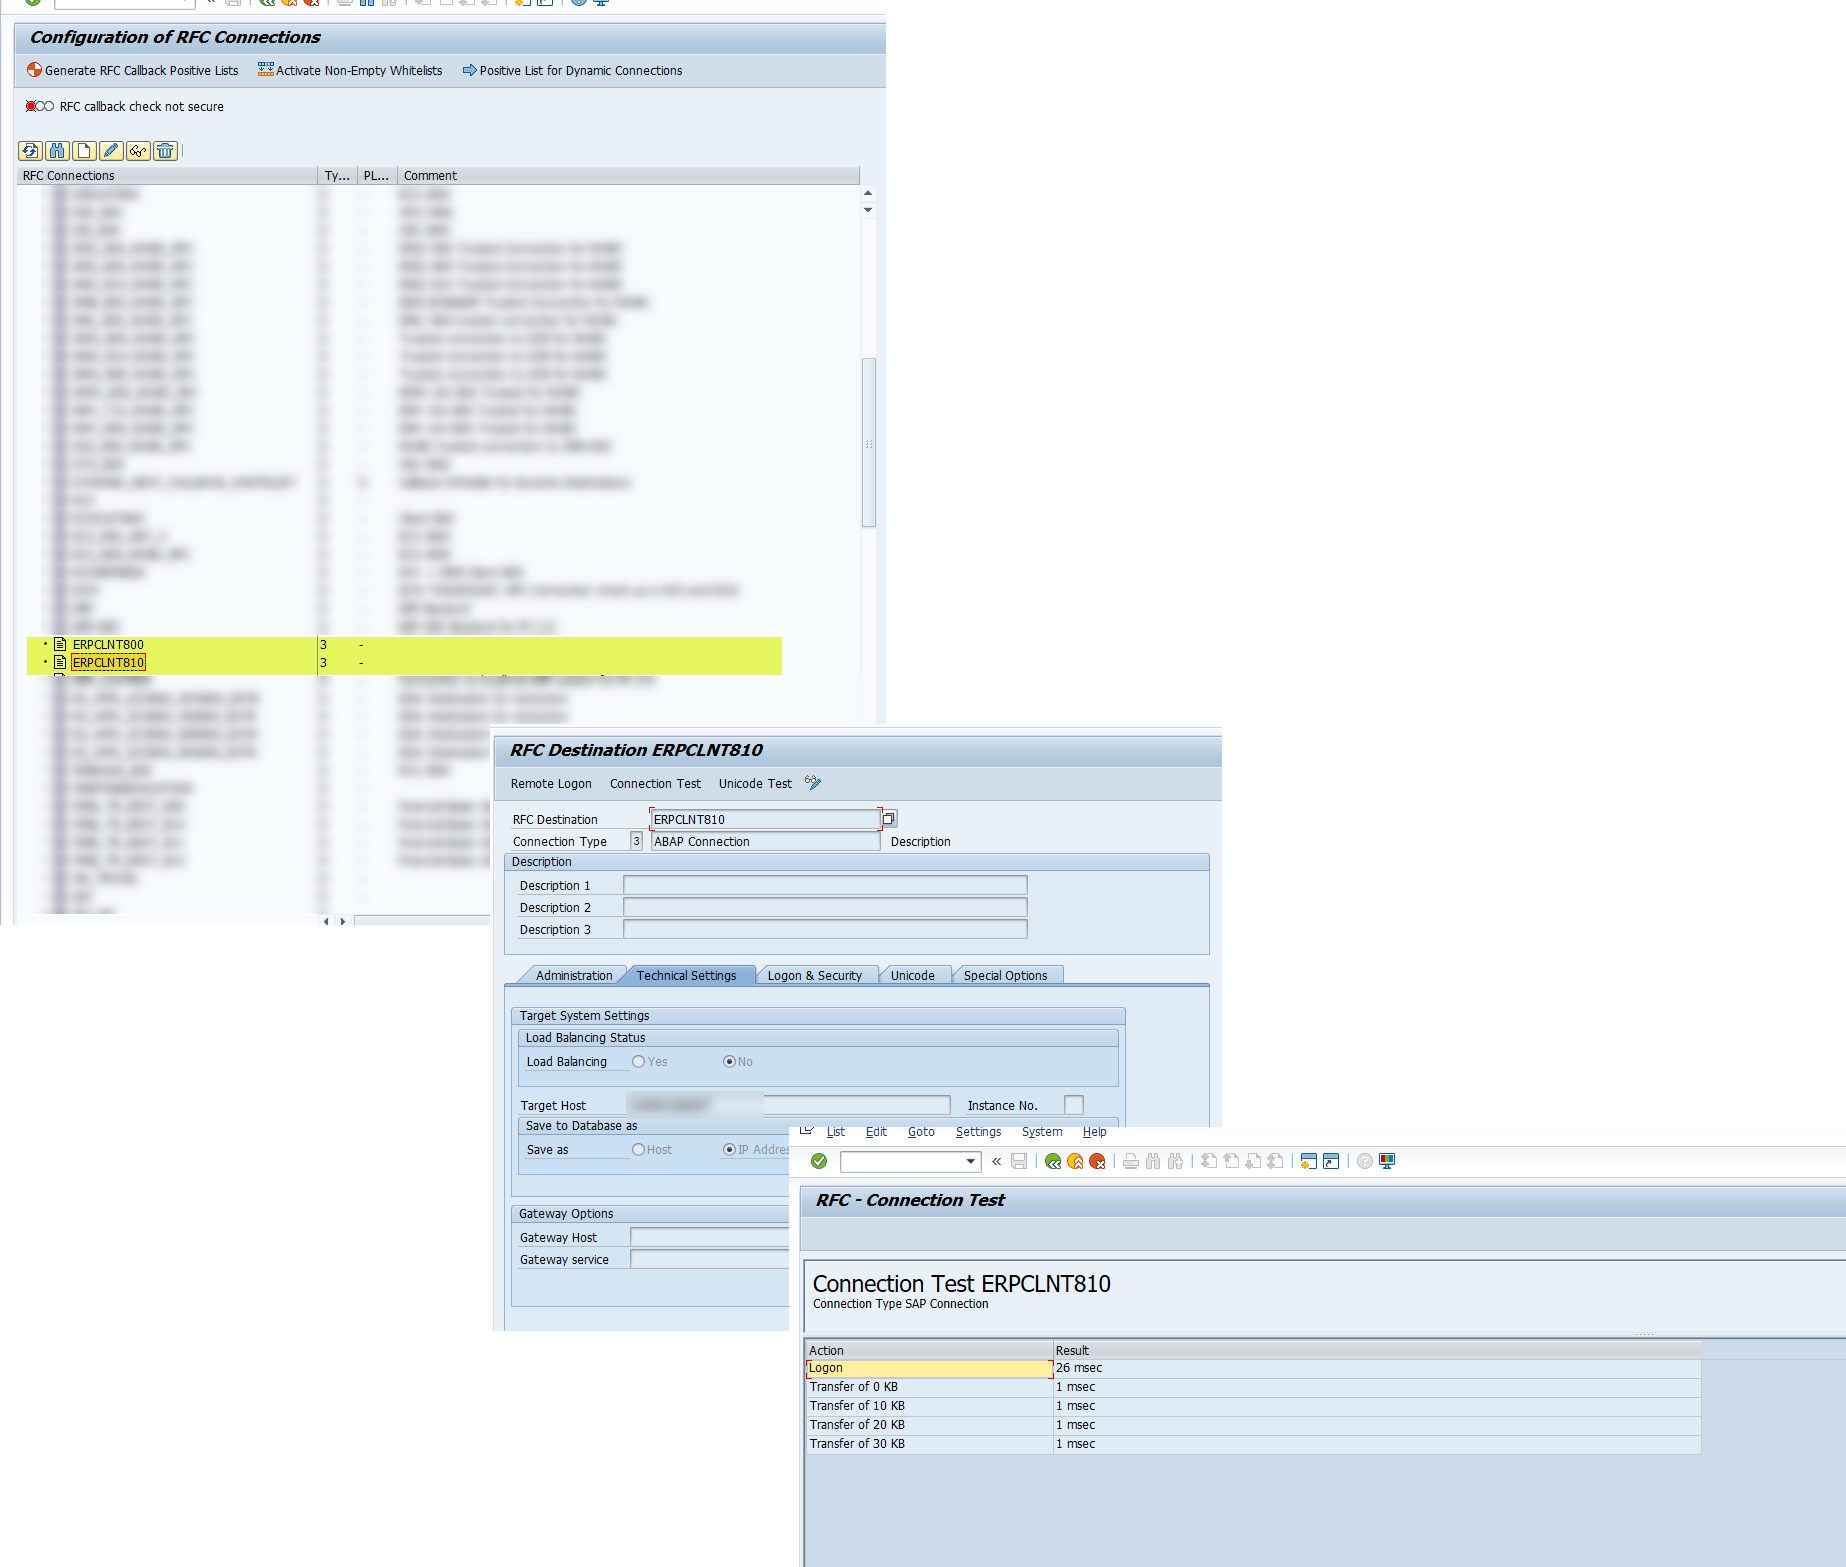
3. Setting Up RFC Connections Between Clients
See: Set Technical Communication Parameters
Set up RFC connections between the systems, and test them to ensure they work.
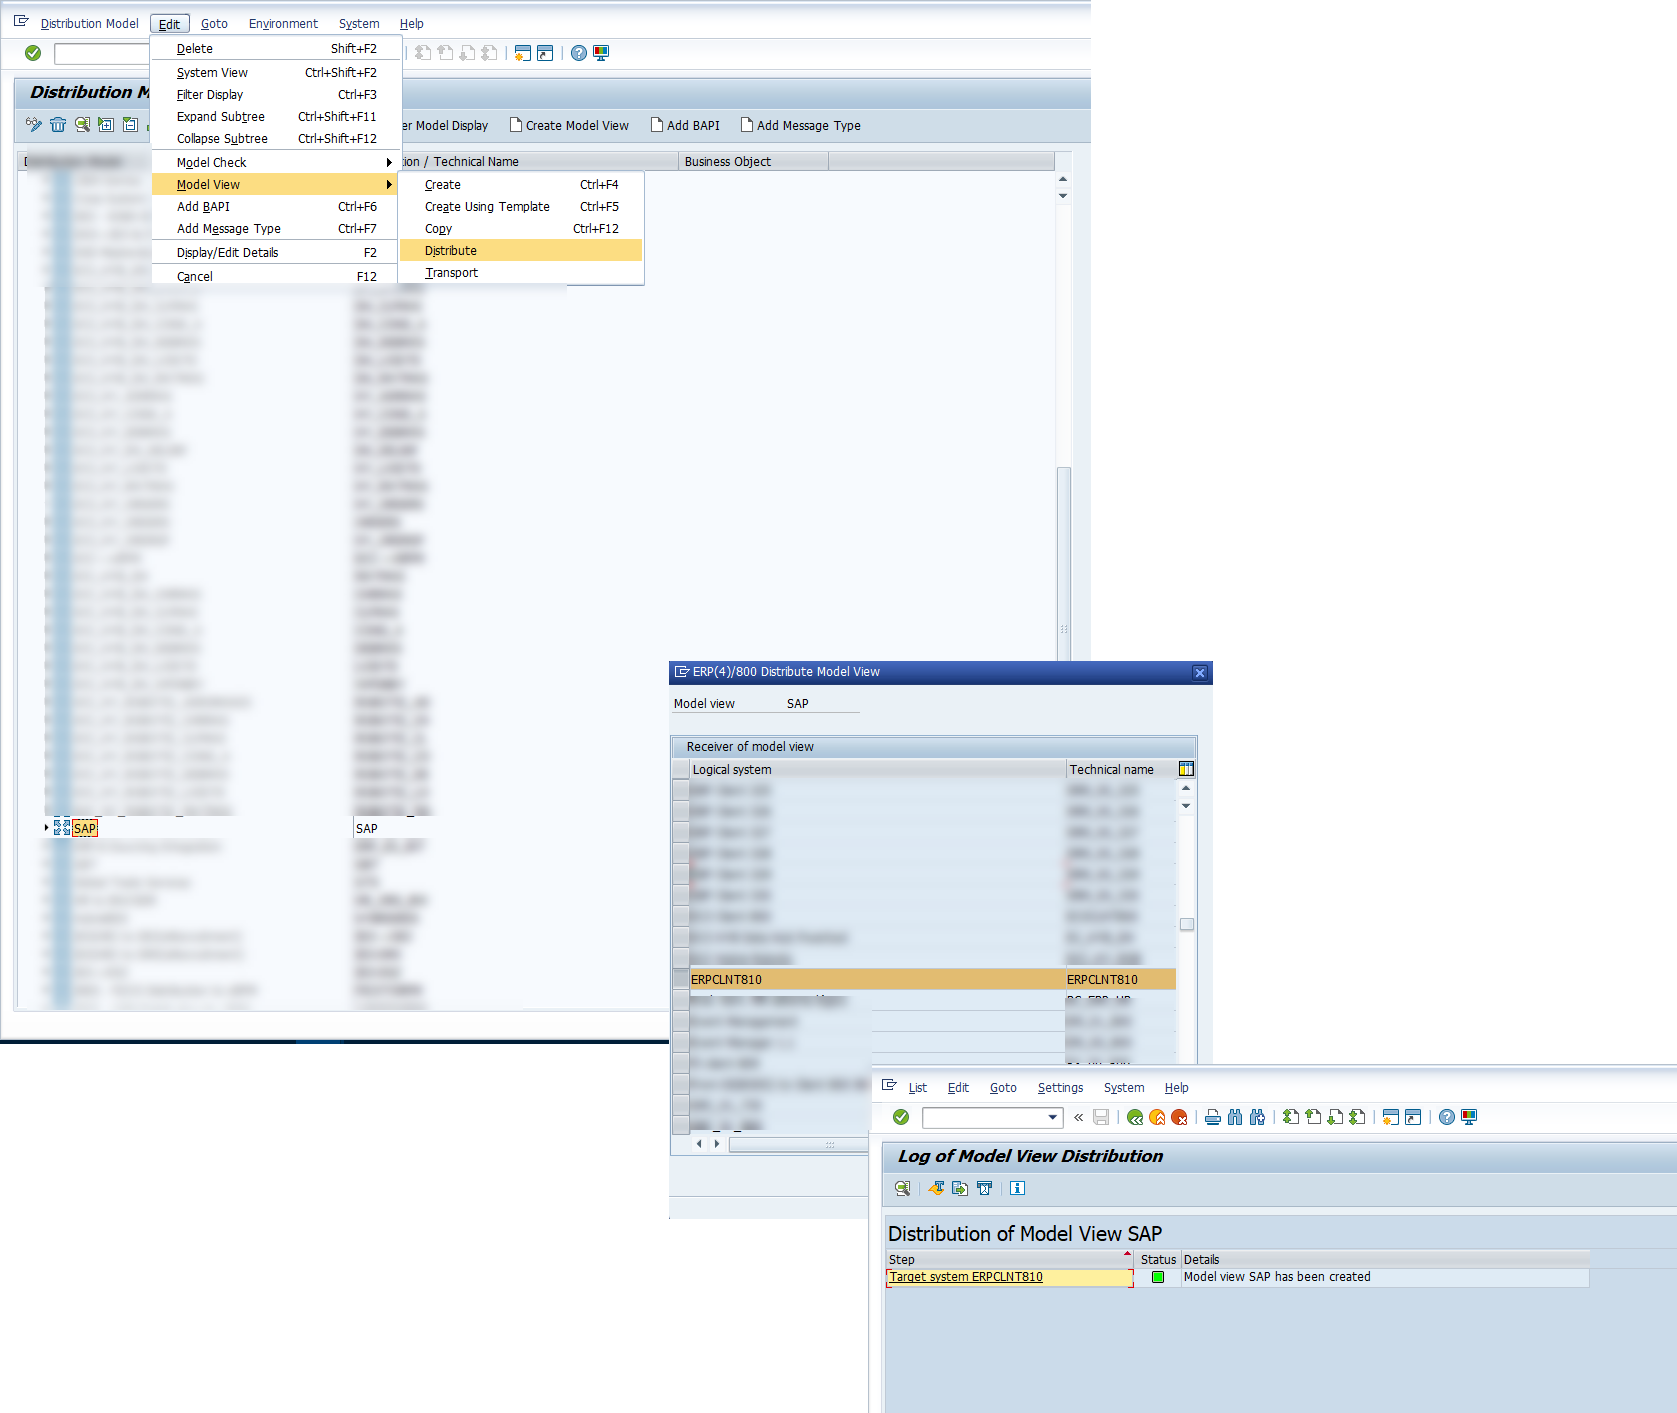
4. Configuring the Distribution Model
See: Model Distribution
Using transaction BD64, configure the distribution model according to the description provided in the reference material.
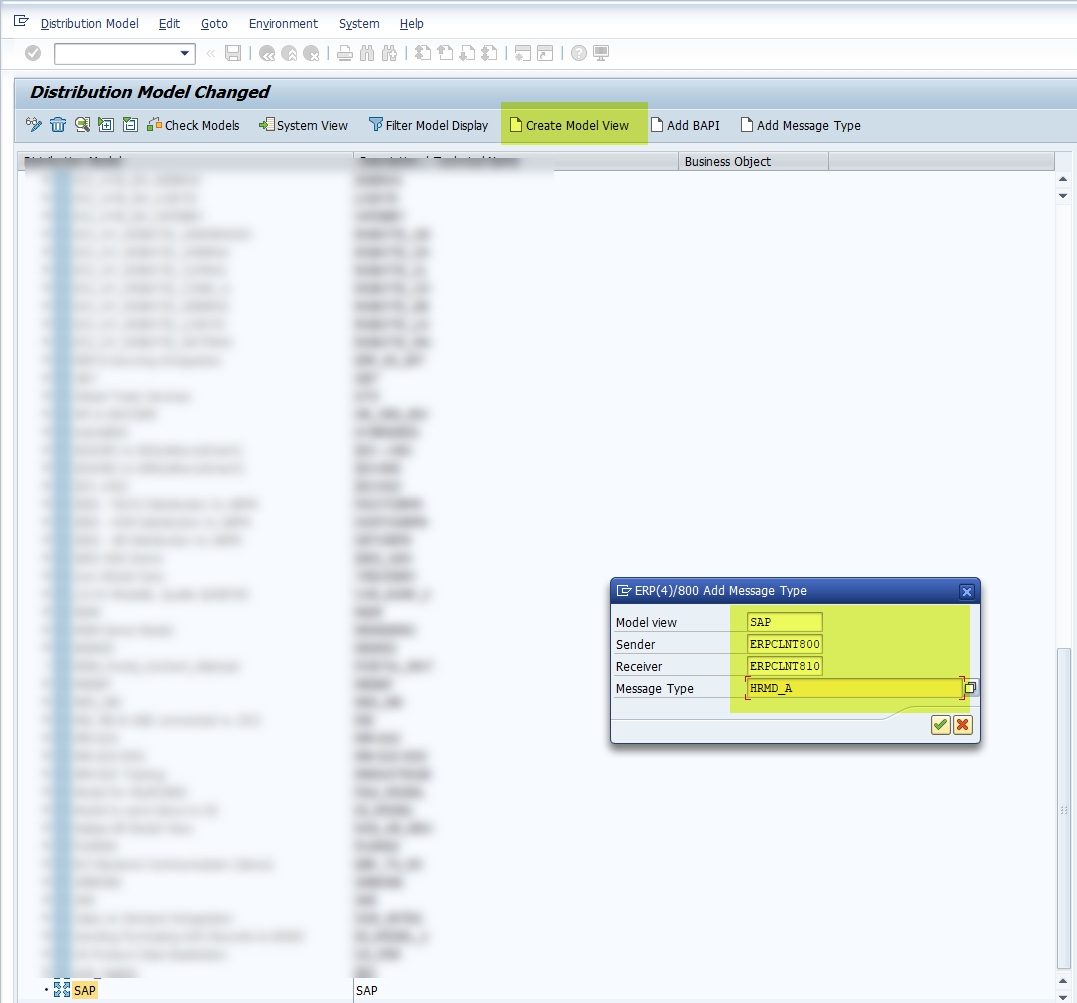
As the sender and receiver systems, specify the previously created logical systems. The message type used is HRMD_A.
Message type HRMD_A is used to transfer data between two HR systems.
Message type HRMD_B is used to transfer data between an HR system and a non-HR system.
If necessary, specify a BAPI.
See: Business Application Programming Interface (BAPI)
Configure the filter settings for the message type used.
5. Generating Partner Profile Definitions
See: Generate Partner Profiles in Sending System
While setting up the distribution model (transaction BD64), select the previously created system, and in the context menu, choose: Environment → Generate Partner Profile.
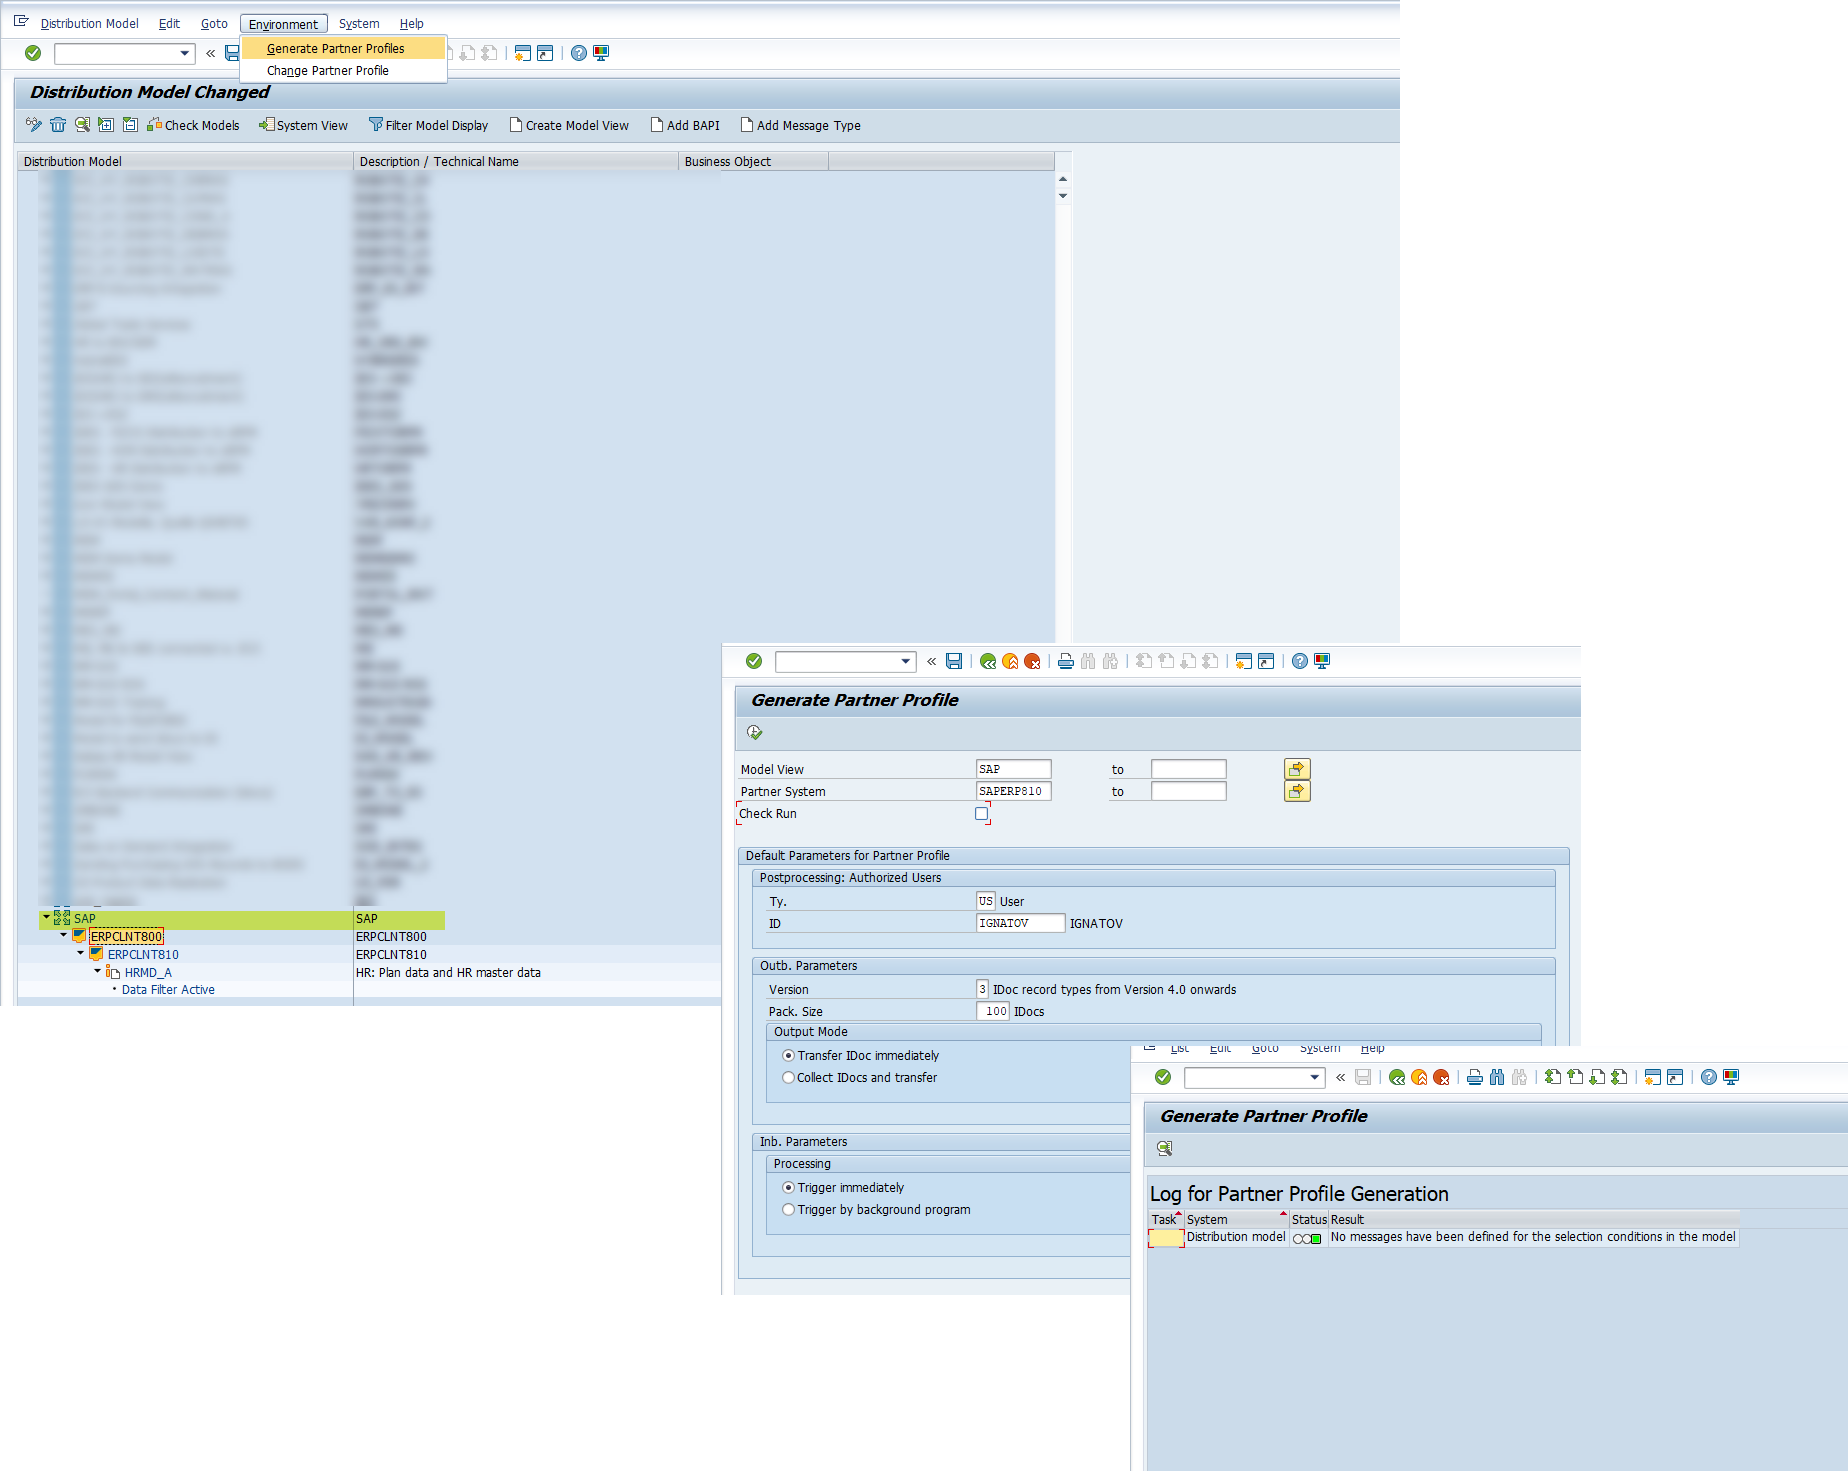
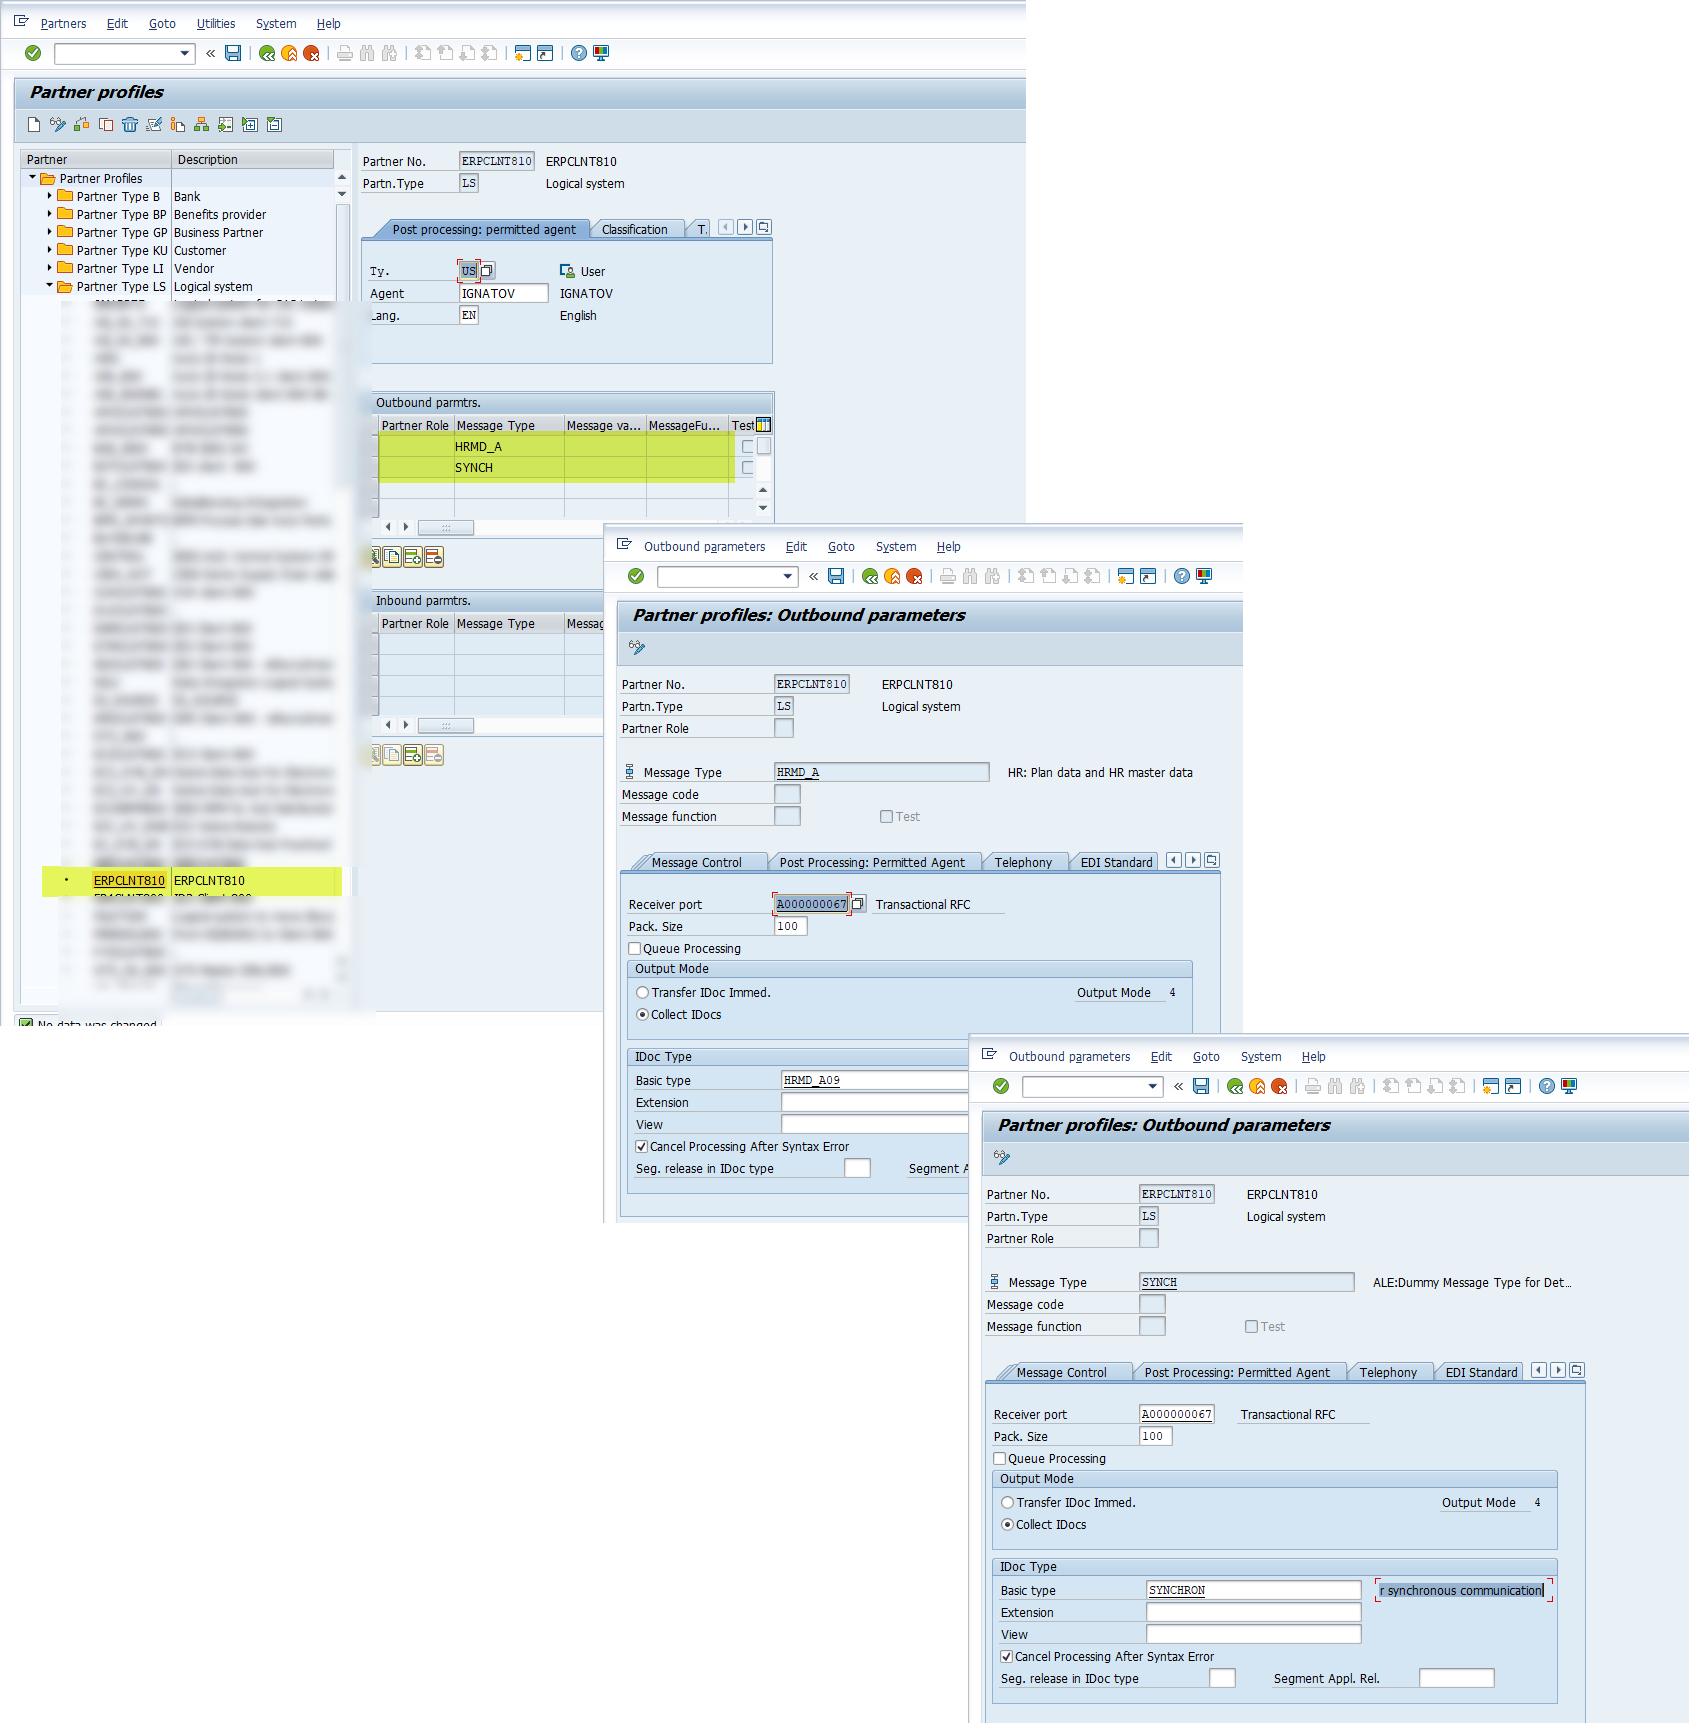
Also pay attention to settings available in transaction WE20.
See: Creating an Outbound Partner Profile
6. Transferring the Distribution Model to Another Client
See: Distribute Distribution Model
In transaction BD64 on the sending client (system), highlight the created distribution model, then choose in the menu:Edit → Model View → Distribute, select the name of the target logical system (receiver), and confirm your choice by clicking the green tick button .
Afterward, perform the procedure described in step #5 (Generating Partner Profile Definitions), but on the receiving system.
7. Sending Data to the External System
Run transaction PFAL, specifying in the selection screen:
- The personnel number for which the changes should be transferred
- The infotype(s)
- The receiving system
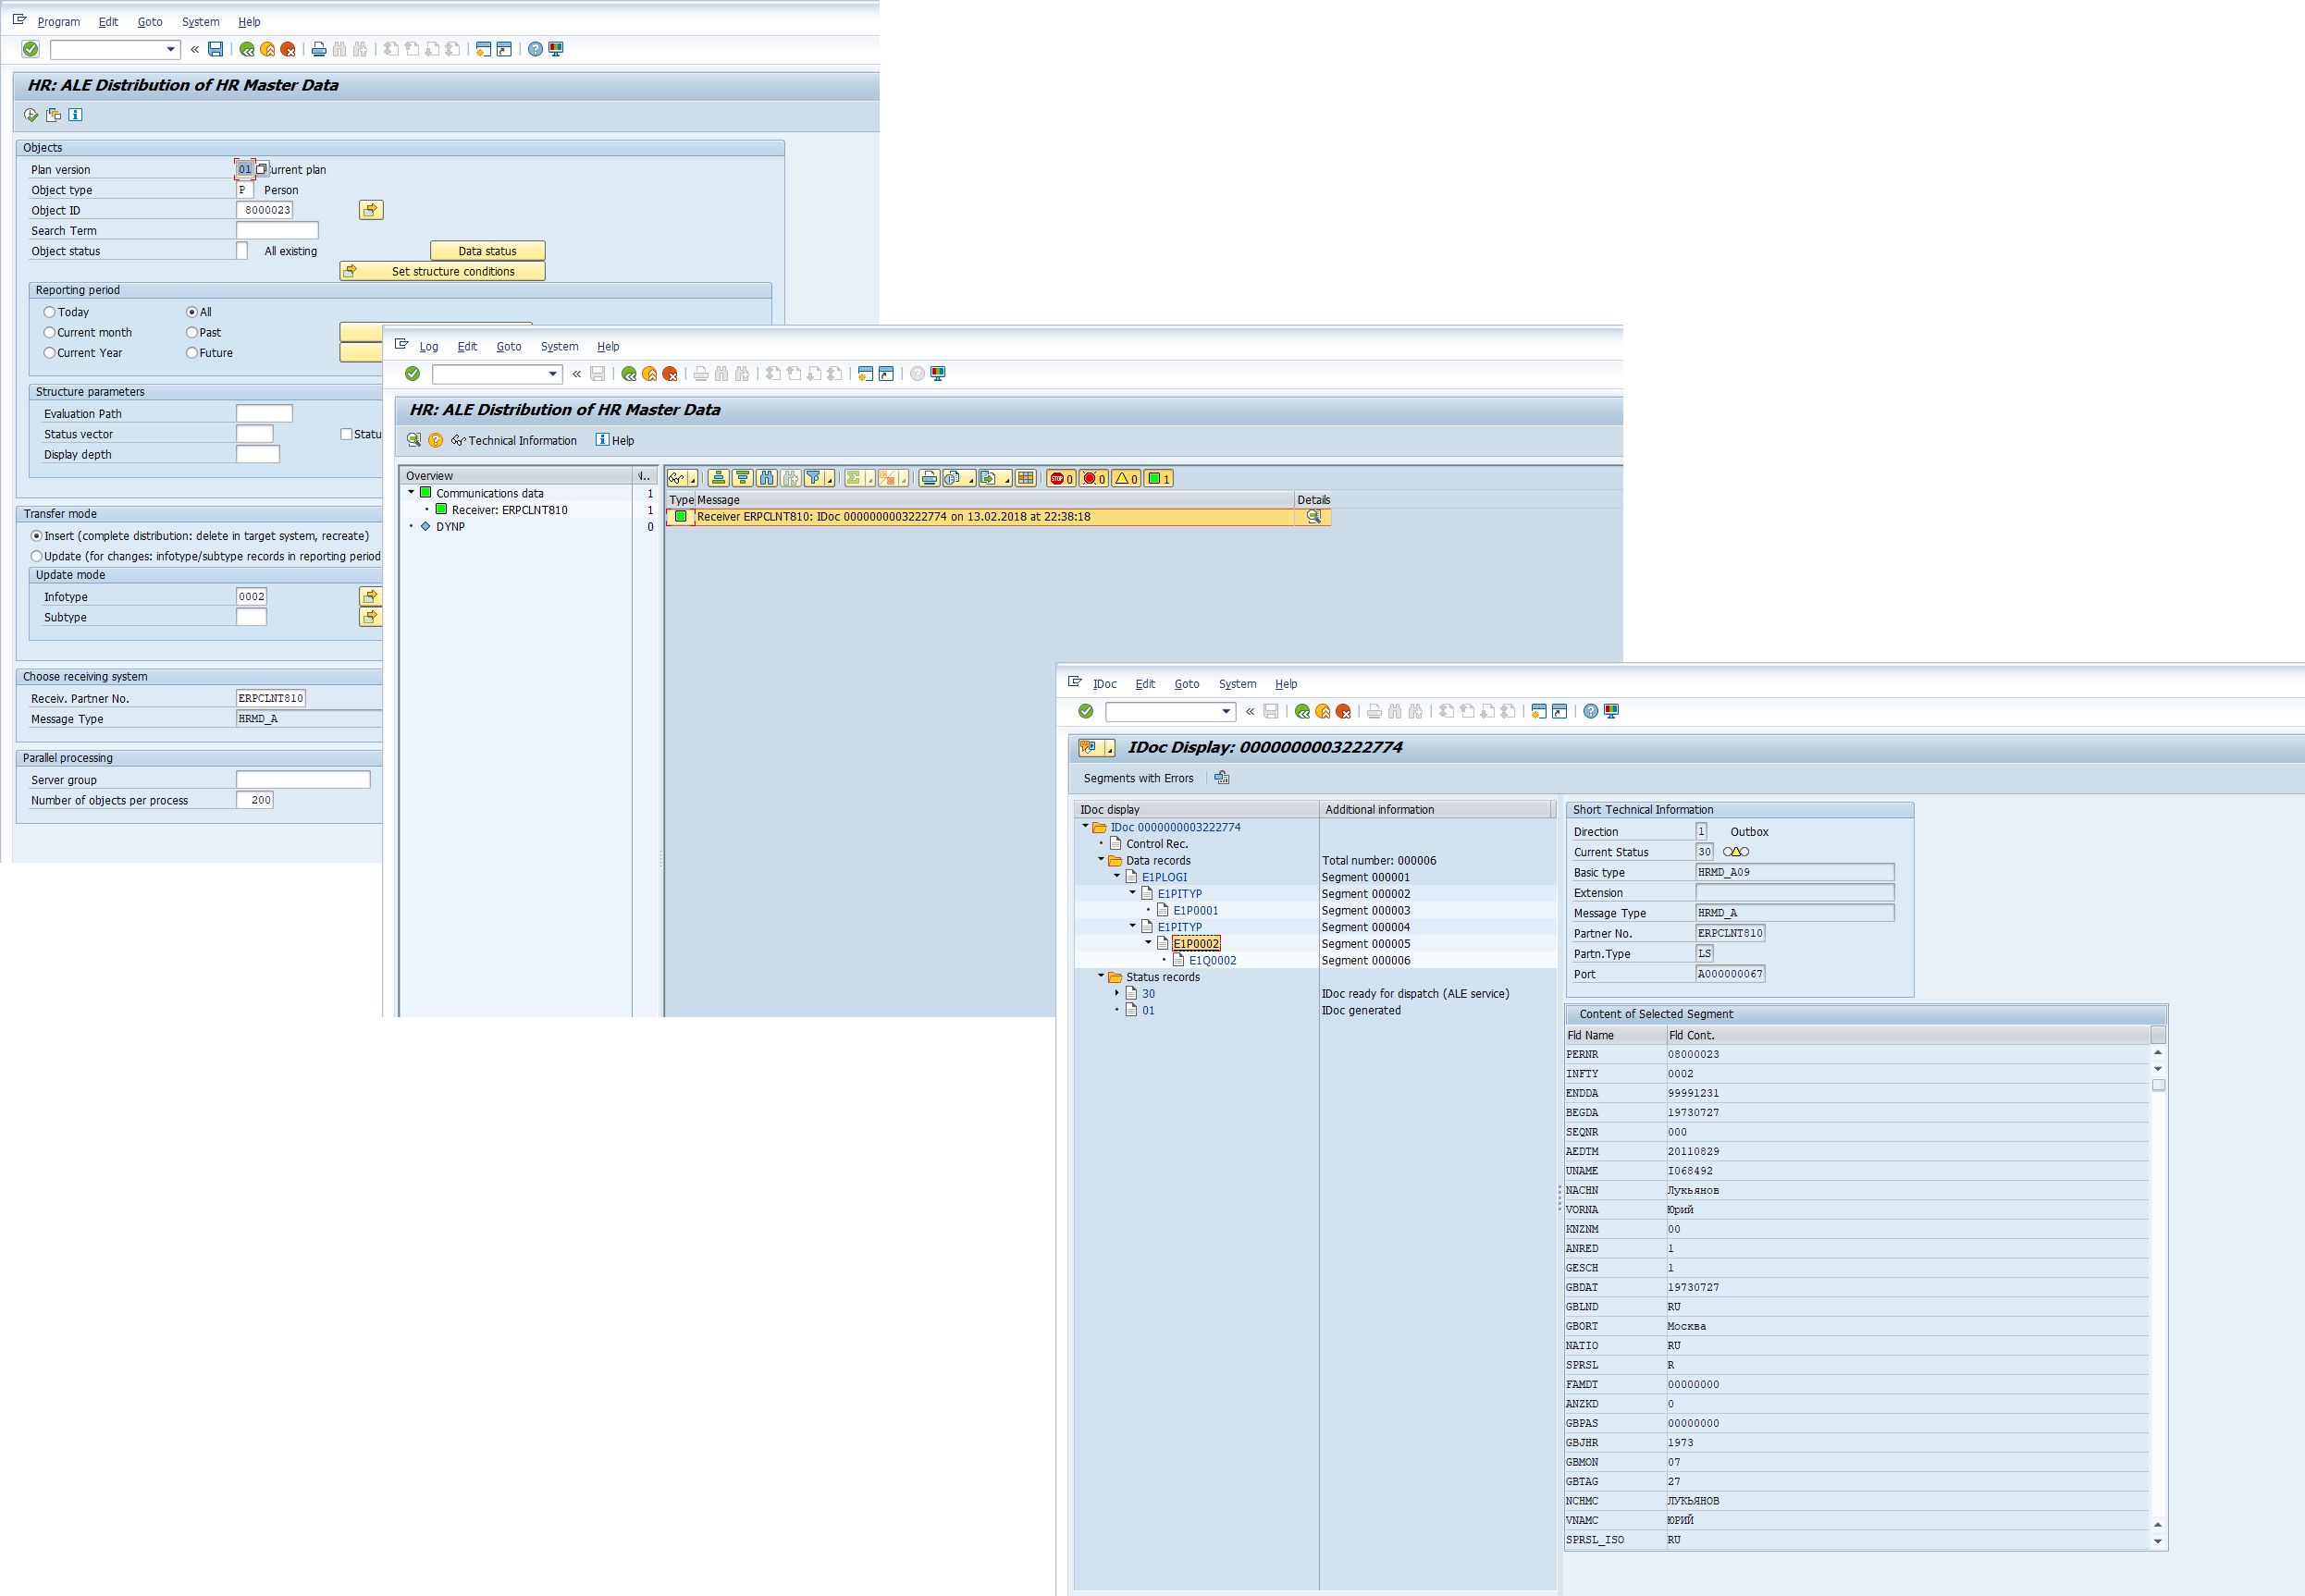
As a result of running transaction PFAL, an IDoc should be generated with status 30 – IDoc ready for dispatch (ALE service).
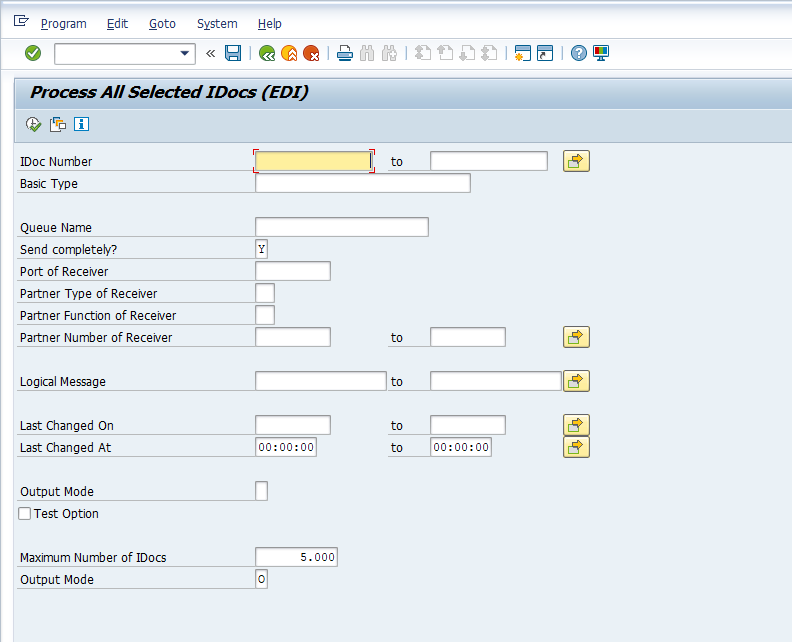
After executing program RSEOUT00, the IDoc’s status will change to 03 – Data passed to port OK. Typically, this program is scheduled to run periodically in the background.
See: Define Variants and Jobs for IDoc Outbound Report RSEOUT00
See: Check Communication
You can review the generated IDocs and their statuses using transaction WE02.
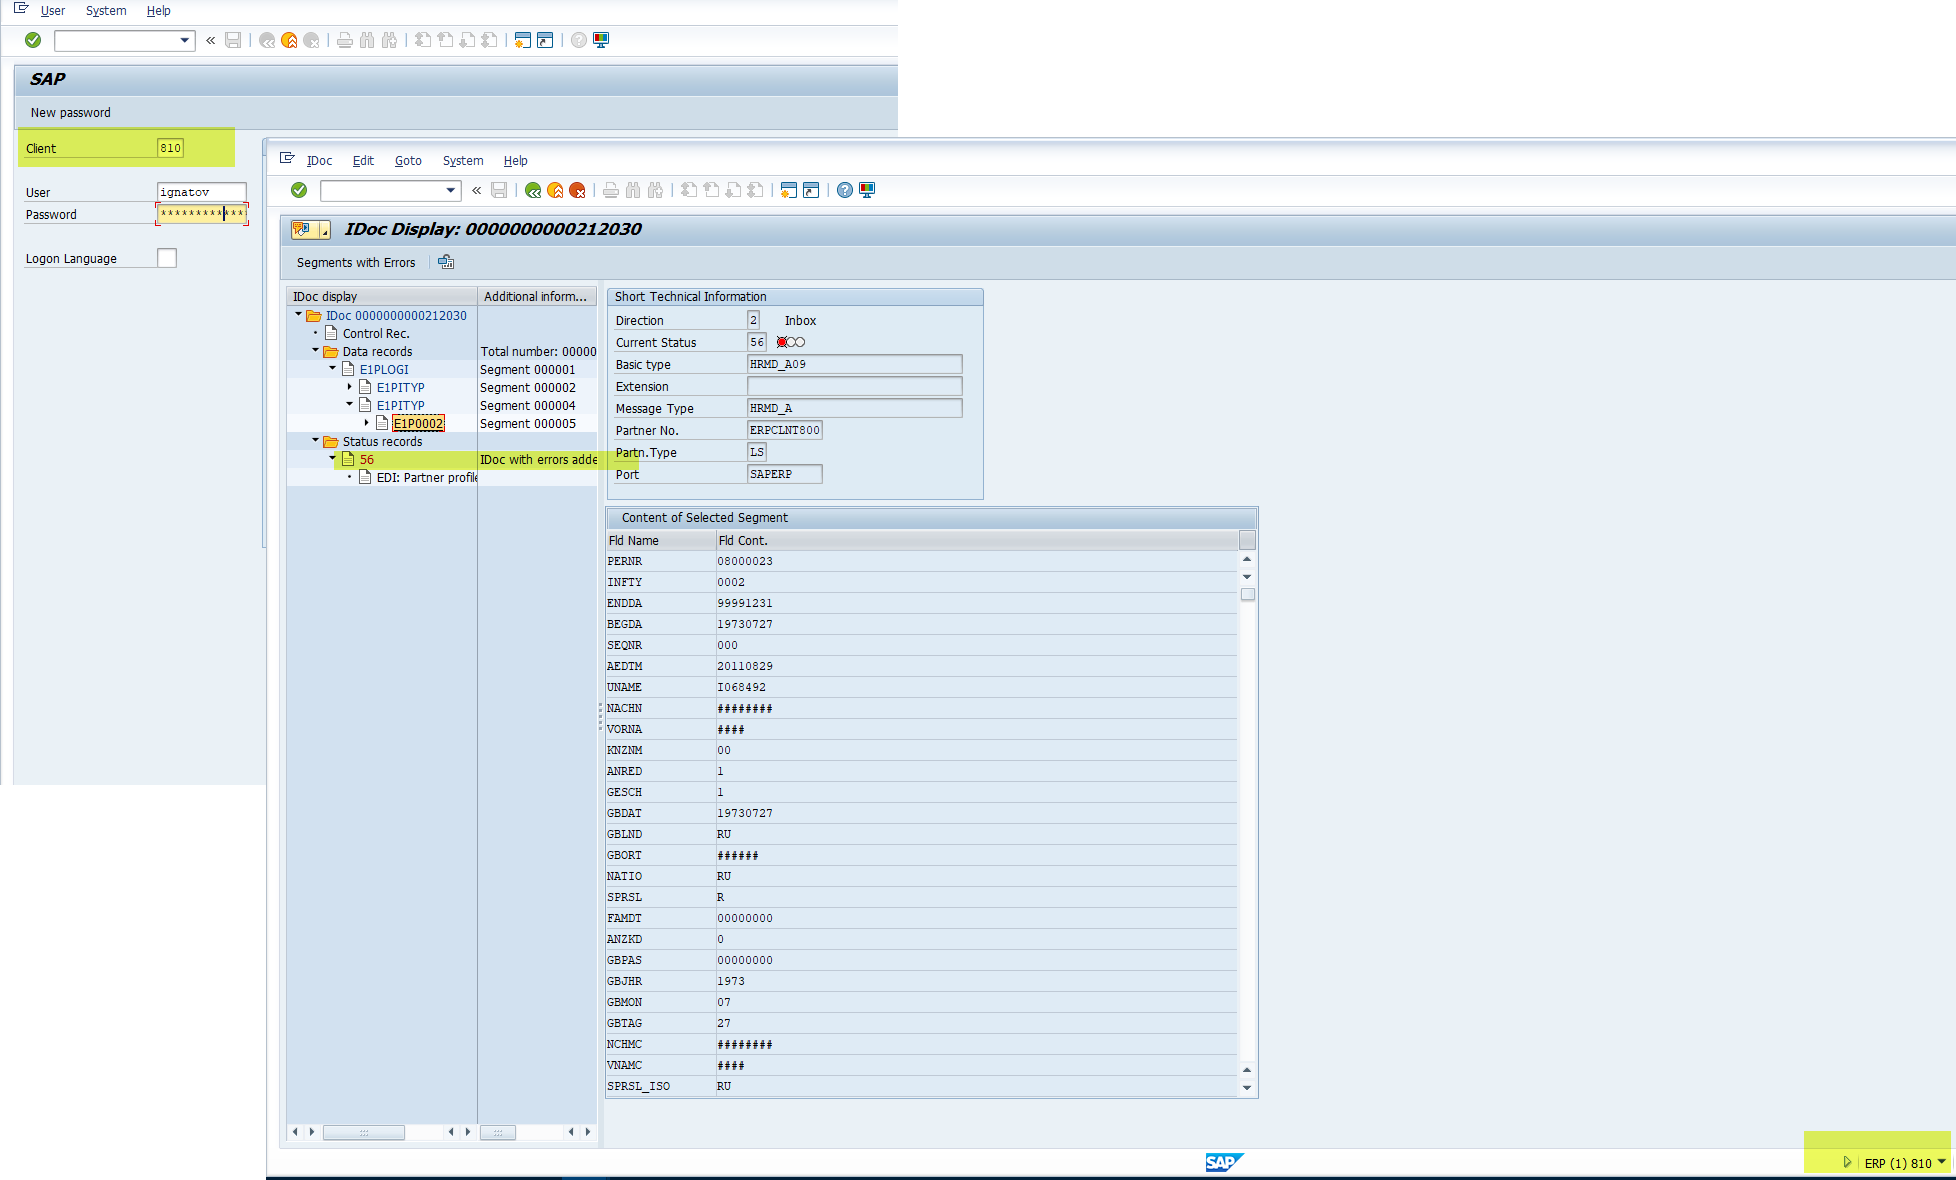
In the receiving system (client 810), you will also see the received IDoc, but it will have status 56 – IDoc with errors added.

What to do in this situation (status 56) will be covered in the next post.
The minimum task has been completed. Thank you for your attention!
See SAP IDocs. Подготовка HR мастер-данных для переноса в другую HR систему. Часть 2