Adding an Employee Photo in Transaction PPOME
Adding an Employee Photo in Transaction PPOME
I've always found it somewhat unfair—or at least poorly thought out—that SAP allows viewing an employee's photo only in transactions PA20/PA30/PA40, and does not provide a similar option in another widely used transaction, PPOME. In this note, I will elaborate on the topic of adding an employee photo in the PPOME transaction.
Introduction
At the beginning of this note, I stated that there is no option to view an employee's photo in transaction PPOME. To be precise, this isn't entirely true.
See: Storage in Personnel Administration (PA-PA)
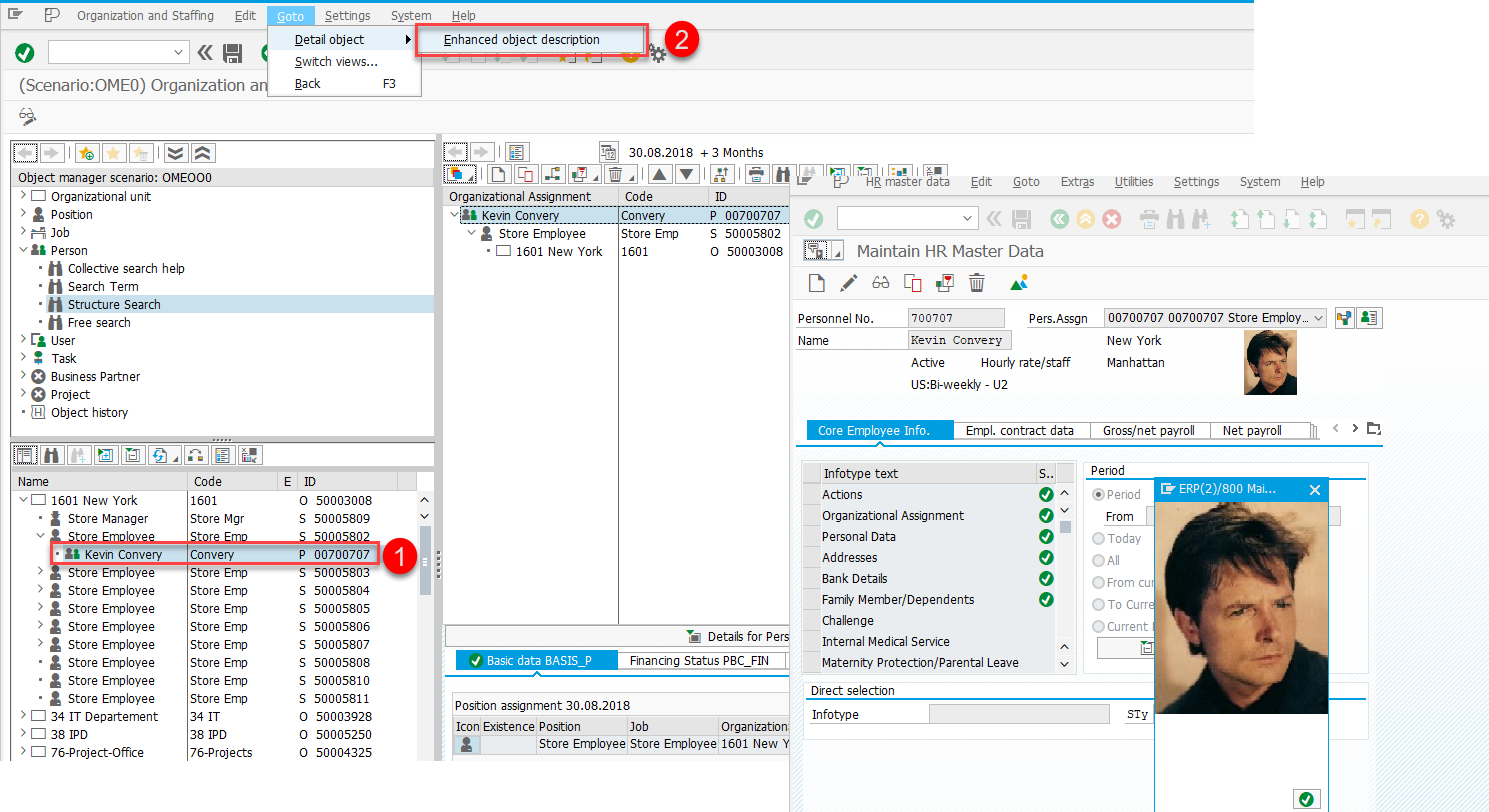
A consultant would likely know that it is indeed possible to view an employee’s photo by first selecting the relevant object type P – “Person” in the structure, then using the context menu command: Goto -> Detail Object -> Enhanced object description.
Implementation Goal
Let’s assume that employee photos are also relevant and, more importantly, necessary for business user groups who work with the PPOME transaction. These users are not inclined to follow a long sequence of selecting an object and switching to PA20/PA30 to view the photo.
Objective: Enable the display of employee photos directly within transaction PPOME.
What Will Be Done
To achieve the goal above, I selected the following approach:
- Create a new OM infotype
- Create a new function group and subscreen for the new OM infotype
- Add ABAP code to retrieve and display the employee photo in the new infotype
- Create a new tab for display in
PPOME(scenarioOME0) - For the purpose of this example, photos will be stored using the standard ArchiveLink tool (business object
PREL, document typeHRICOLFOTO)
See: How to Mass Upload Employee Photos into ArchiveLink?
Step 1: Creating the OM Infotype
The following video segment demonstrates the steps required to create an OM infotype.
See: Creating an OM Infotype
Step 2: Creating the Function Group and Subscreen for the OM Infotype
The next video segment shows the steps for creating the function group and subscreen that will be used to display the employee photo.
See: Subscreens
Step 3: Defining Rules to Retrieve the Employee Photo for the Subscreen
This video segment includes nothing new except a few lines of rather poor-quality ABAP code. Take care of your eyes!
See: How to Display a Photo in a Custom Infotype?
The code to be cautious with:
DATA:
    lv_orgobject TYPE  objec,
    lv_pernr     TYPE  p_pernr,
    sv_handle    TYPE i.

  CALL FUNCTION 'NF_EM_GET_LAST_OTYPE_OBJECT'
    EXPORTING
      otype     = 'P'
    IMPORTING
      orgobject = lv_orgobject
*   EXCEPTIONS
*     NOT_EXIST = 1
*     OTHERS    = 2
    .
  IF sy-subrc <> 0.
* Implement suitable error handling here
  ENDIF.

  CALL FUNCTION 'HR_IMAGE_RESET'
    EXPORTING
      handle = sv_handle
    EXCEPTIONS
      OTHERS = 0.
  lv_pernr = lv_orgobject.

  CALL FUNCTION 'HR_IMAGE_INIT'
    EXPORTING
      p_pernr        = lv_pernr
      begda          = '19000101'
      endda          = '99991231'
      container      = 'GV_PHOTO'
    IMPORTING
      handle         = sv_handle
    EXCEPTIONS
      no_document    = 1
      internal_error = 2
      OTHERS         = 3.
  IF sy-subrc <> 0.
    CLEAR sv_handle.
  ENDIF.
Step 4: Creating a New Tab and Assigning It to the PPOME Transaction Scenario
This involves working with the well-known T77FRAMEWORK cluster view. You’ll need to define a new tab and assign it to the appropriate scenario OME0, which is used in the PPOME transaction.
Step 5: Testing
You can now attempt to run a test scenario with an end user.