Creating a New Scenario for Infotype 1222 (Part 1)
Creating a New Scenario for Infotype 1222 (Part 1)
Continuing from the post about the proper way to maintain Infotype 1222 General Attribute Maintenance let’s talk about creating a new attribute for this infotype. There will be two parts on this topic, differing as follows:
- Part 1 will cover the creation of a new scenario for Infotype 1222 that allows manual value entry.
- Part 2 will cover the creation of a new scenario for Infotype 1222 with value selection from a Z* table.
If this is of interest to you, don’t stop reading now. As I usually like to start off with, let’s set a task:We need to create a new scenario and attribute for Infotype 1222. The attribute should allow manual value entry, and the new scenario should be available for the object “S – Position.”
We begin by understanding that a so-called “scenario” for Infotype 1222 is essentially a subtype of this infotype. So first, we need to define a new subtype.
1. Creating a Subtype for Infotype 1222
Open SPRO via the following path: IMG: Personnel Management → Organizational Management → Basic Settings → Data Model Enhancement → Infotype Maintenance → Subtype Maintenance
Create a new subtype entry for Infotype 1222.
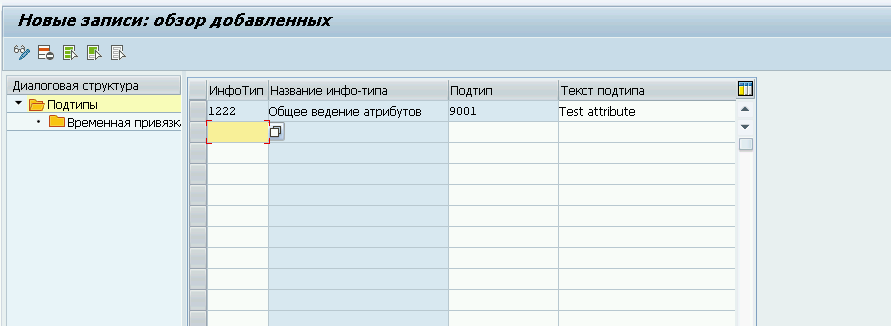
Then define the time constraint and assign it to the relevant object type where it will be used.
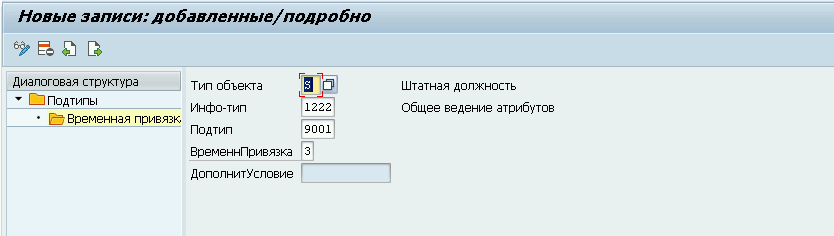
Save the new entry.
2. Creating a New Scenario for Infotype 1222
Open table T77OMATTR in transaction SM30, and under the Scenarios node, create a new entry.
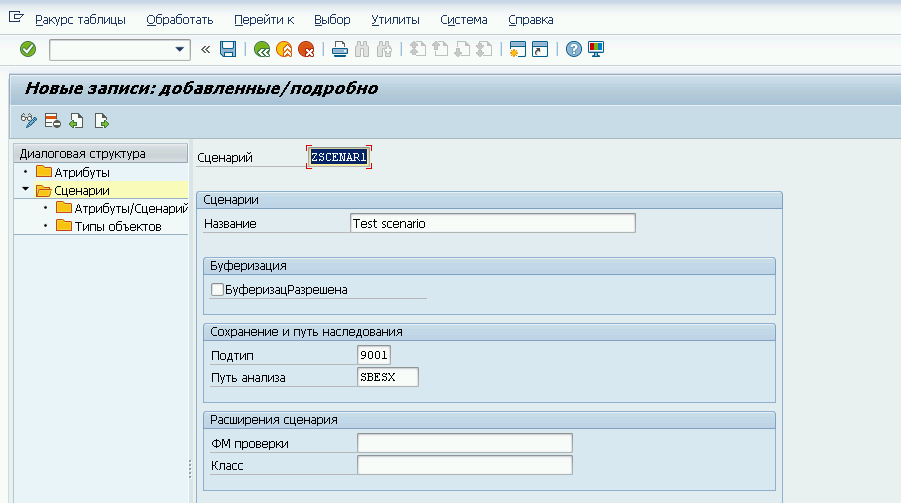
Take note of the Subtype and Evaluation Path fields.
- For the Subtype, use the value defined in Step 1.
- For the Evaluation Path, use a path for inheritance logic. In standard setups,
SBESXis used. However, for our example, this isn't needed since we are not using inheritance.
Still, keep in mind that if attribute maintenance is allowed at the organizational unit level, the attribute will be inherited by all positions below that unit.

Save the new entry.
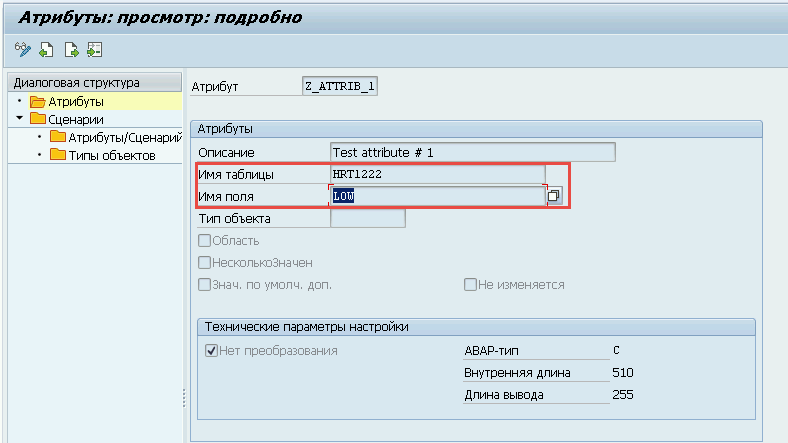
3. Creating a New Attribute
While still in the same configuration table, go to the Attributes node and create a new entry.
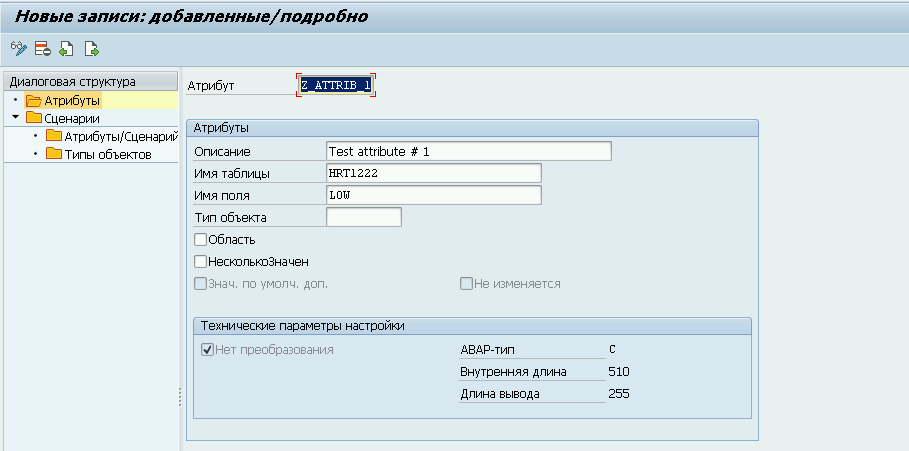
Specify the attribute code, name, and the table/field on which the attribute's values will be stored. Save the entry.
4. Assigning the Attribute to the Scenario and Defining Valid Object Types
Under the Scenarios node in table T77OMATTR, select the scenario you created and open the Attributes/Scenario subnode.
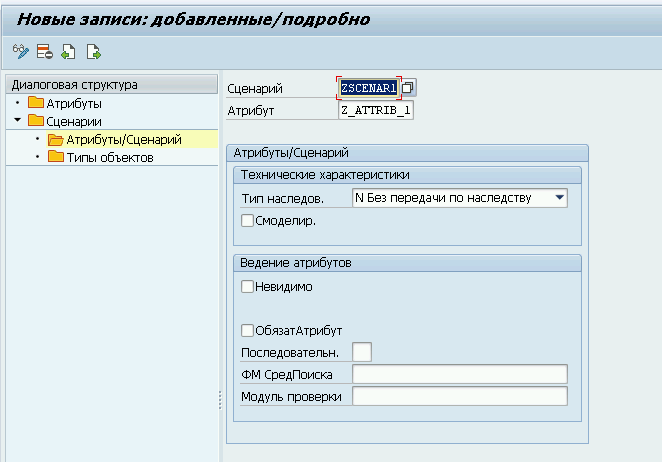
As our scenario is intended only for positions, inheritance to subordinate elements is unnecessary. Save the changes and proceed to the Object Types subnode.
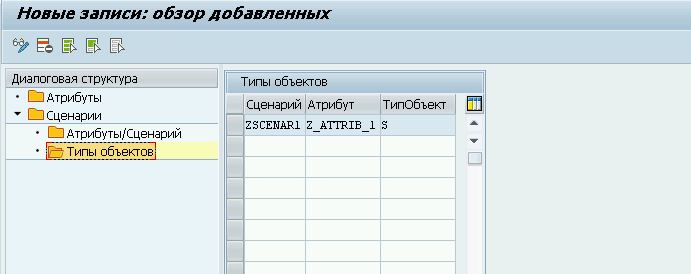
Create a new entry for your scenario/attribute and select the appropriate object type. Now we move on to testing.
5. Testing
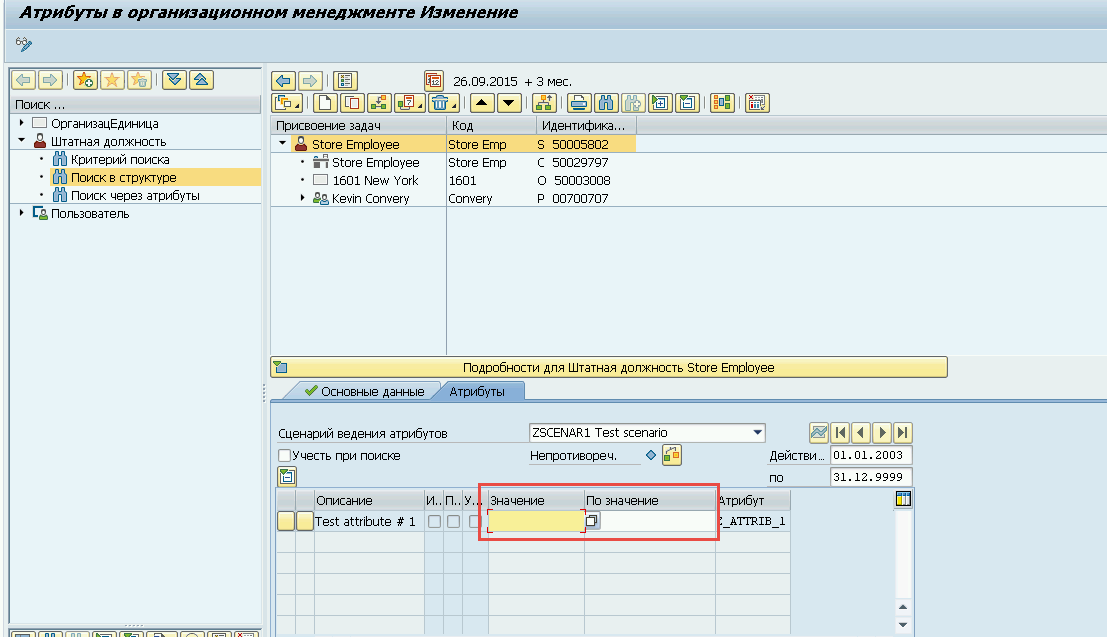
This test case is straightforward. Open transaction PPOMA, choose any position (or the object where your attribute/scenario is allowed), and go to the Attributes tab.
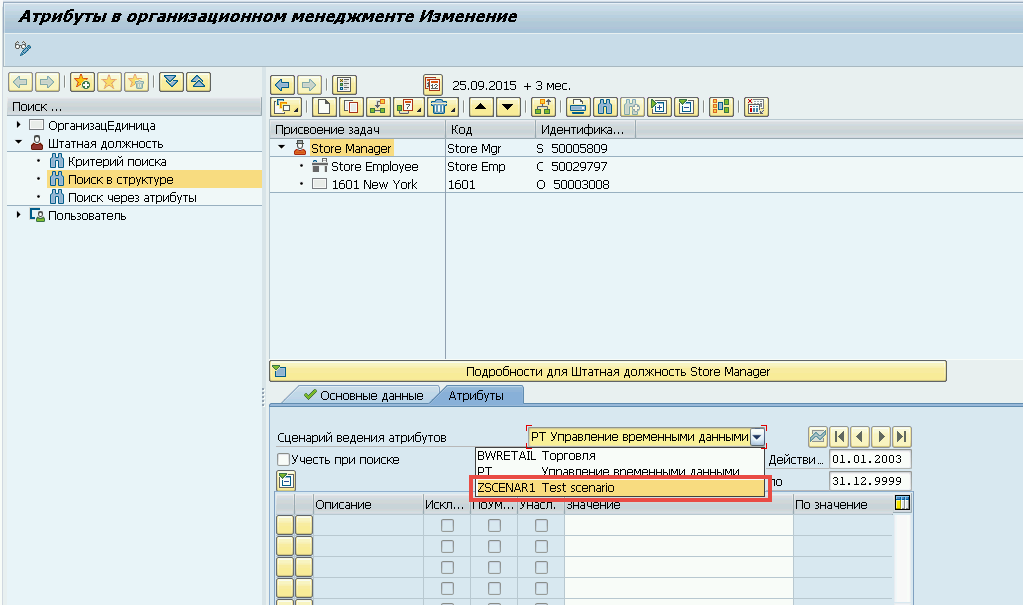
From the dropdown list, select your scenario and verify that the attribute is available.

Great — the attribute has been successfully selected. Now enter any value in the corresponding column and click Save.
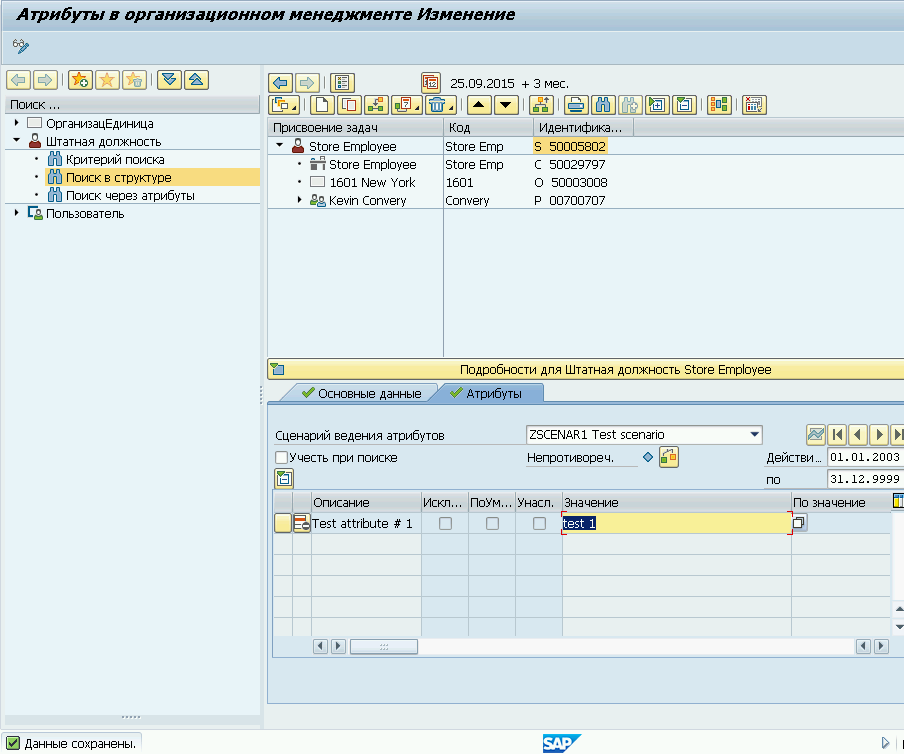
The task has been successfully completed.
NB: A few important points to keep in mind when configuring new scenarios/attributes:
How to specify a numeric (not text) value for the attribute?
In the scenario settings, assign a table field that does not expect text input.
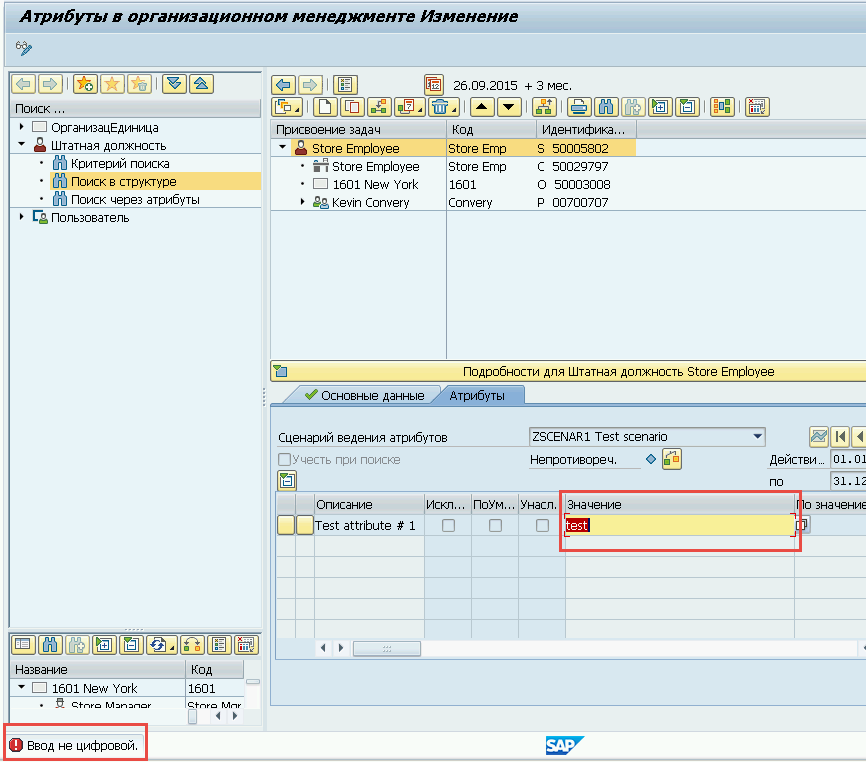
For example, if we change the attribute’s field to OBJID in table HRP1222, save it,
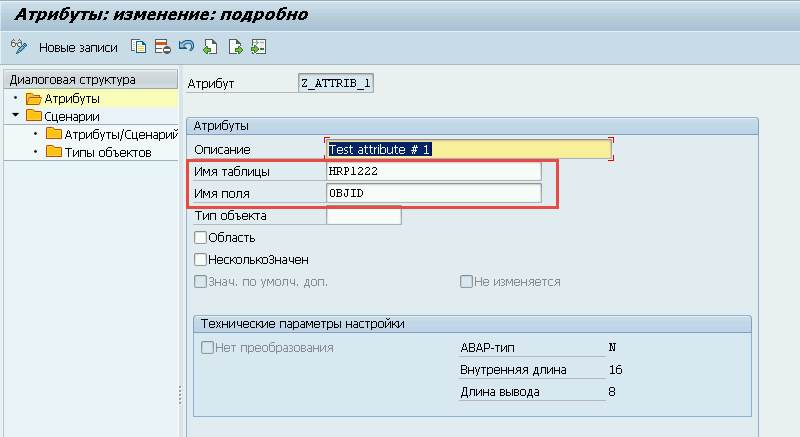
and then try entering a text value in PPOMA, we will receive an error like this:
How to allow users to enter two values for one attribute, e.g., an upper and lower limit?
In the attribute settings, enable the Range flag.
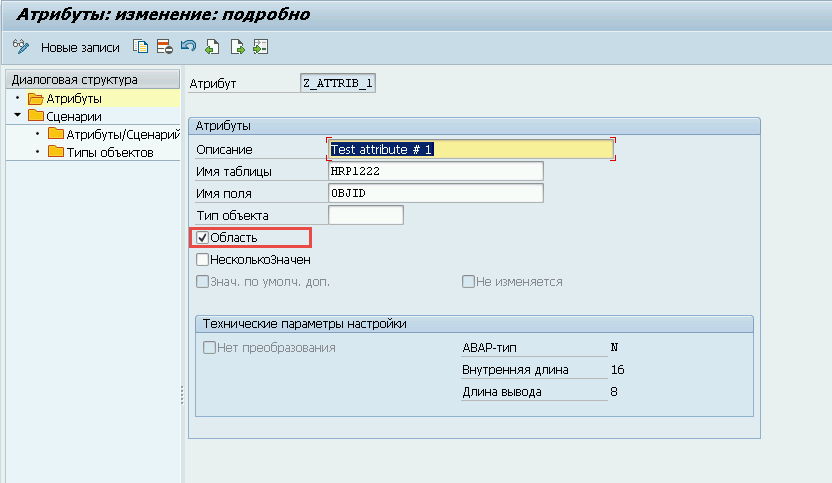
In transaction PPOMA, the attribute entry will then look like this: