Creating an API for iFlow: A Step-by-Step Guide
This guide aims to outline the steps required to create an API for iFlow and subsequently run the iFlow through the API.
Step # 1. Develop an iFlow
Begin by creating a simple iFlow.
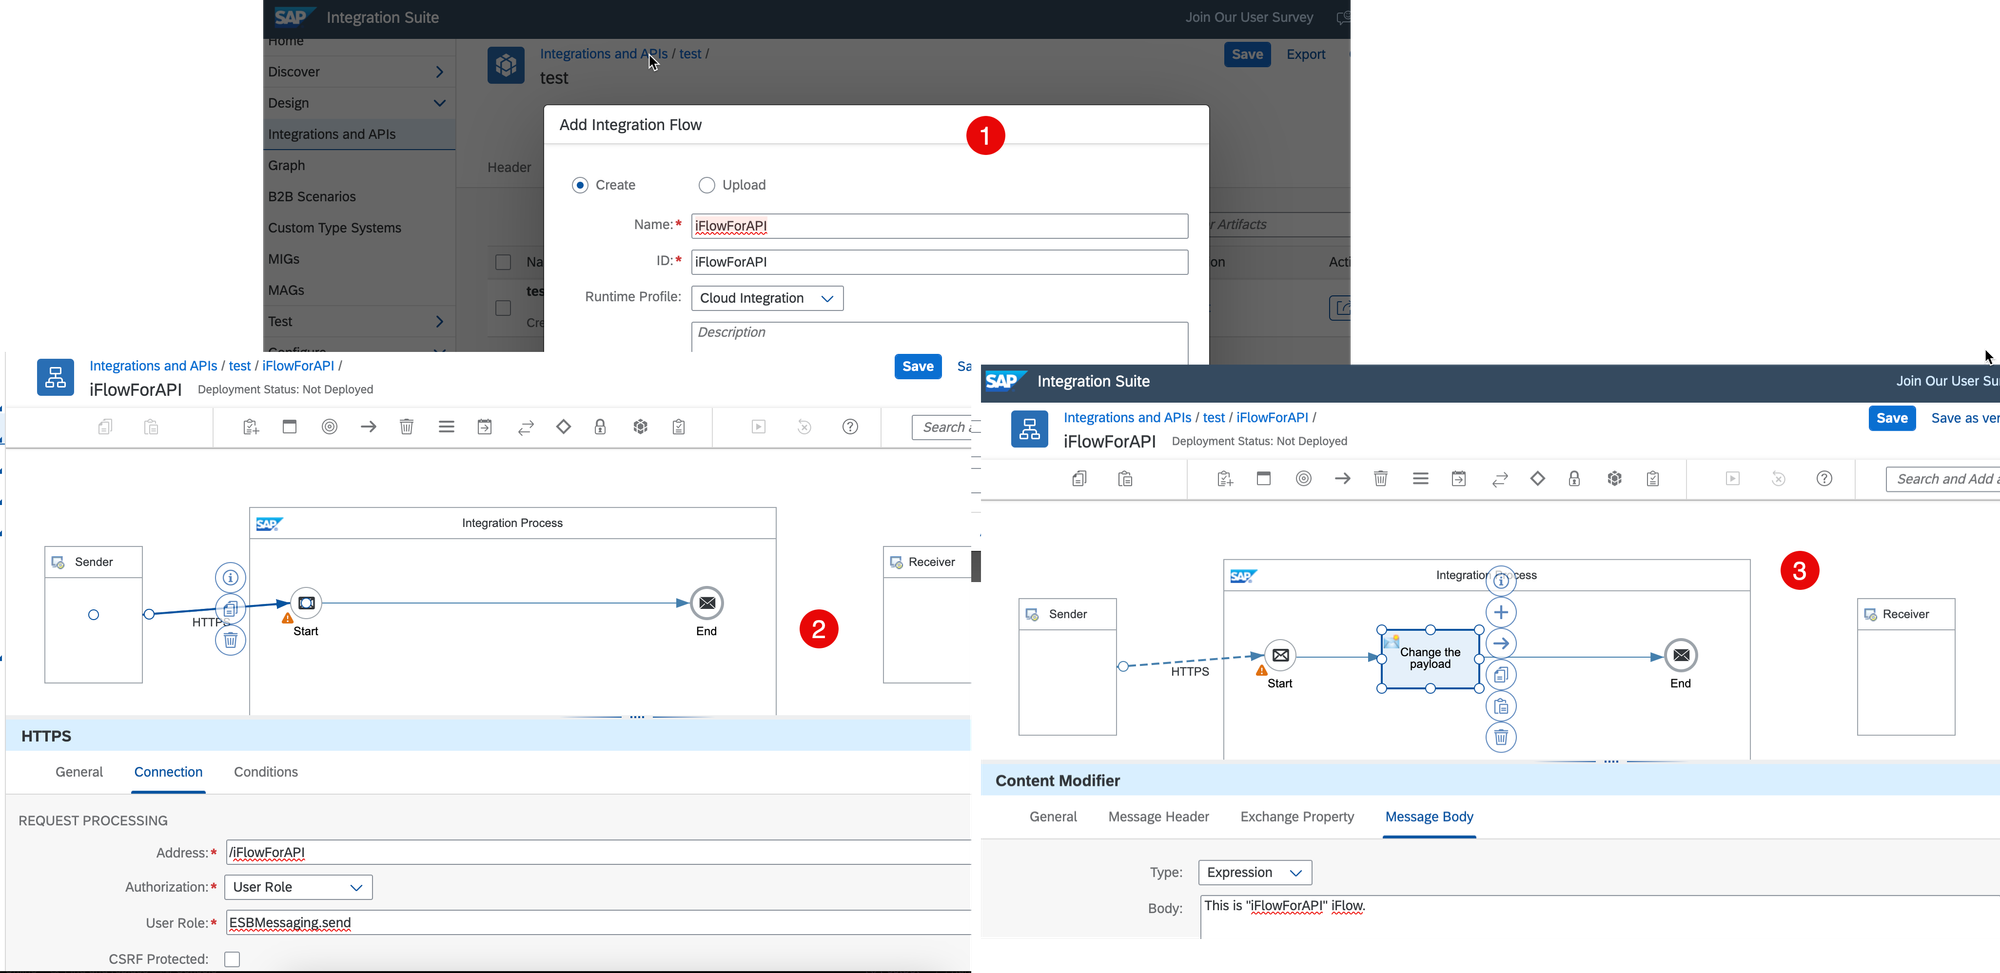
Deploy any changes made.
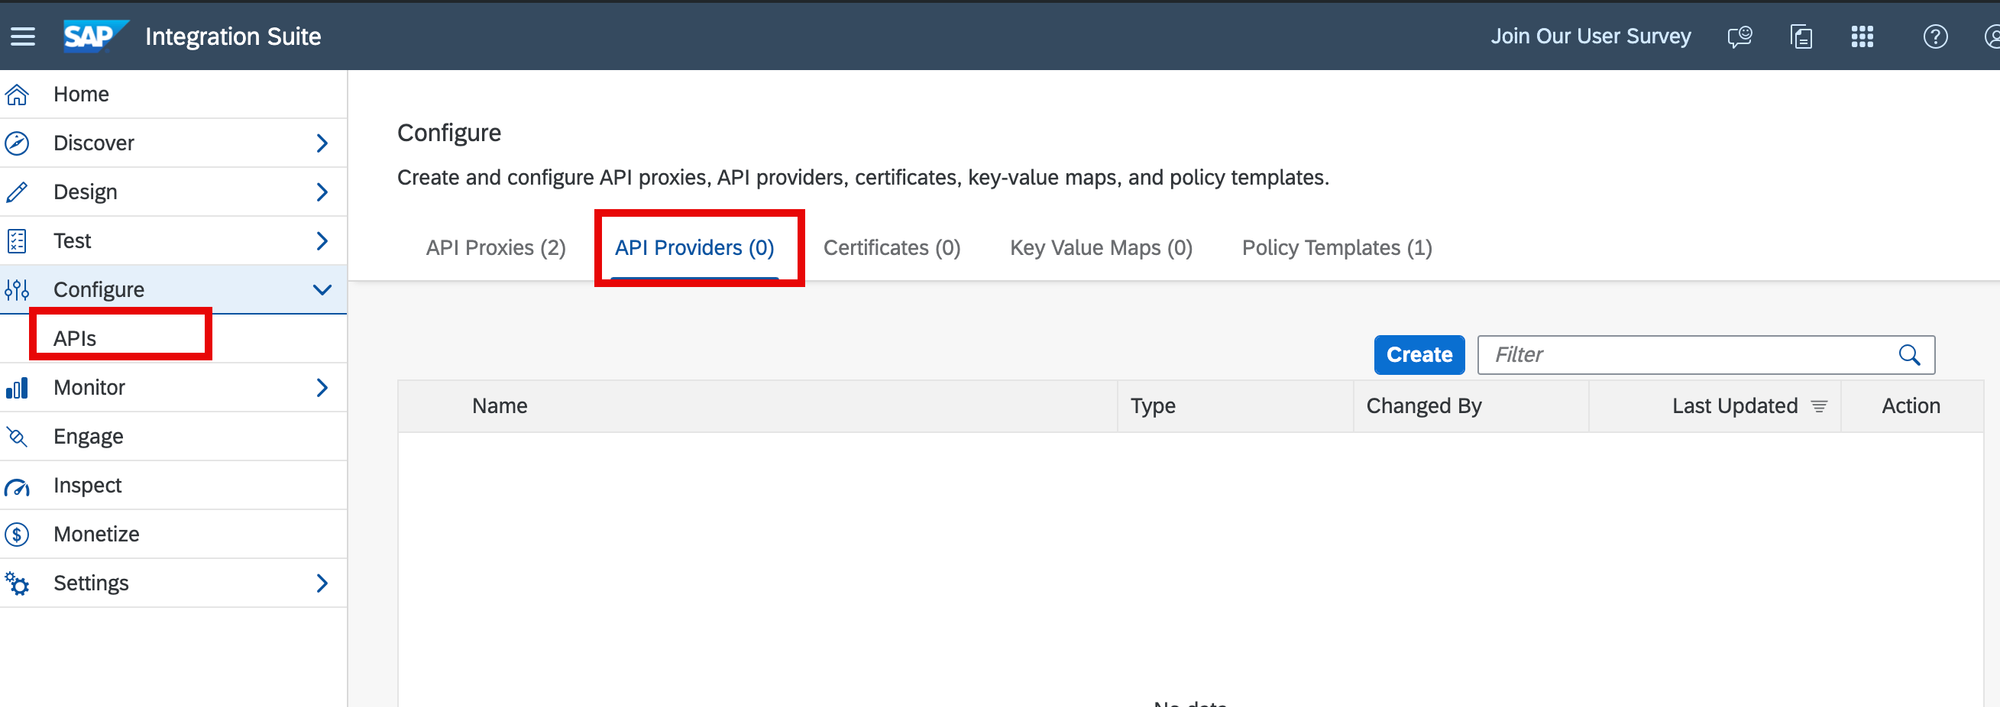
Step # 2. Setting Up API Providers
Navigate to the API section on the Integration Suite and switch to 'API Providers'.
See API Providers
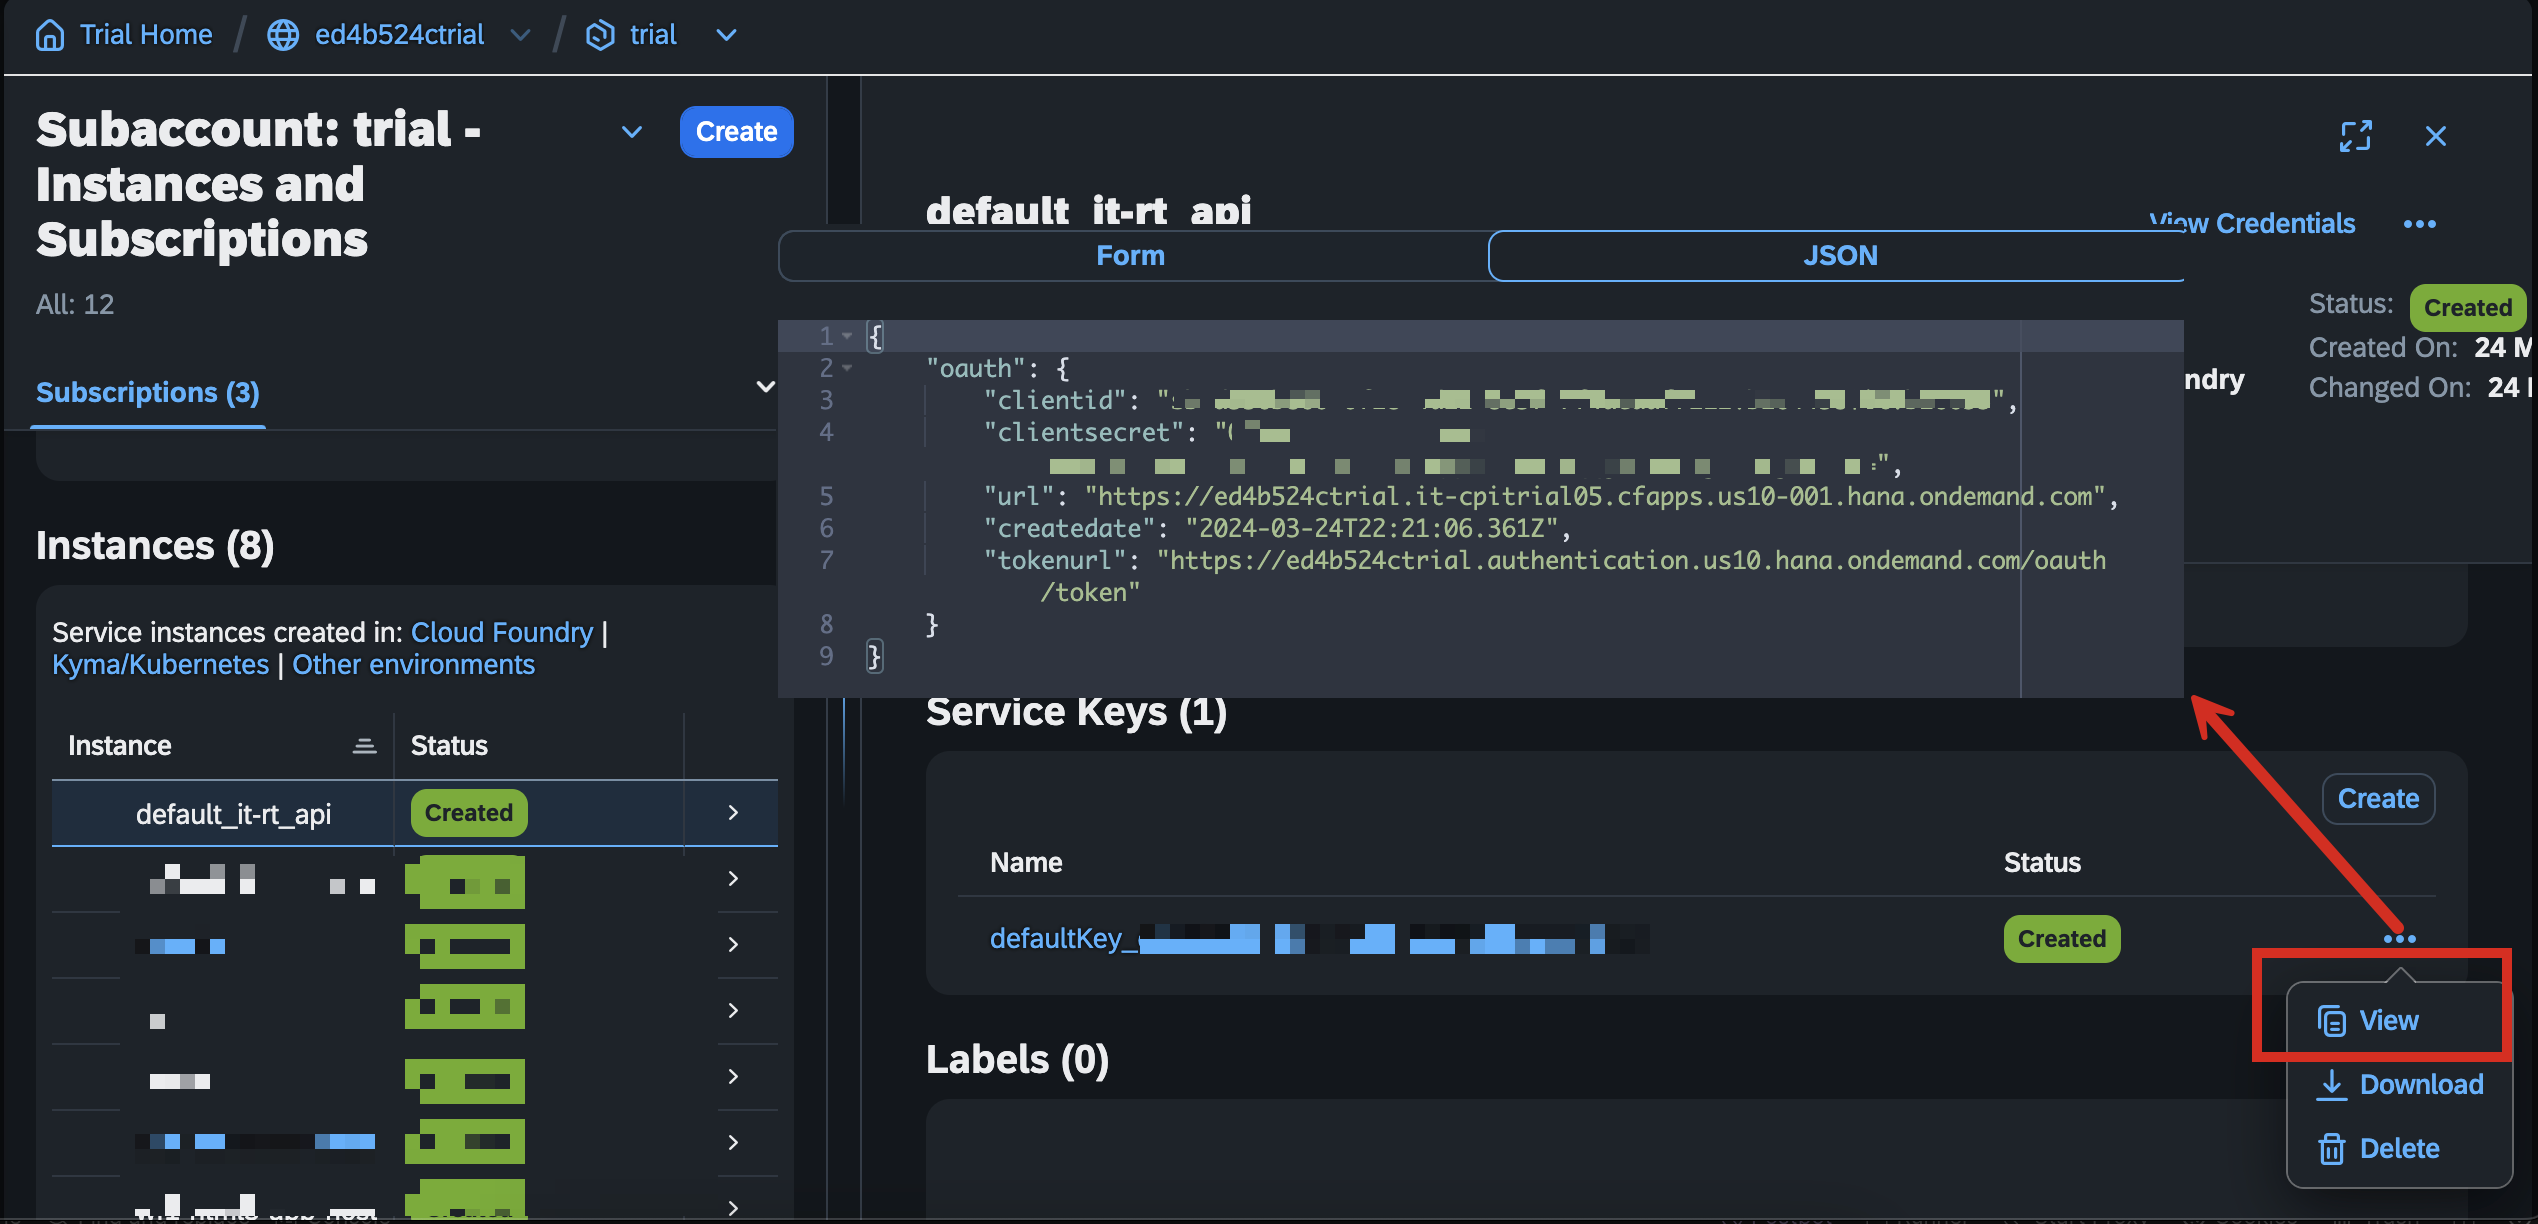
Click on the 'Create' button to generate a new API provider of the 'Cloud Integration' type, utilizing the service key details from the API instance of your SAP BTP tenant.
See Setting Up OAuth for Cloud Integration in Cloud Foundry
See Service Key Types
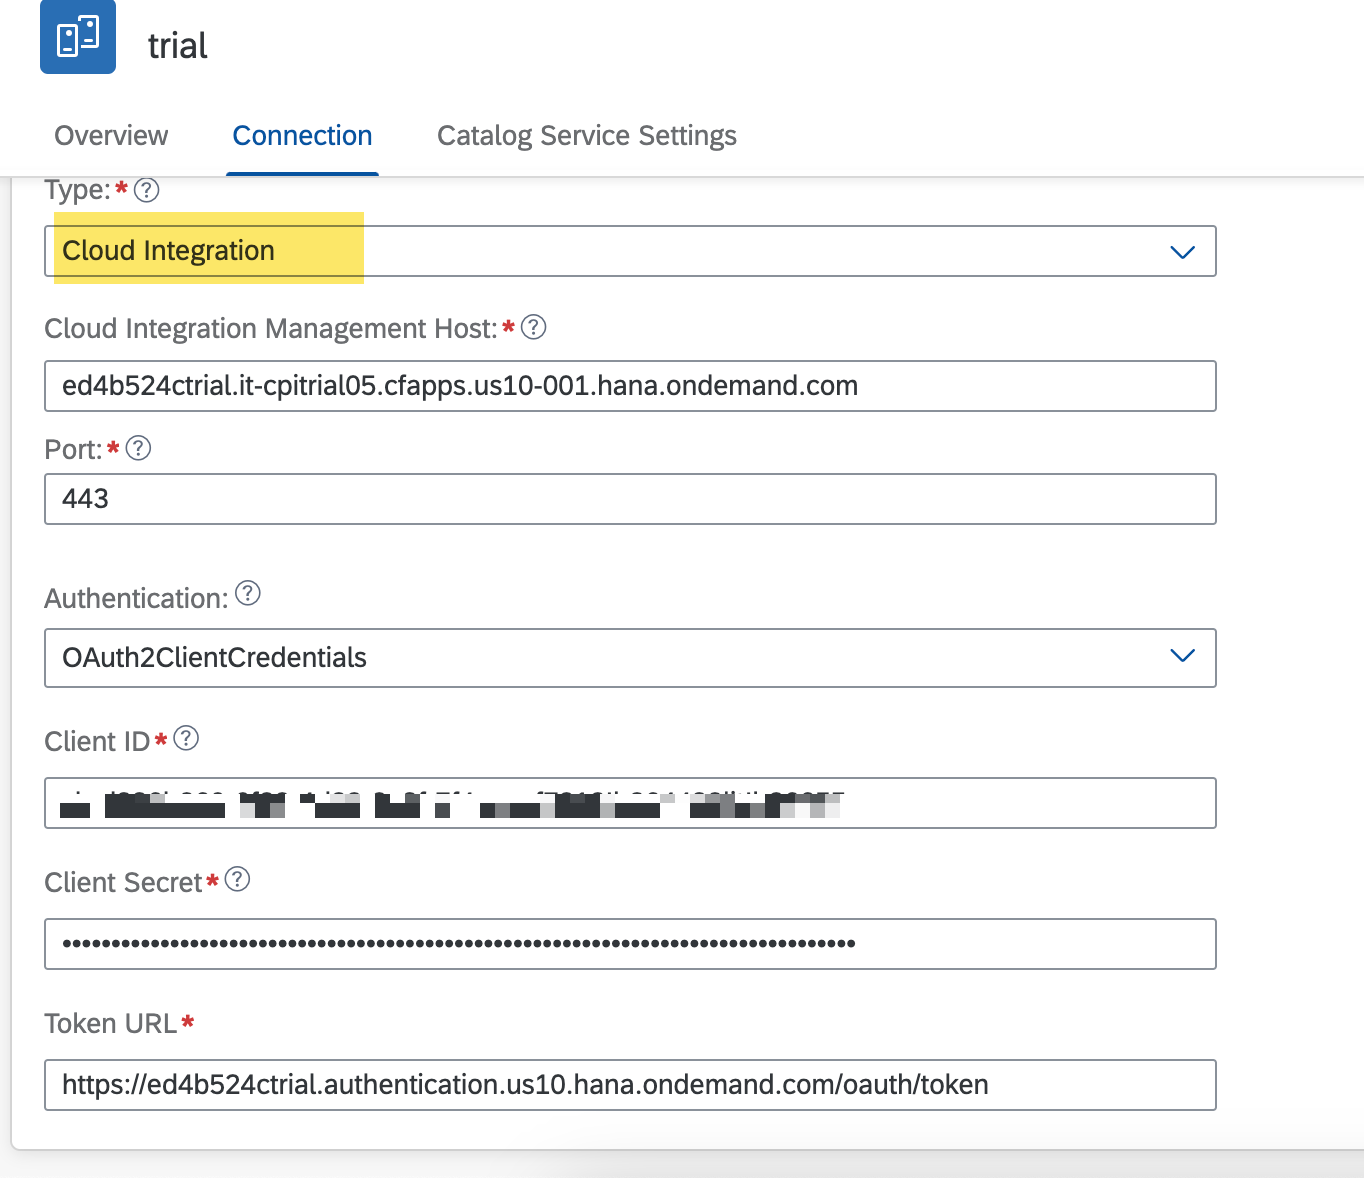
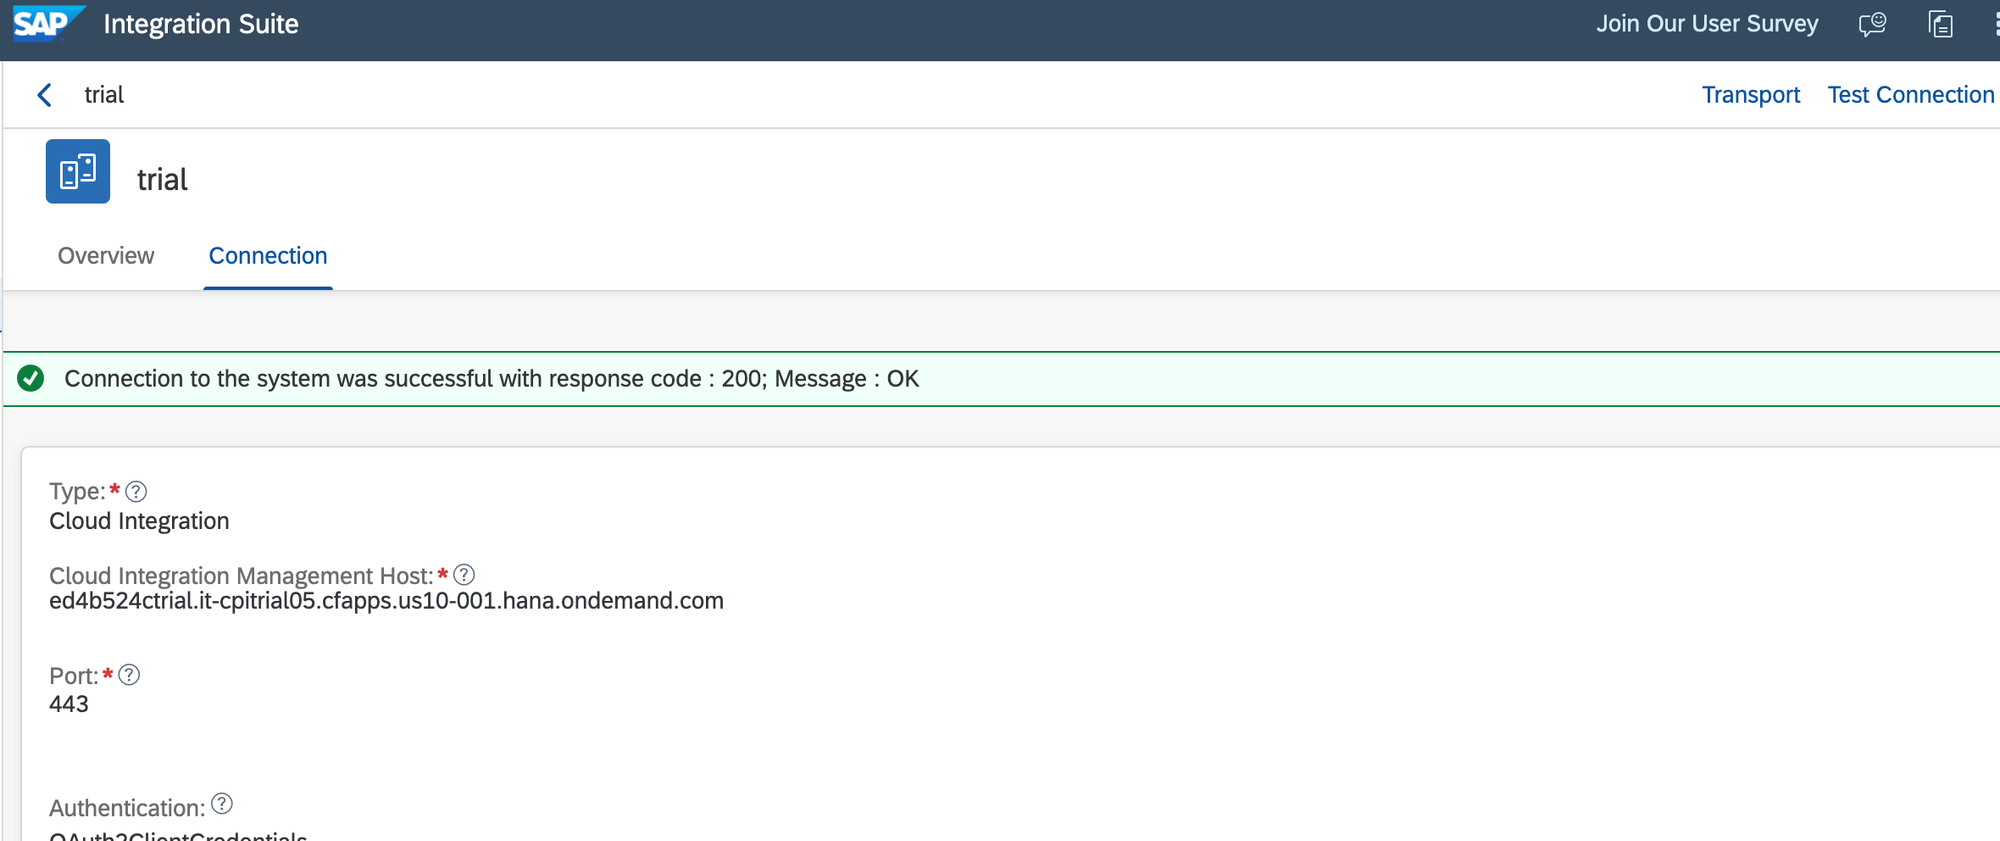
Save the settings and verify the connection by clicking on the 'Test Connection' button.
Step # 3. Creating the New API
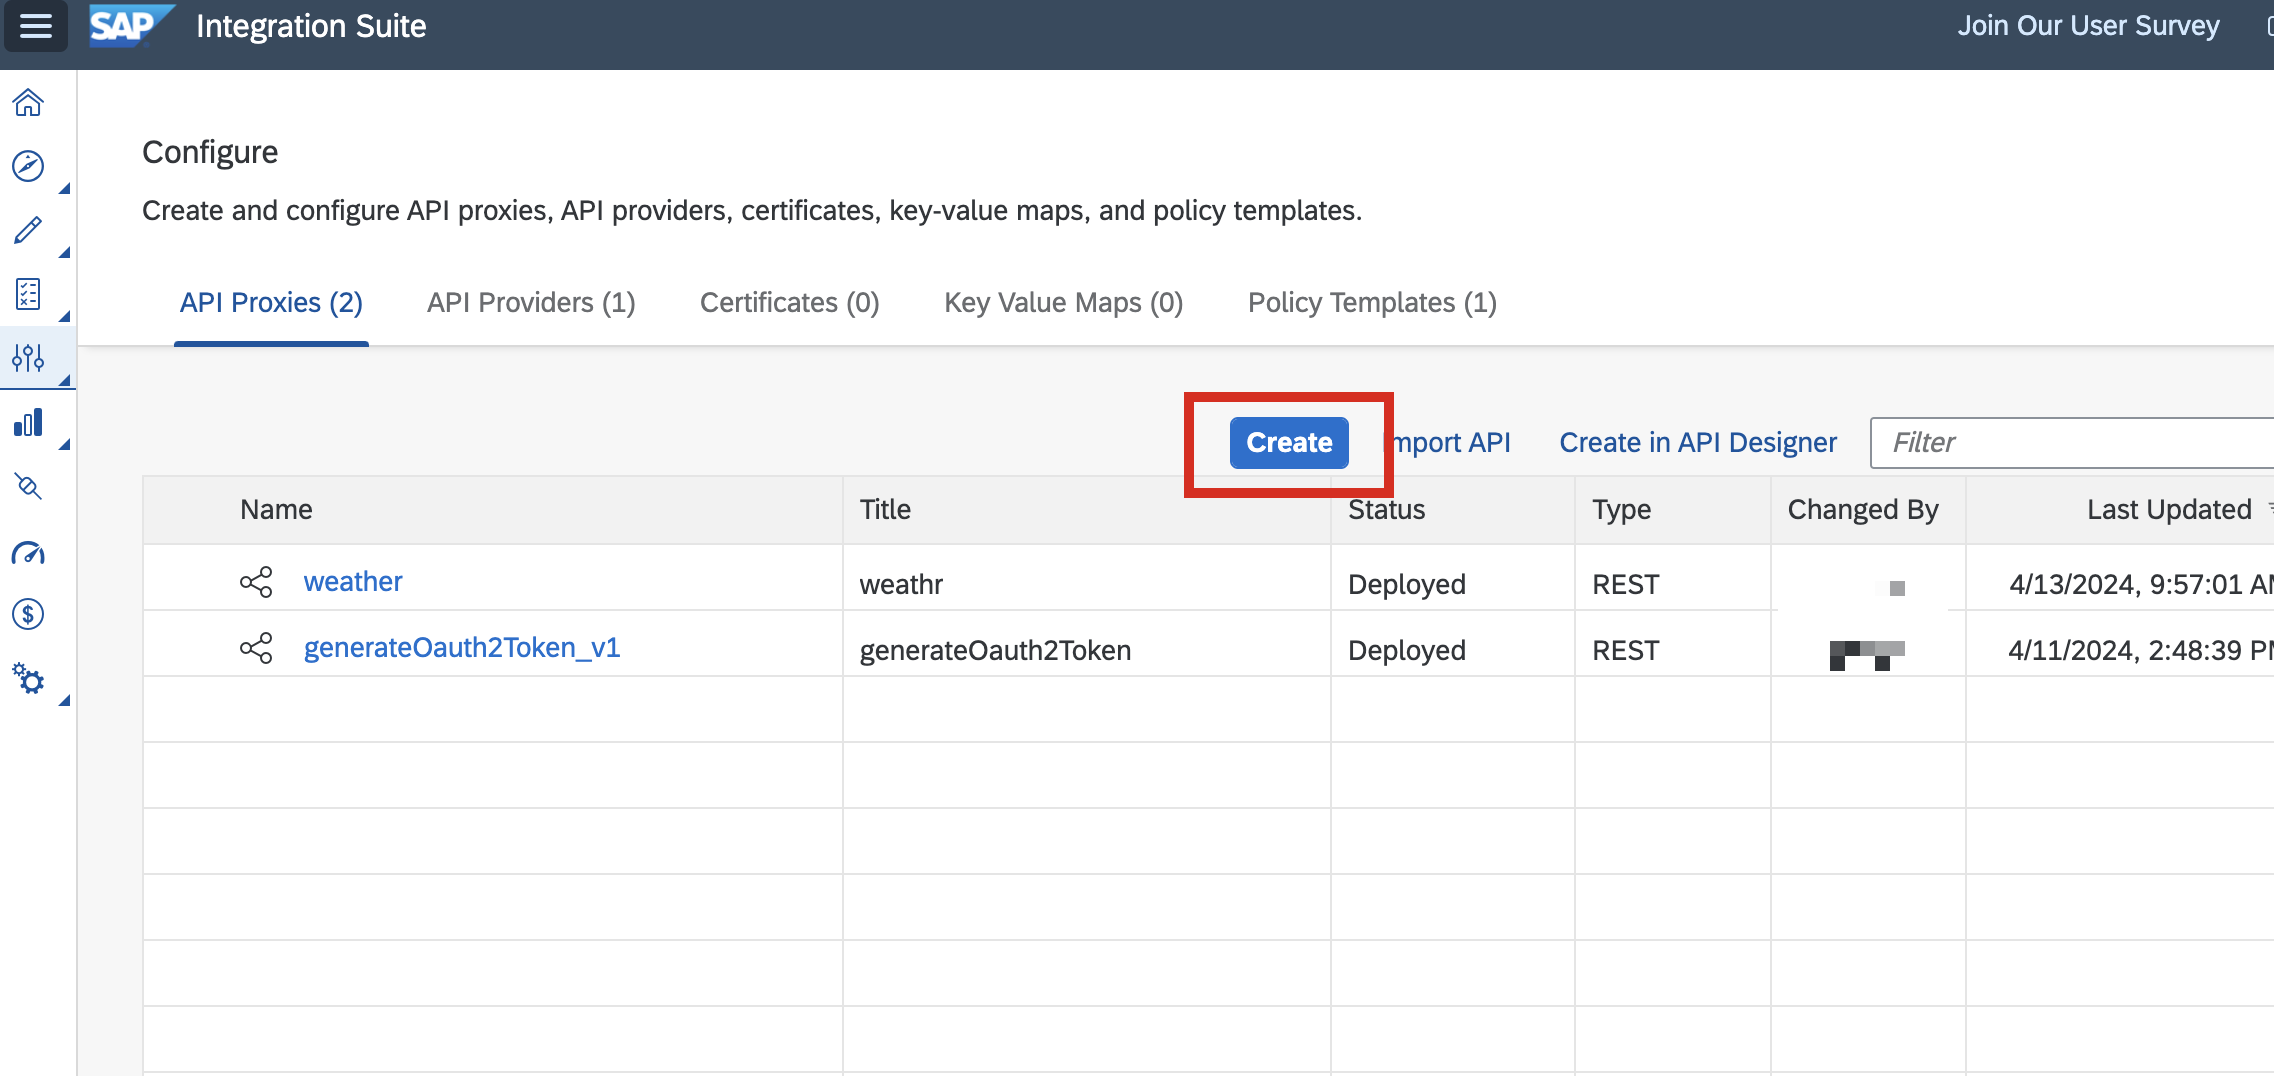
Start creating the new API.
See Build API Proxies
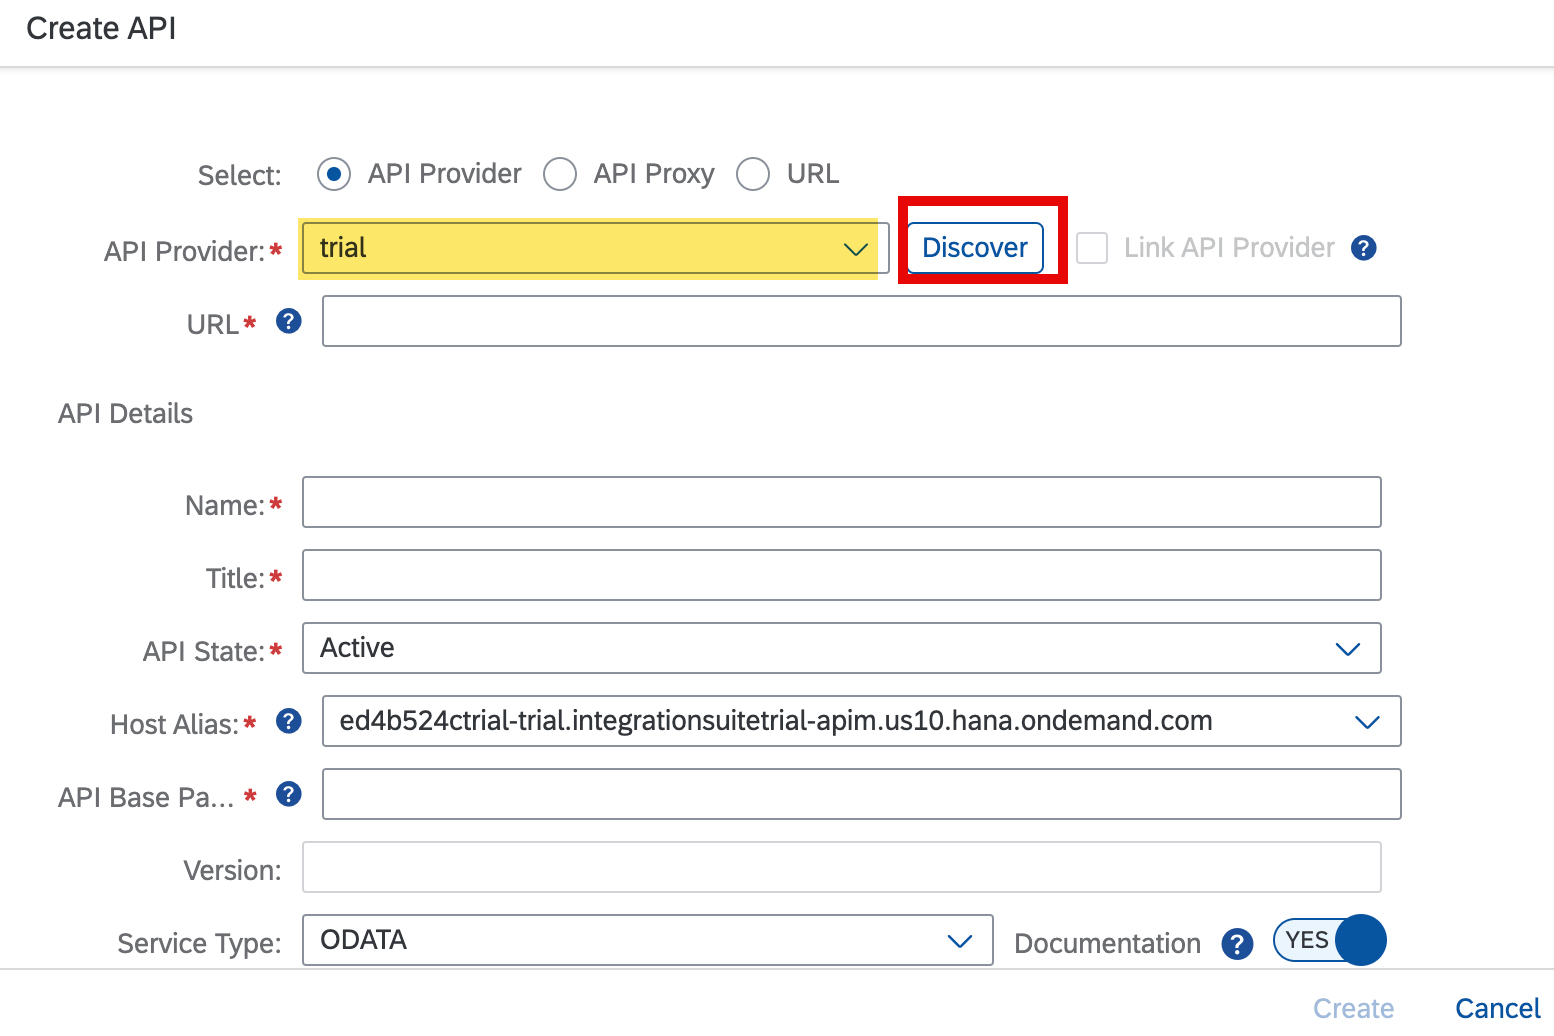
Select the previously created API provider from the list and click on the 'Discover' button.
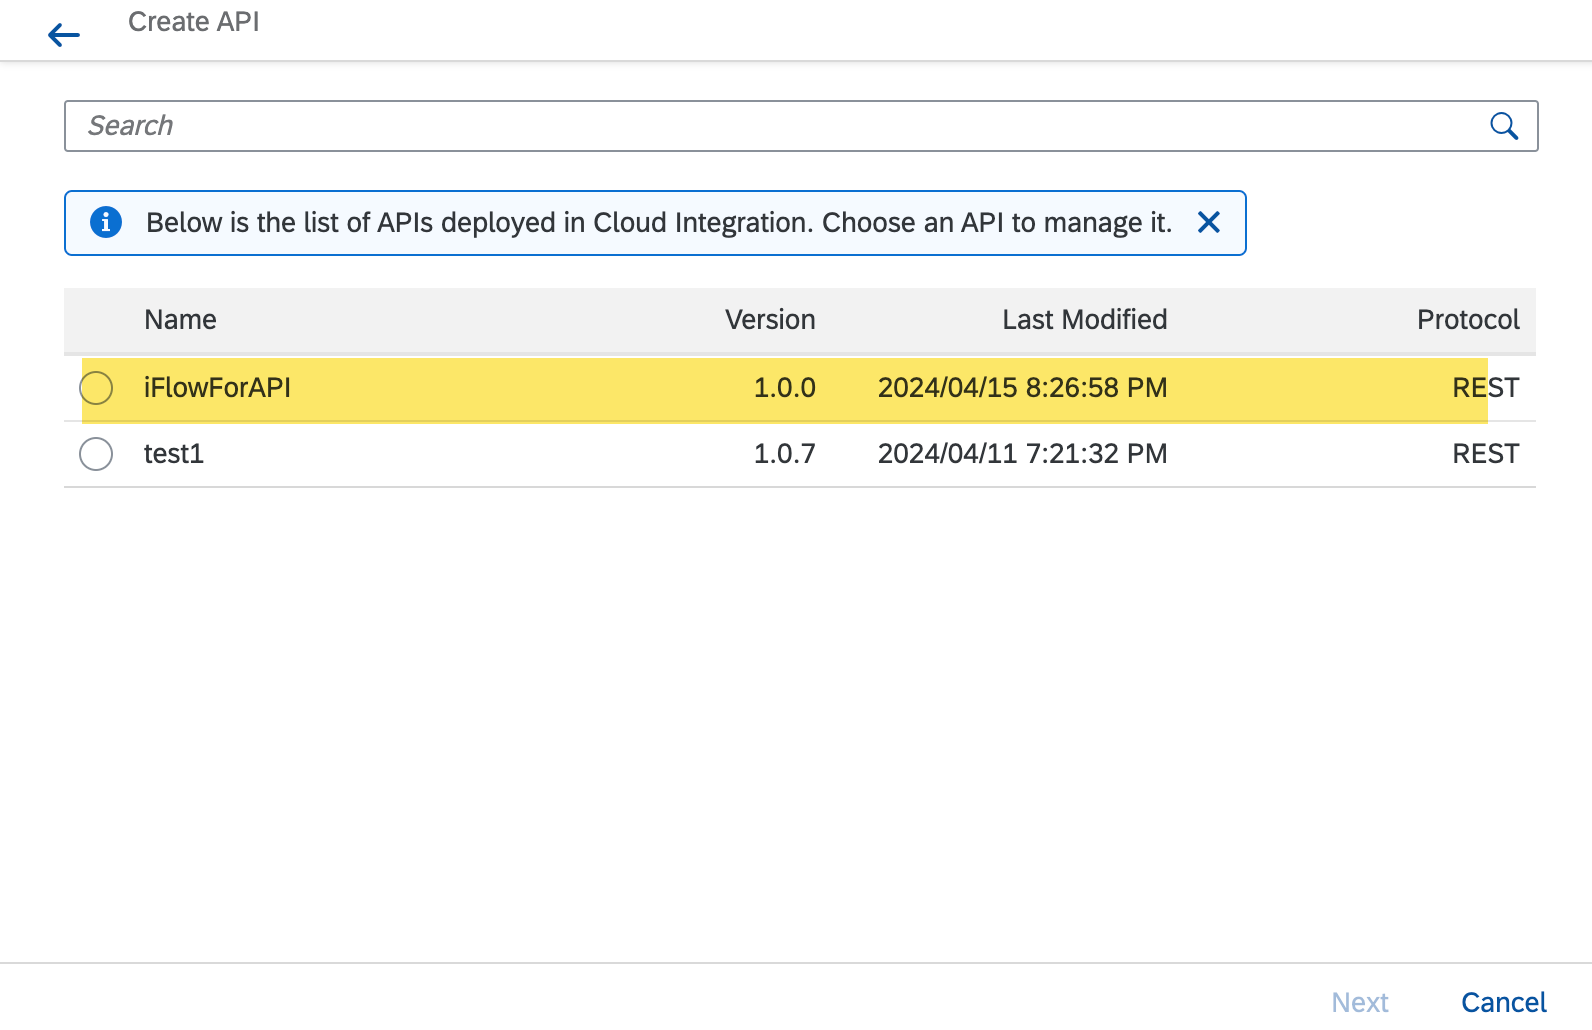
Choose the iFlow from the list created earlier and proceed by clicking 'Next'.
Provide the required information using the service key details from the Integration Flow instance of your BTP tenant on the following screen.
See Service Key Types
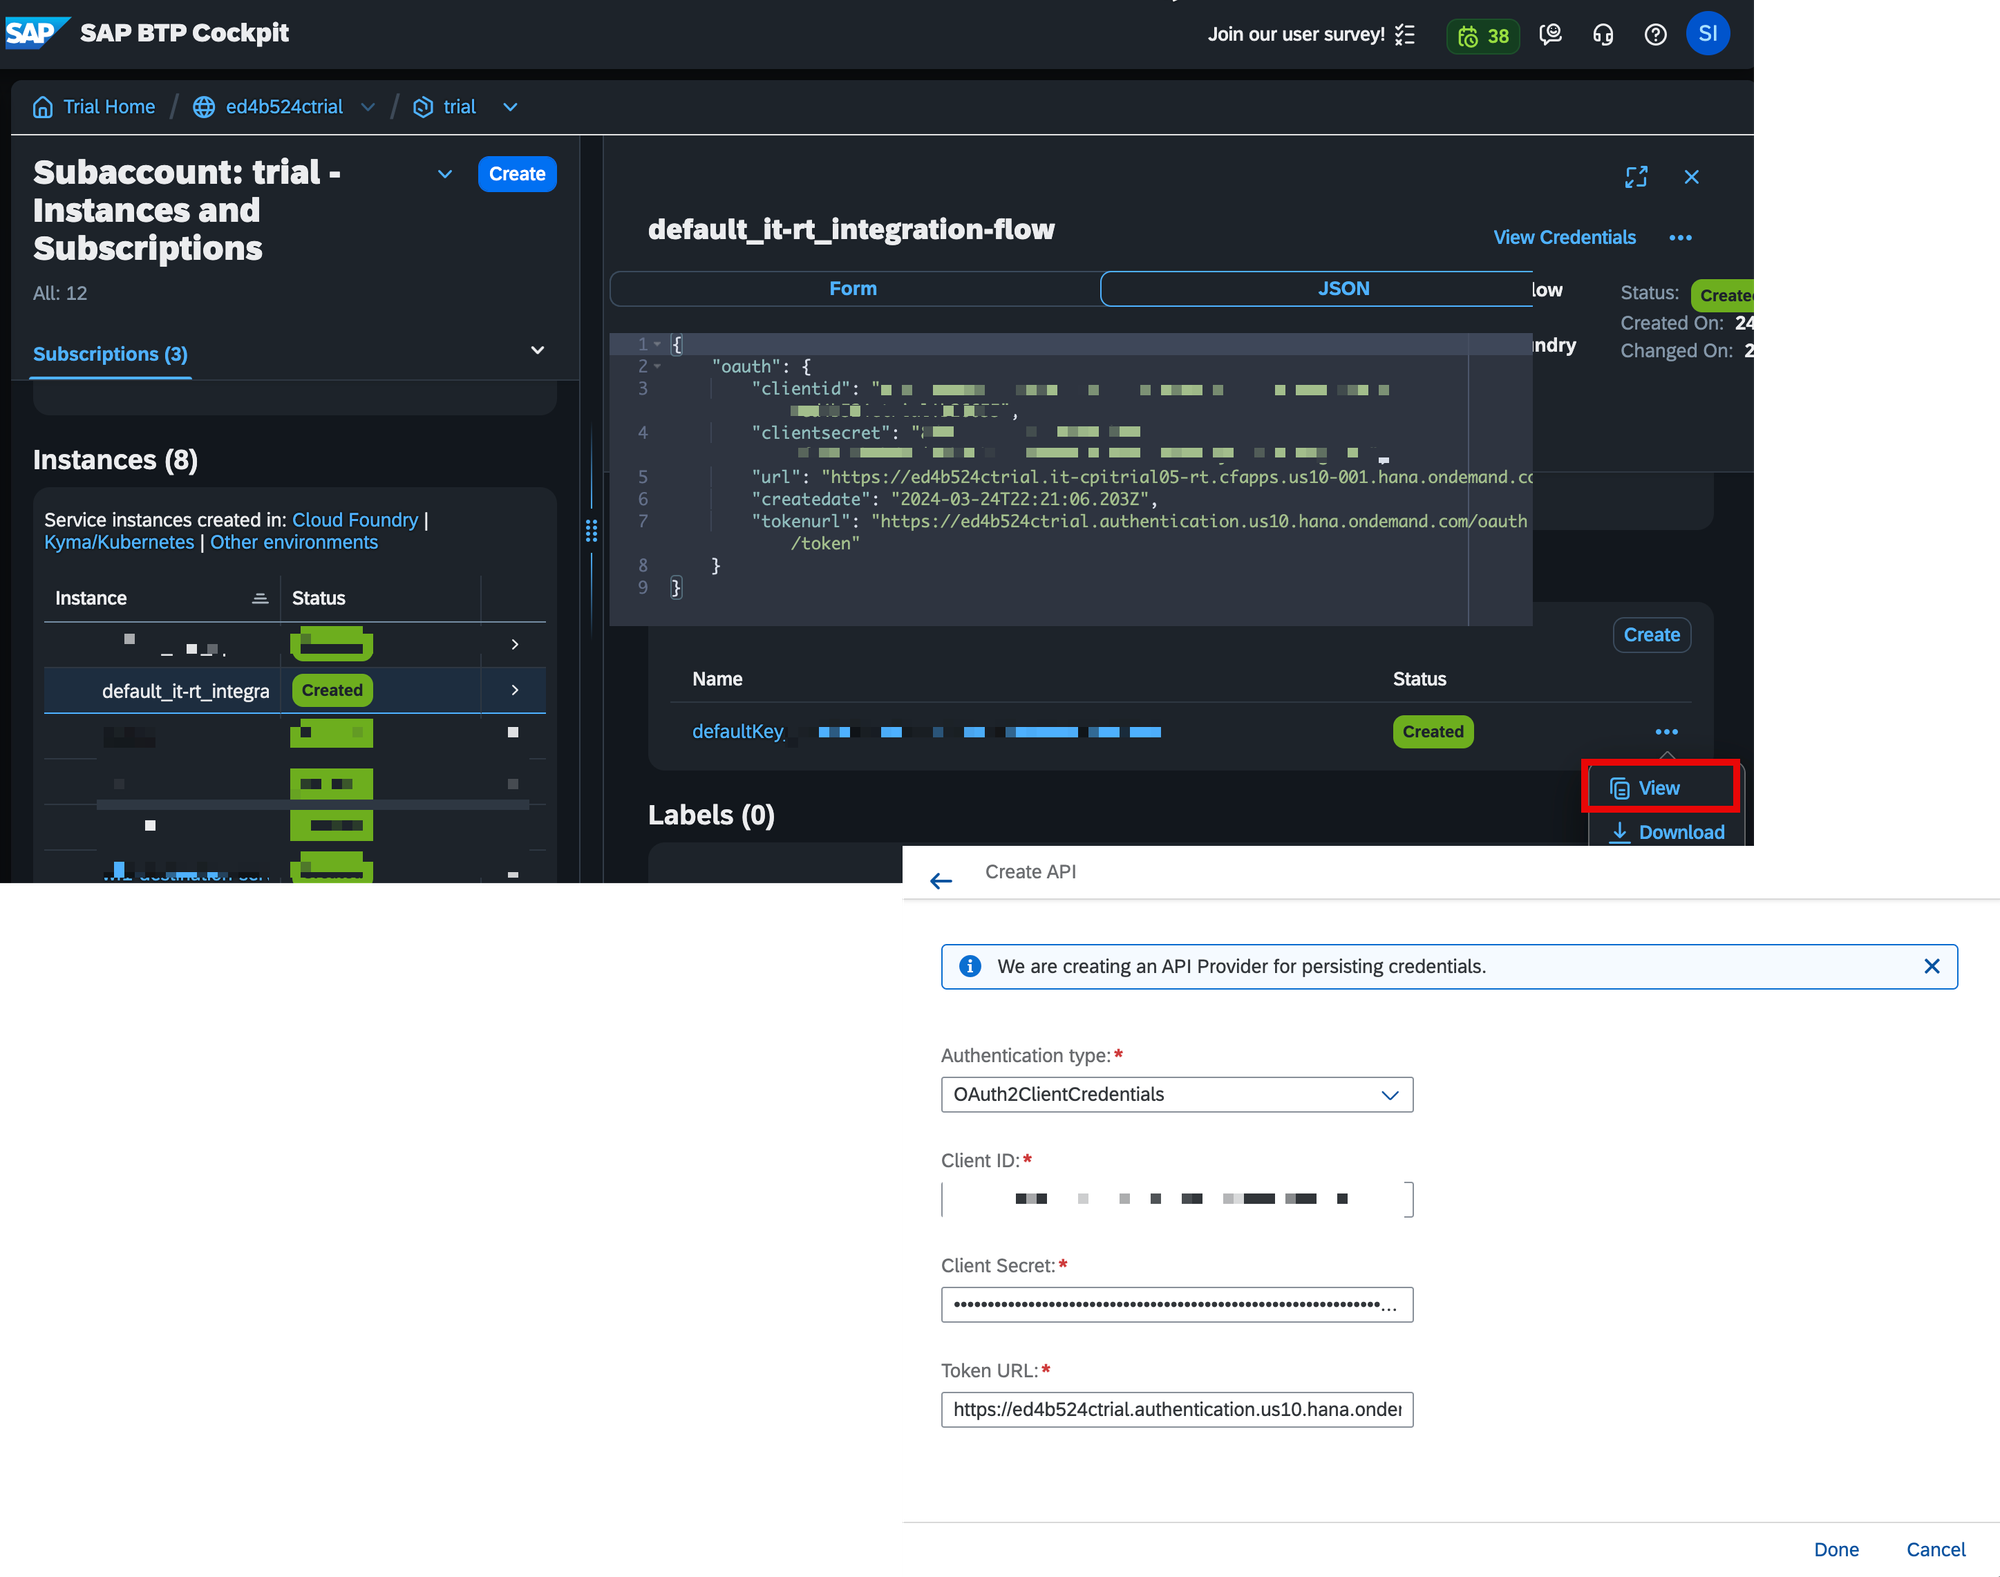
Once done, click on the 'Done' button.
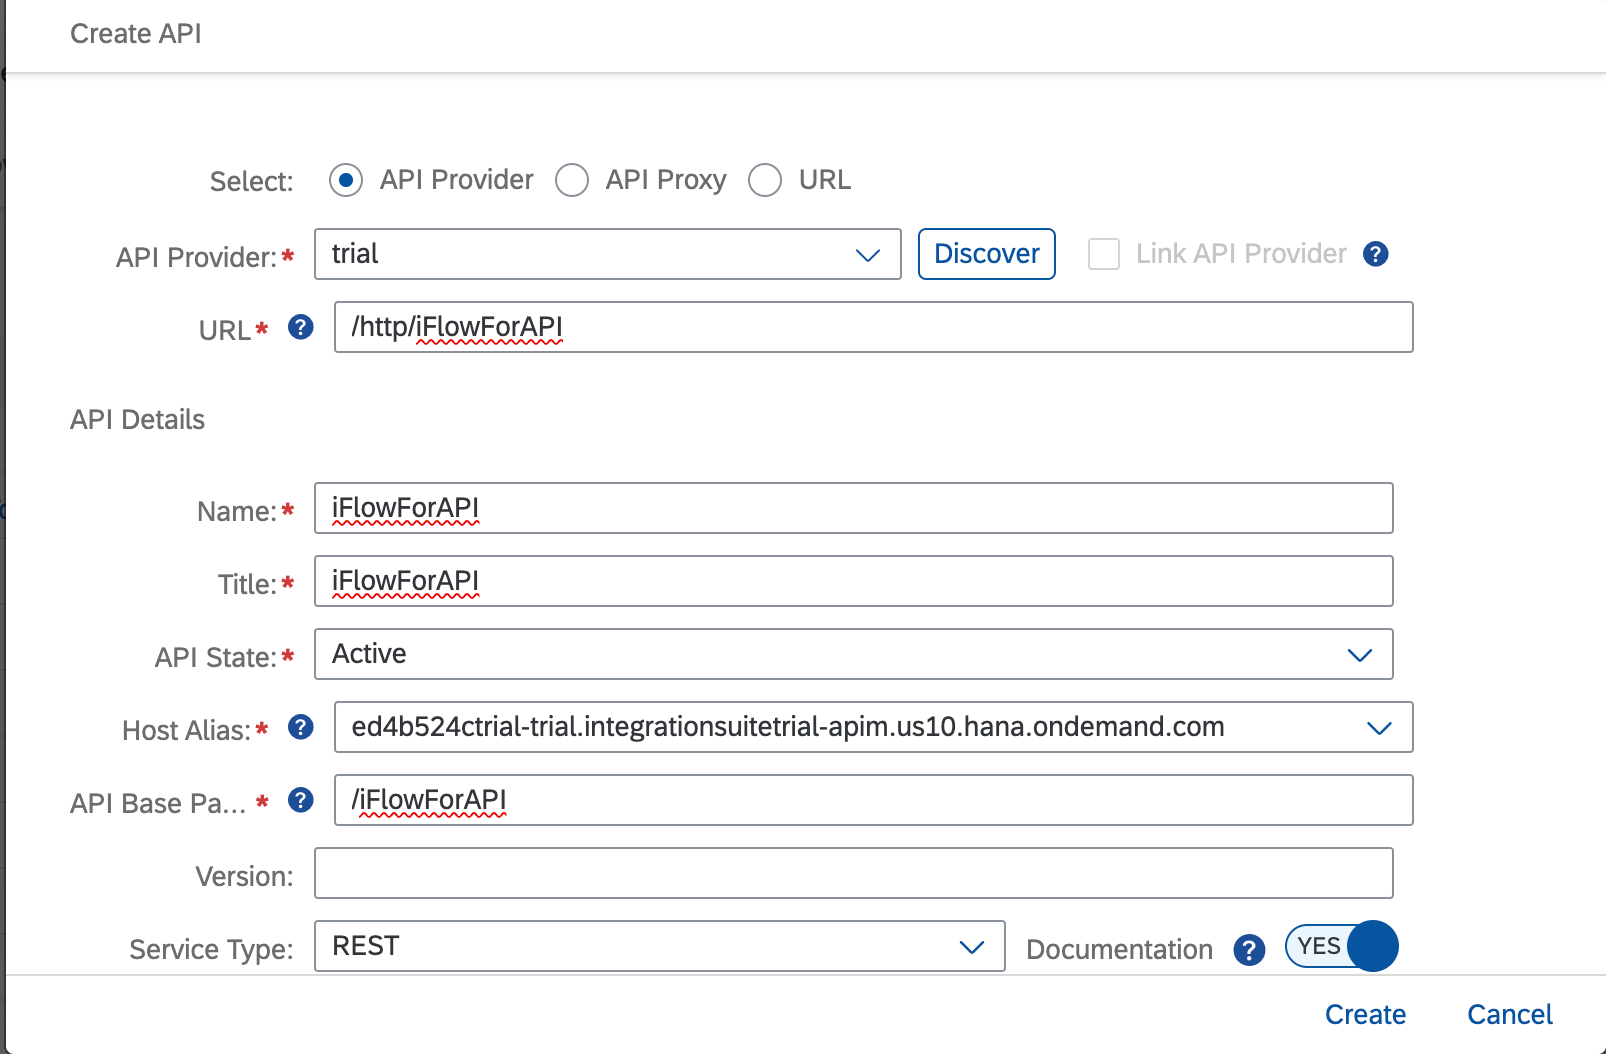
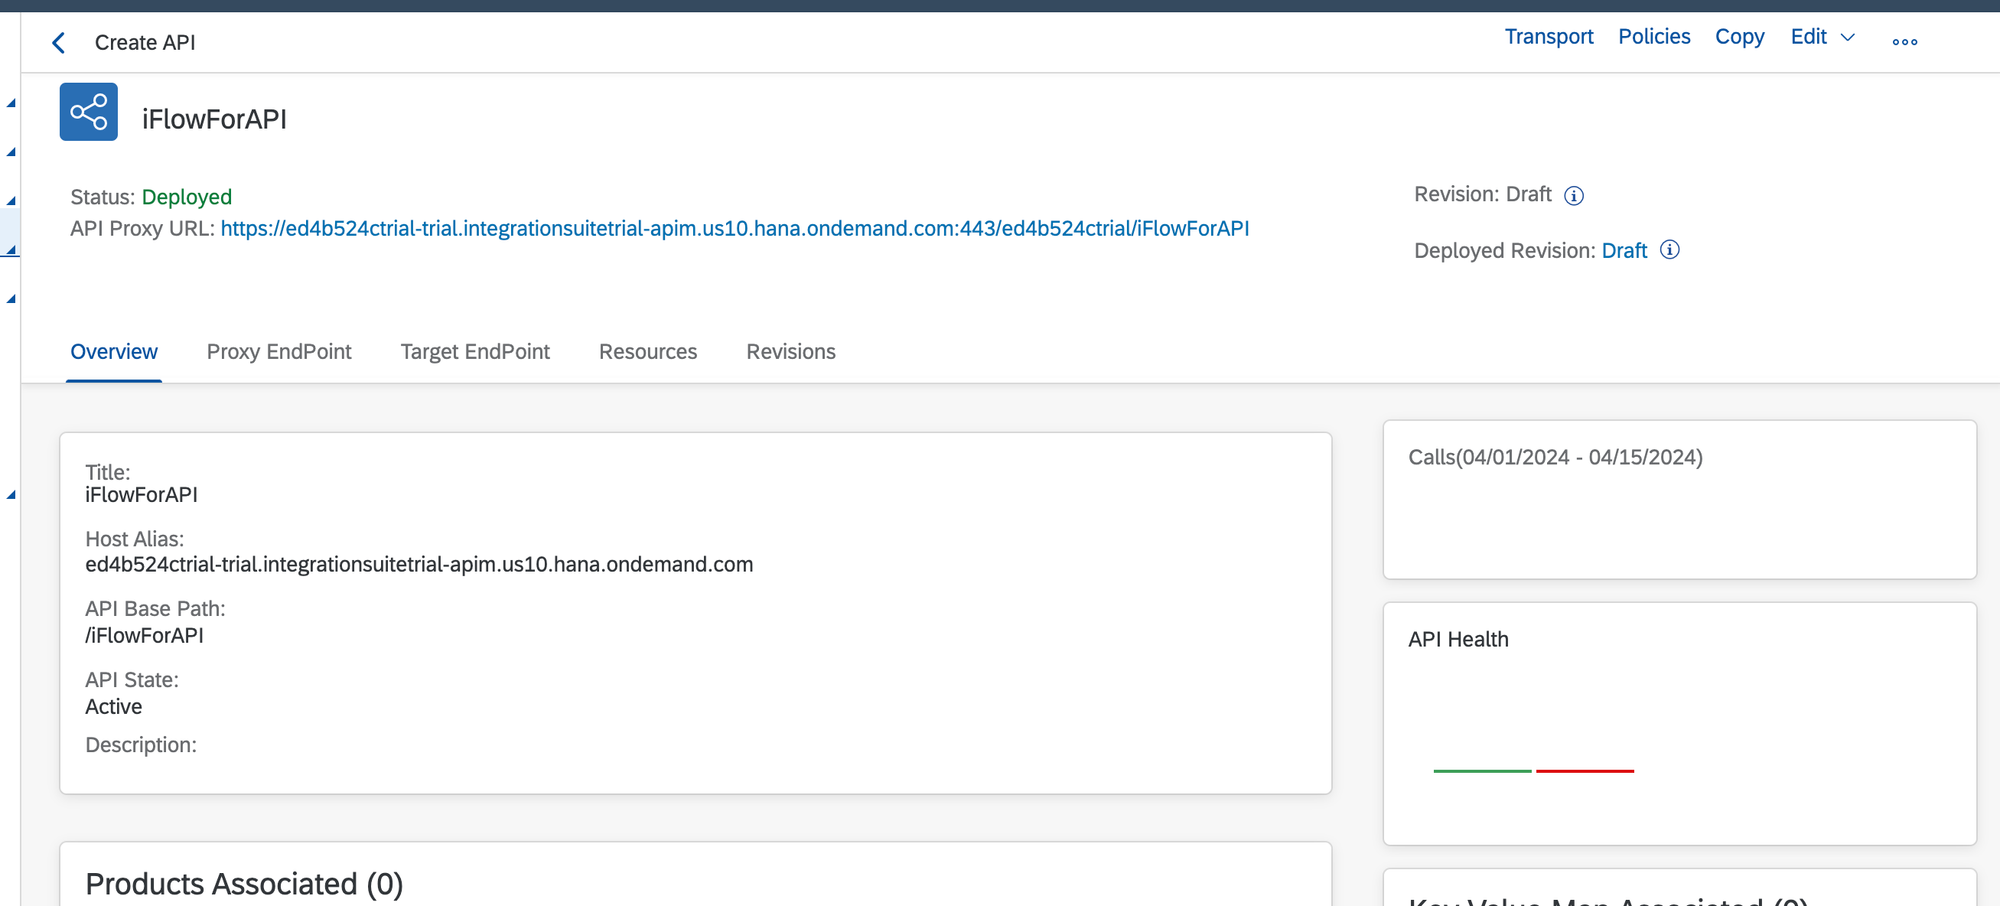
Review the details of the new API. If everything appears correct, click on 'Create' and deploy any changes.
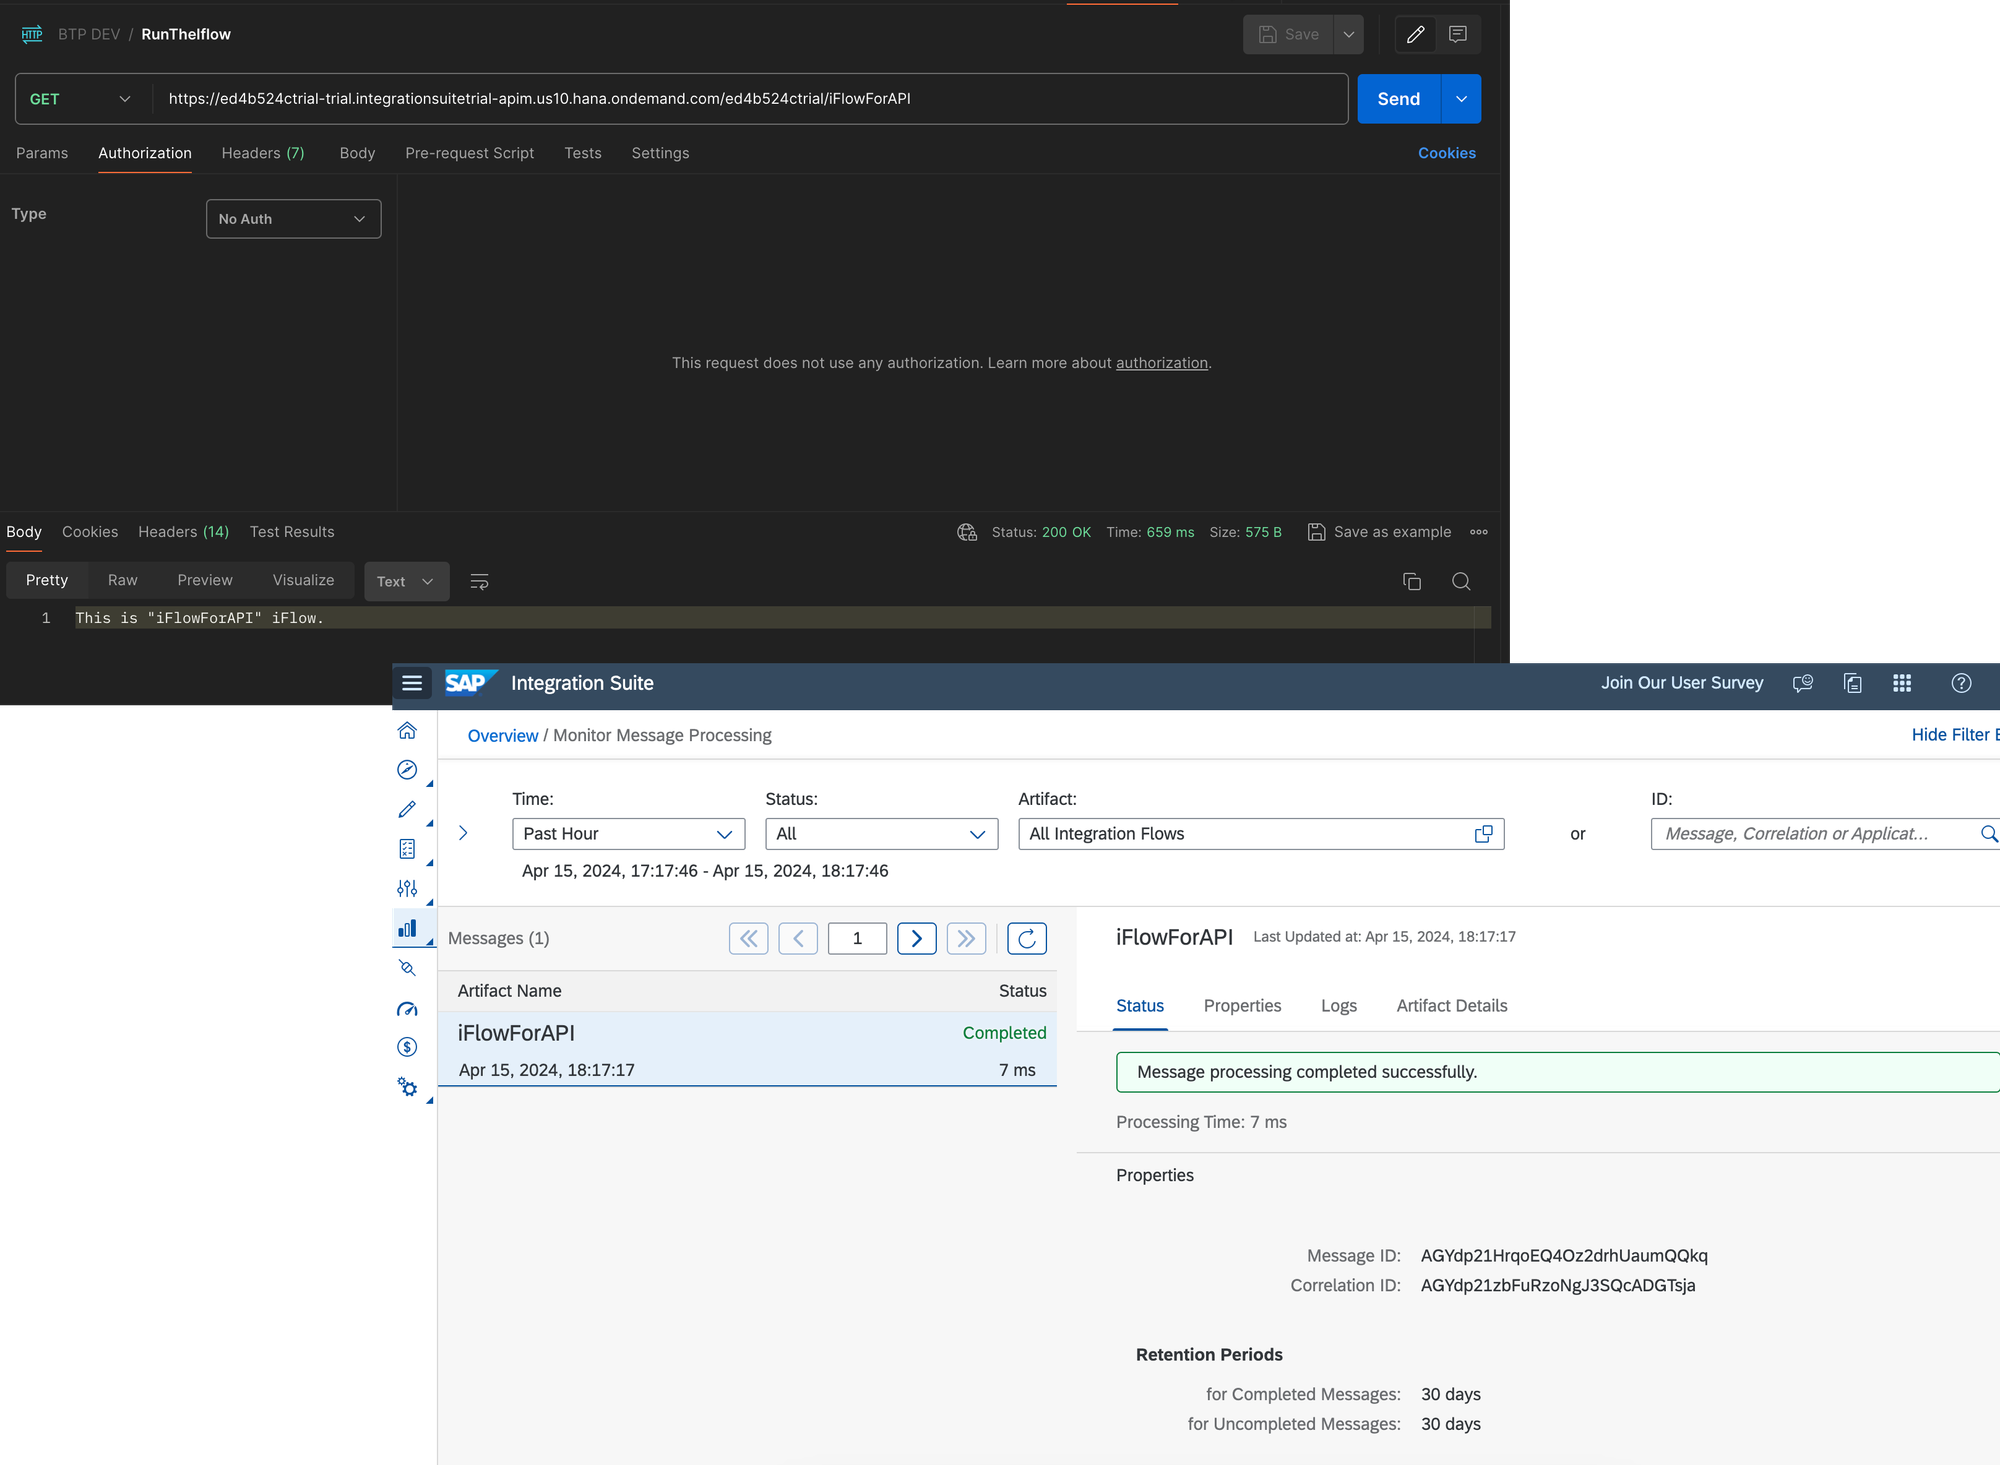
Step #4. Testing
Trigger the recently created API and verify if the message for the iFlow has been generated upon triggering the API's endpoint.
PS
It's important to acknowledge that this realization is not without its security concerns. These issues will be addressed in a subsequent post.