Restricting access to iFlows
In this post, I would like to consider a sequence of steps required for restricting access to iFlows within the BTP instance.
Preface
As you probably know, an Integration Flow could be triggered via the generated endpoint URL that you can find in the corresponding tile on the Monitoring dashboard.
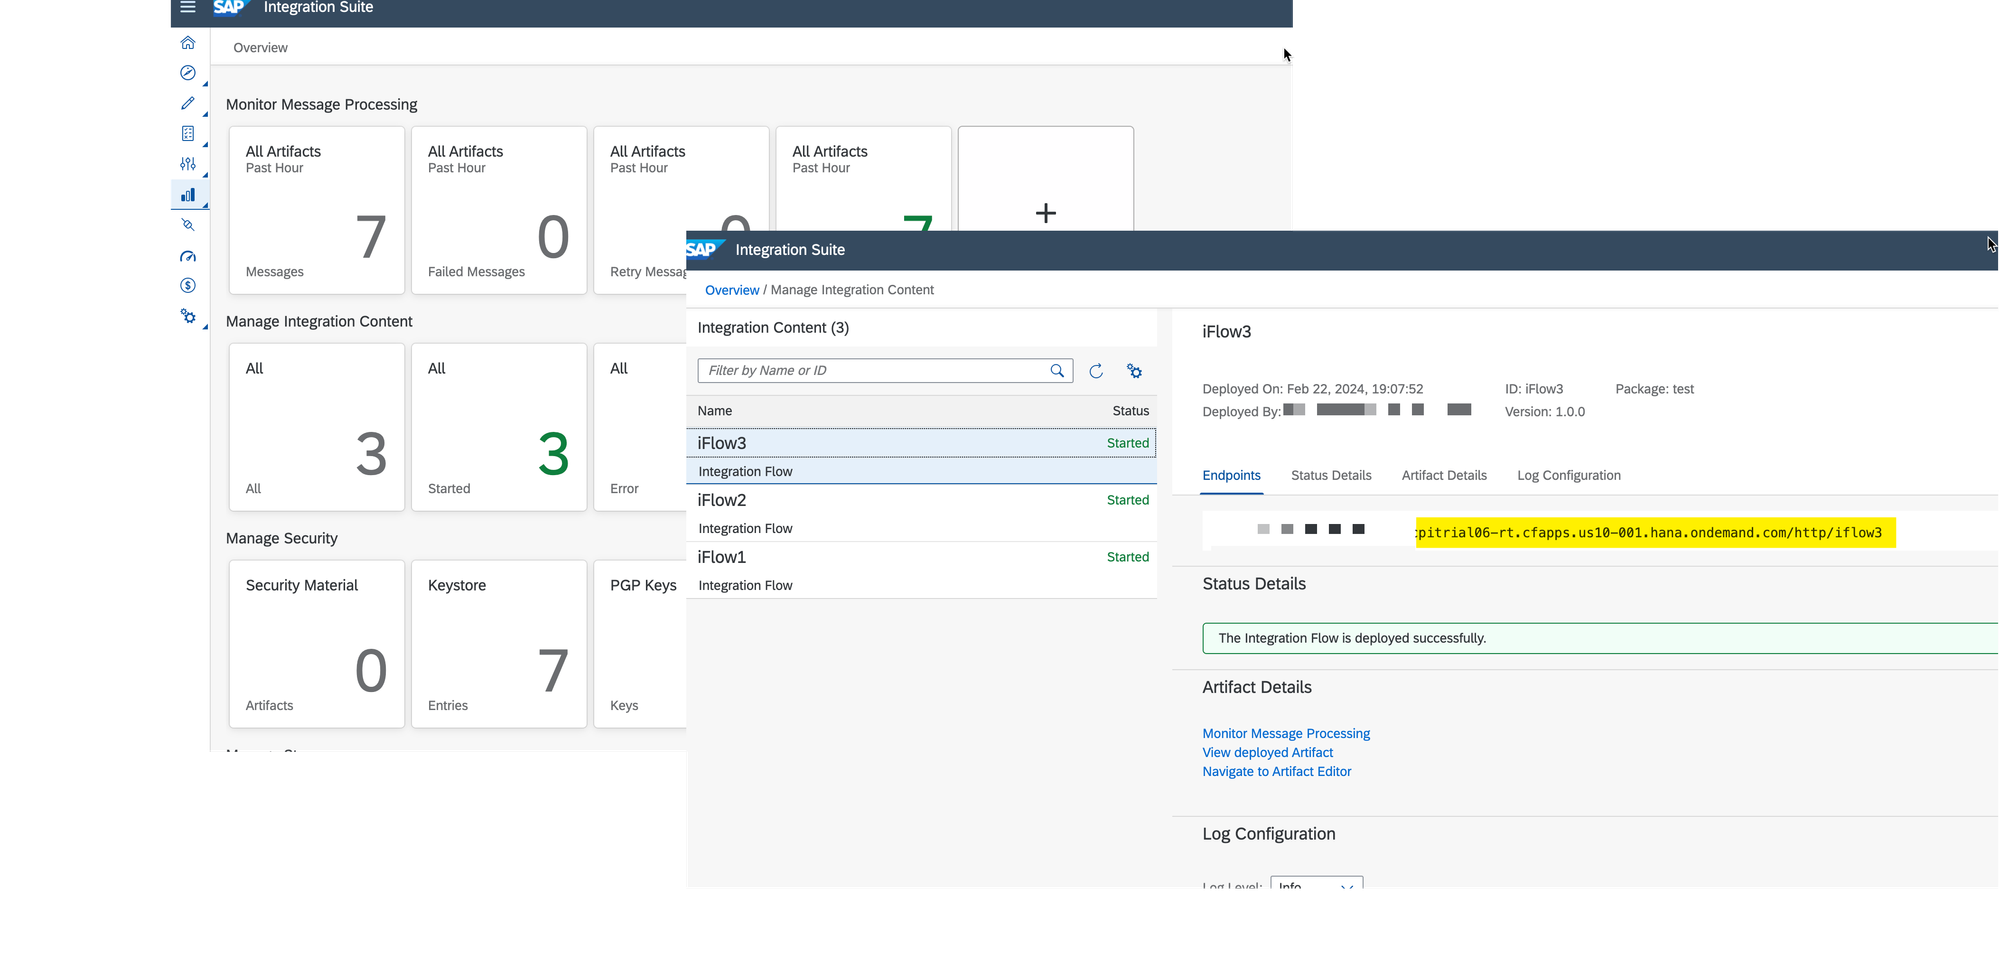
Several scenarios could exist to trigger iFlows. However, if you want to provide the direct link to the iFlow, you should provide the client ID and the client secret of the Process Integration Runtime instance. Otherwise, you won't be able to trigger the iFlow, constantly getting the 401-error response code.
See Creating Service Instance and Service Key for Inbound Authentication
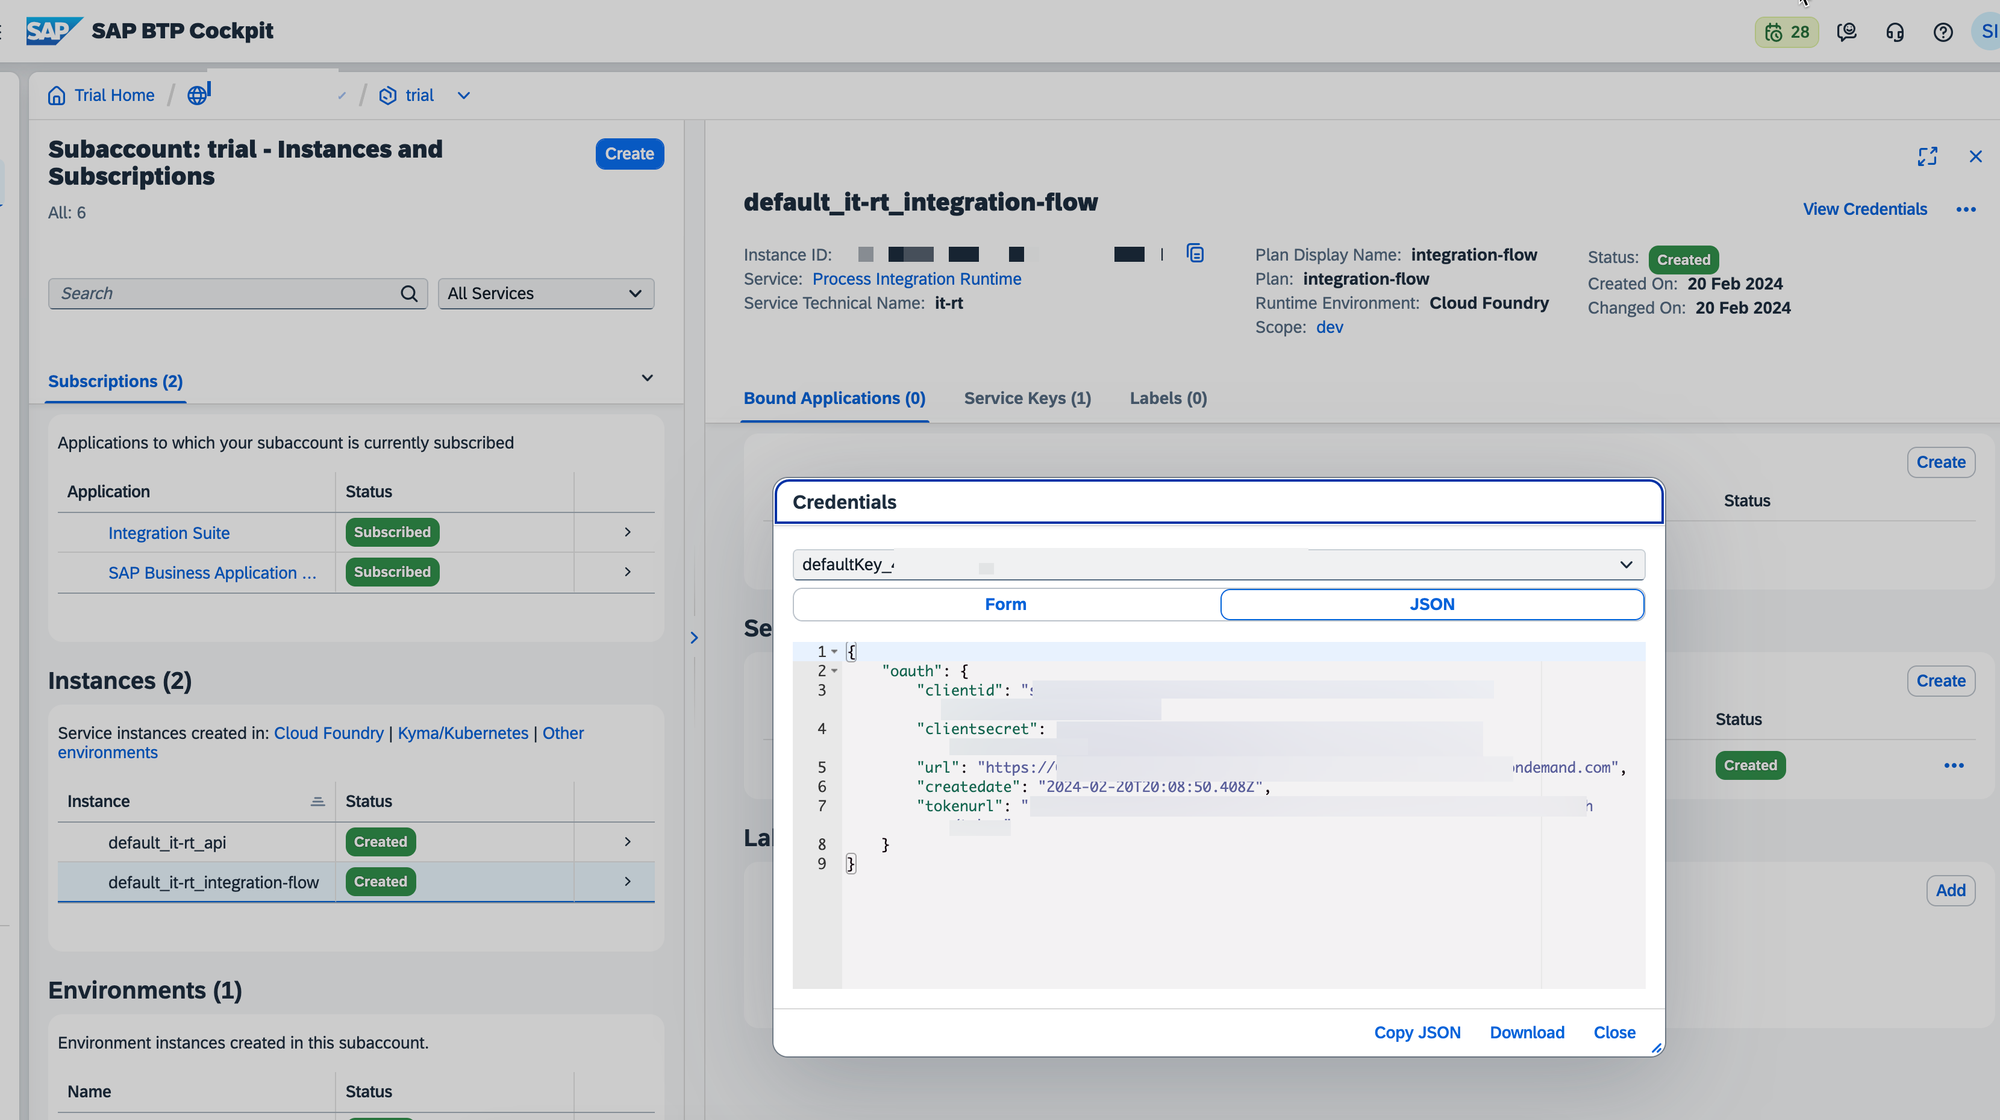
When you provide the client ID and the client secret of the entire Integration Runtime instance, it means that someone who will be triggering an endpoint of the required iFlow potentially can trigger all other endpoints within the same BTP instance. This may raise security concerns.
Further, I will try to demonstrate how this situation could be fixed.
#1. Initial set up
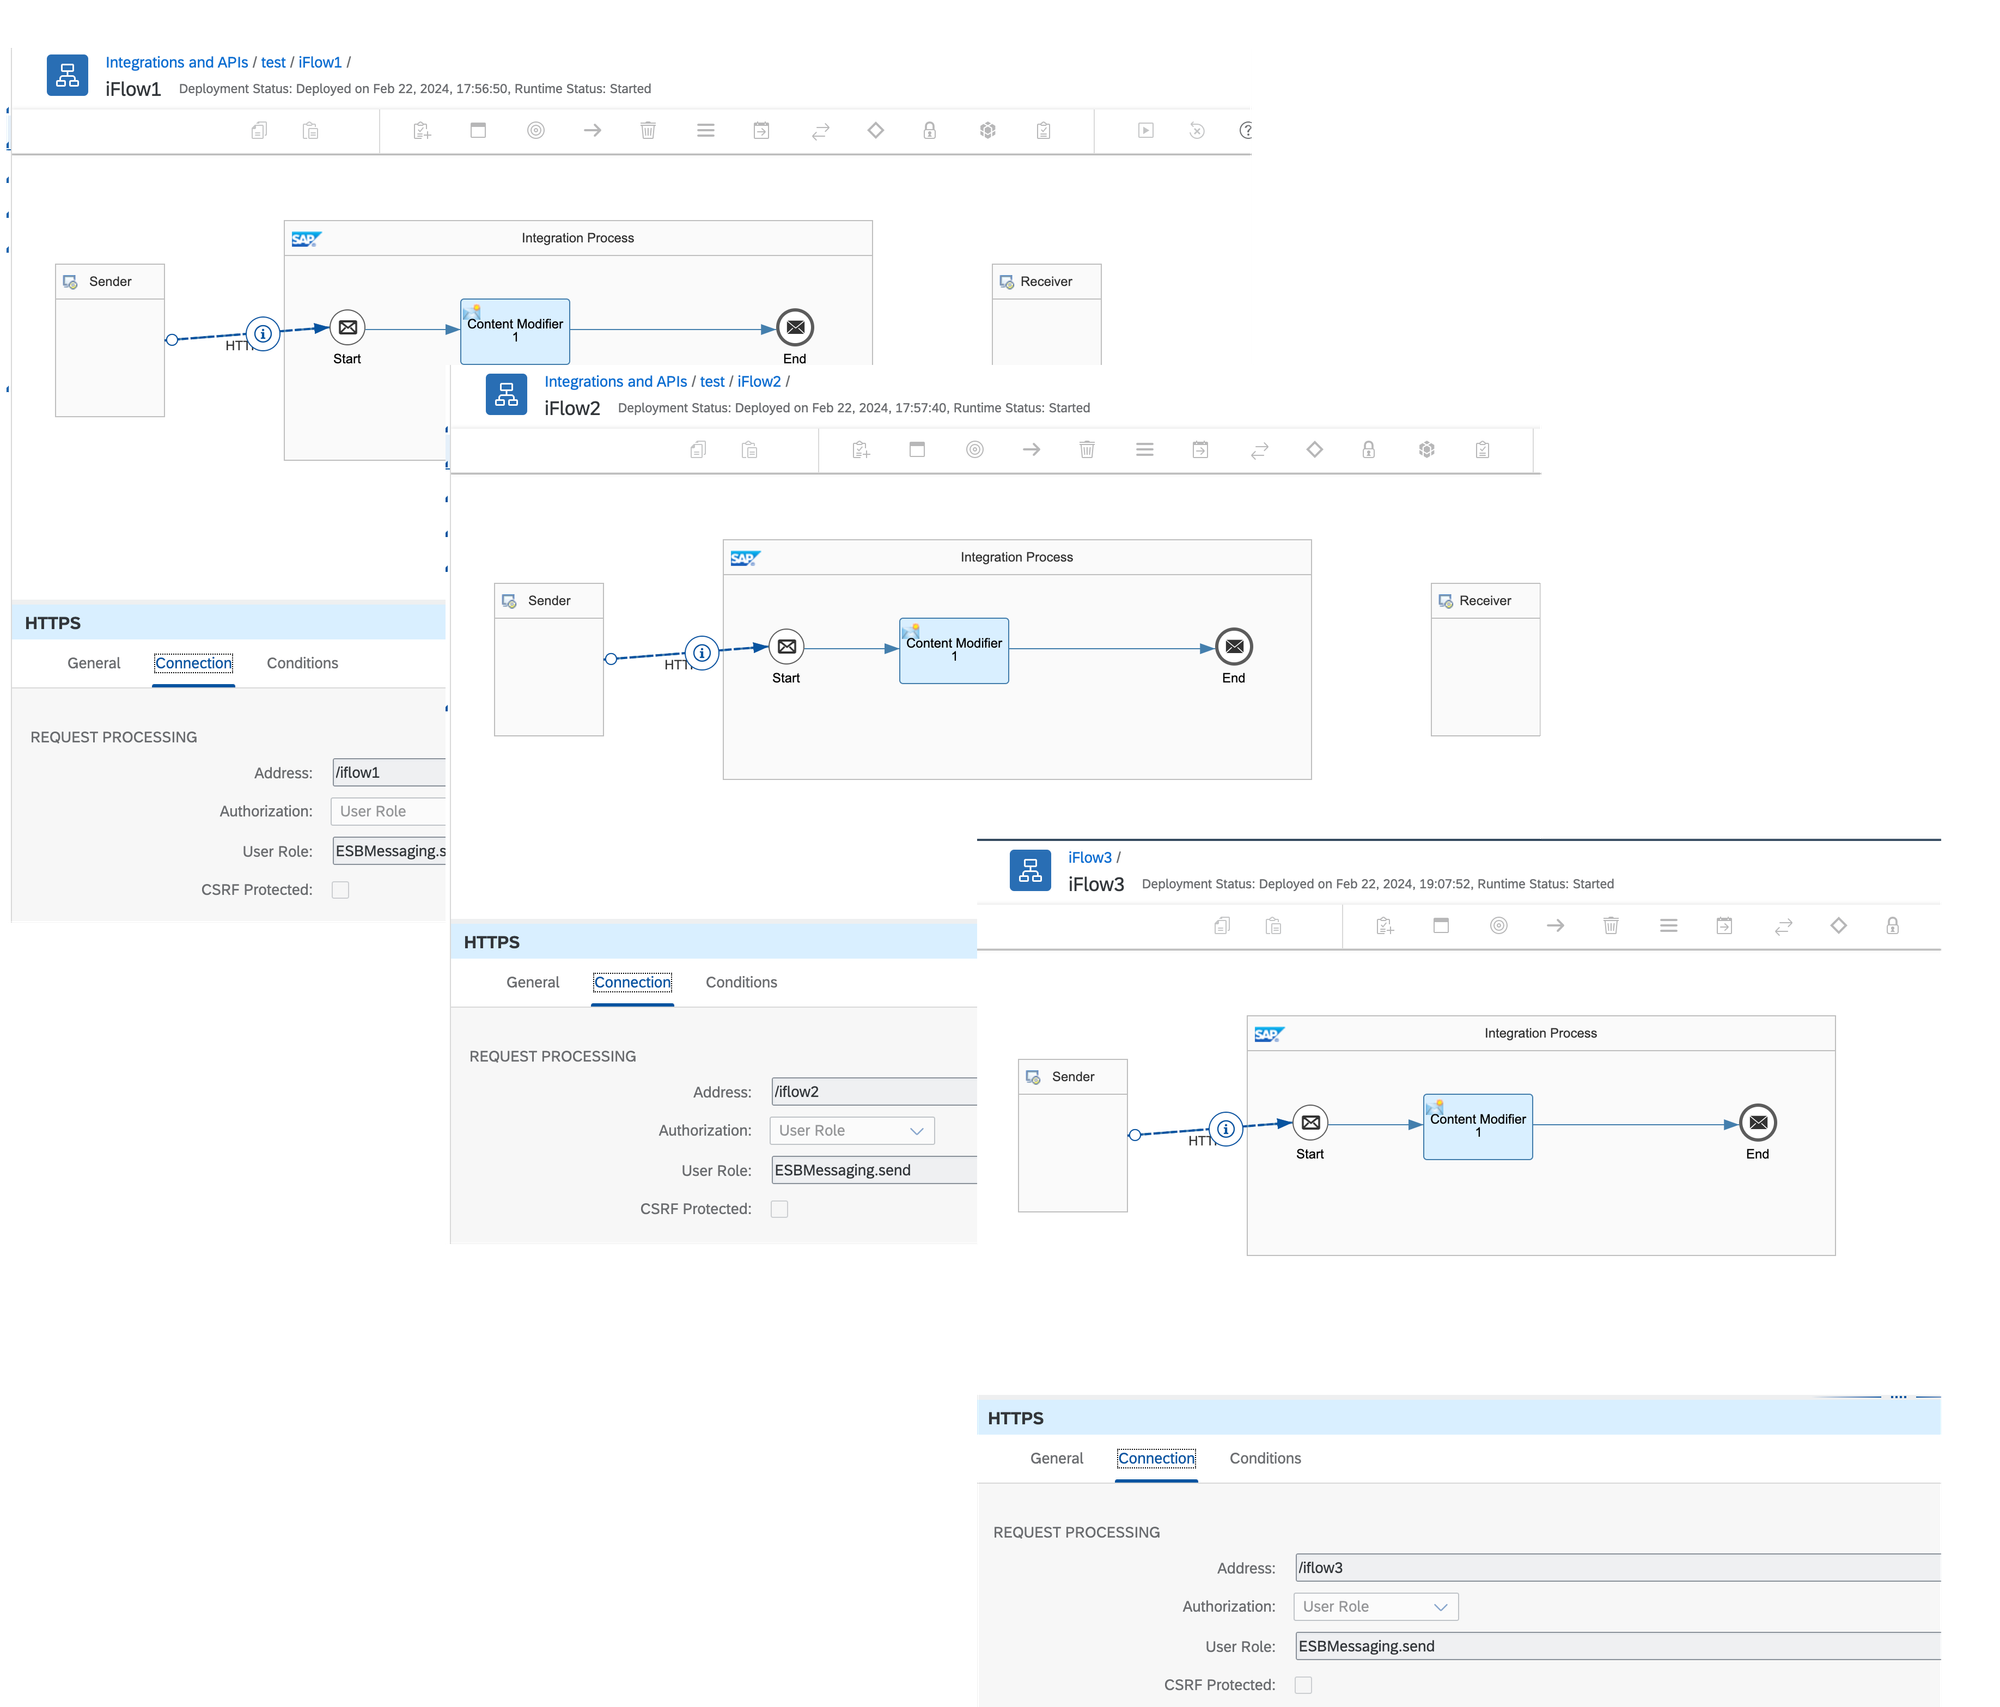
For demonstration purposes, I will use three iFlows that are fully identical apart from the output message they send to the client upon completion, and of course, their endpoint URLs.
To trigger all these endpoints, I will be required to have the client ID and the client secret of the Process Integration Runtime BTP instance.
#2. Requirements
Let's consider that it is required to restrict the launch of all the iFlows within the BTP instance, except for iFlow #3.
#3. Create a role
Create a new role indicating authorization to run the specific iFlow. In my example, it is iFlow #3. To do that, open the 'User roles' tile in the Monitor section of the Integration Suite.
See Managing User Roles
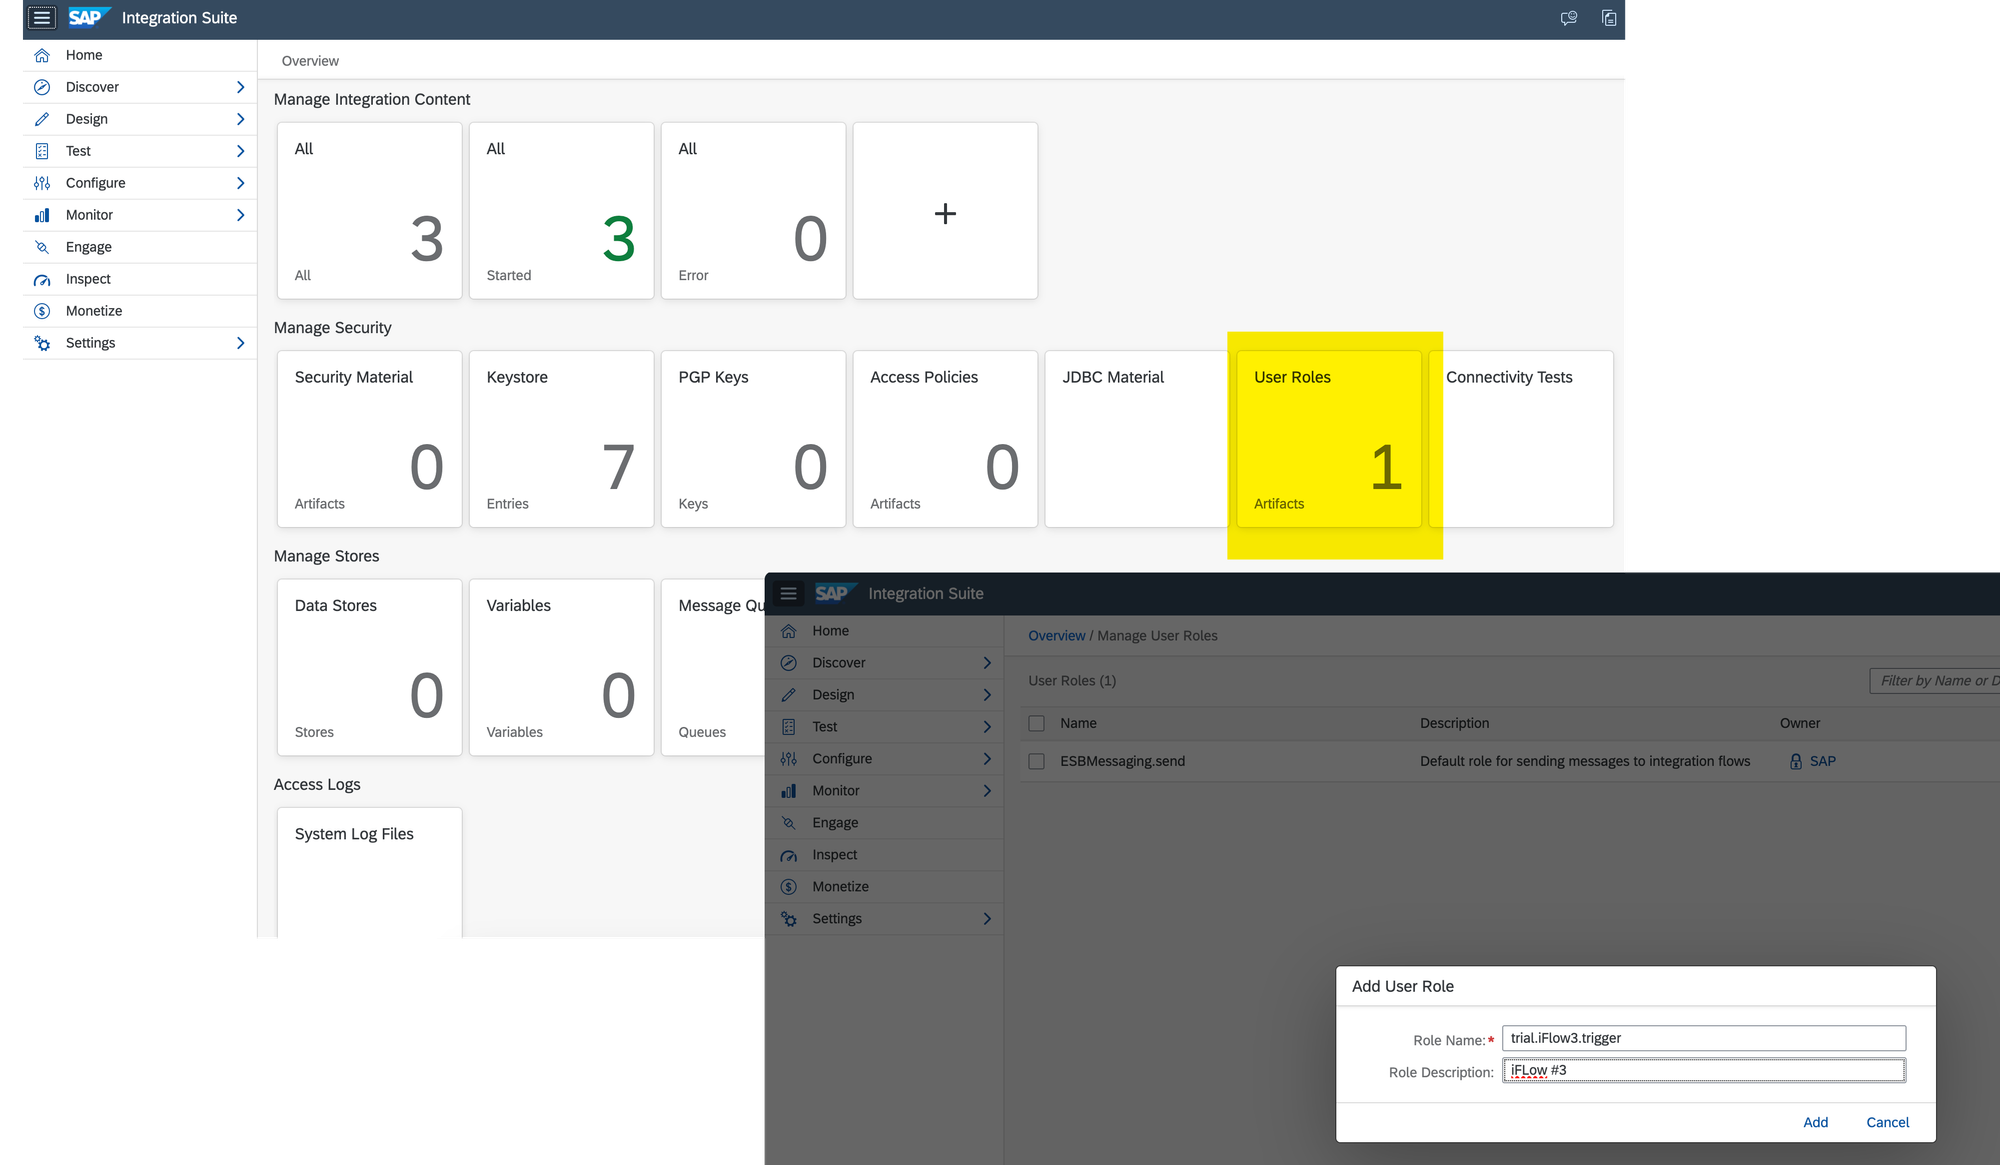
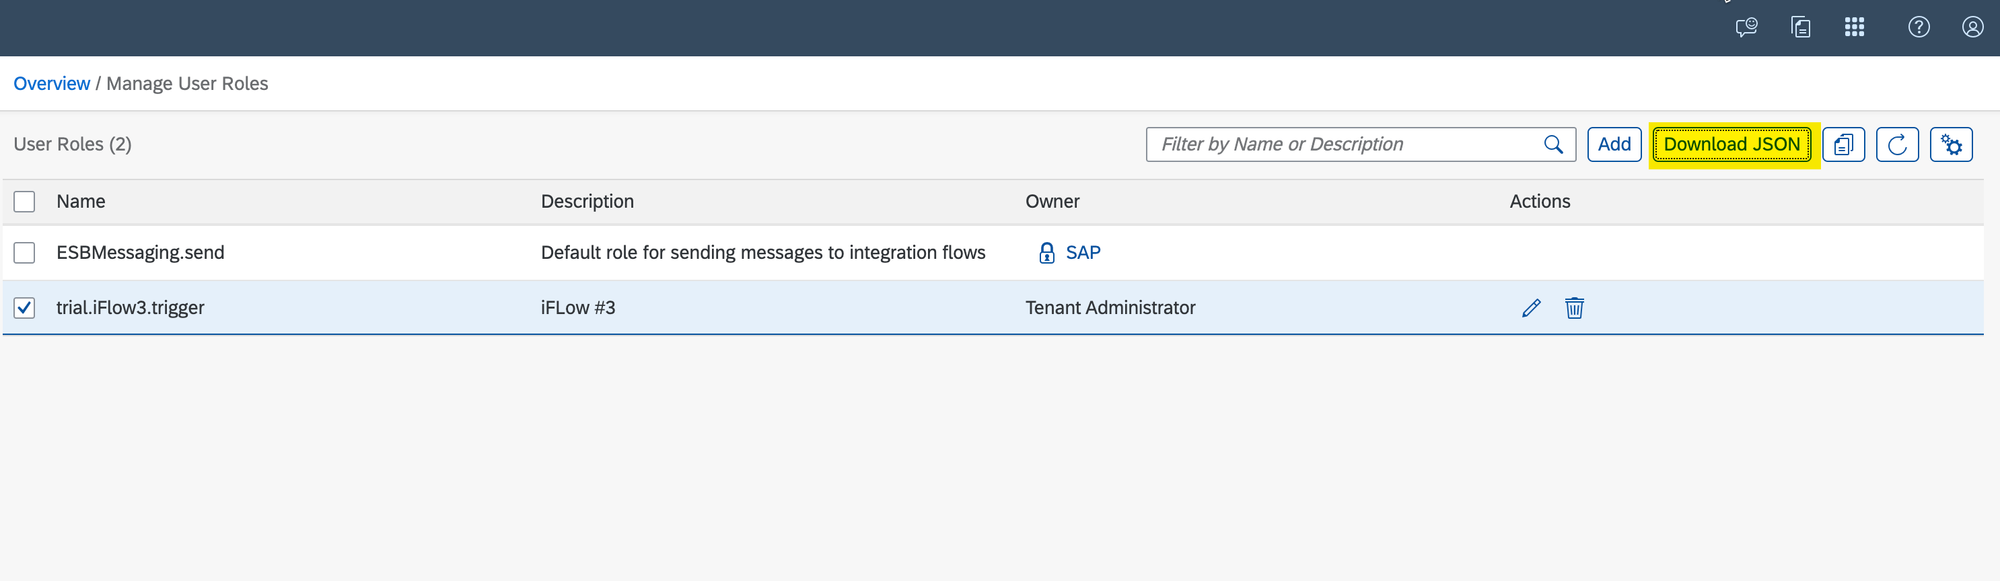
After you create the role, press the 'Download JSON' button, and save it on the local laptop.
#4. Assign the new role to the iFlow
Assign the newly created role to the specific iFlow that you want to allow running by opening it in the Artifact Editor.
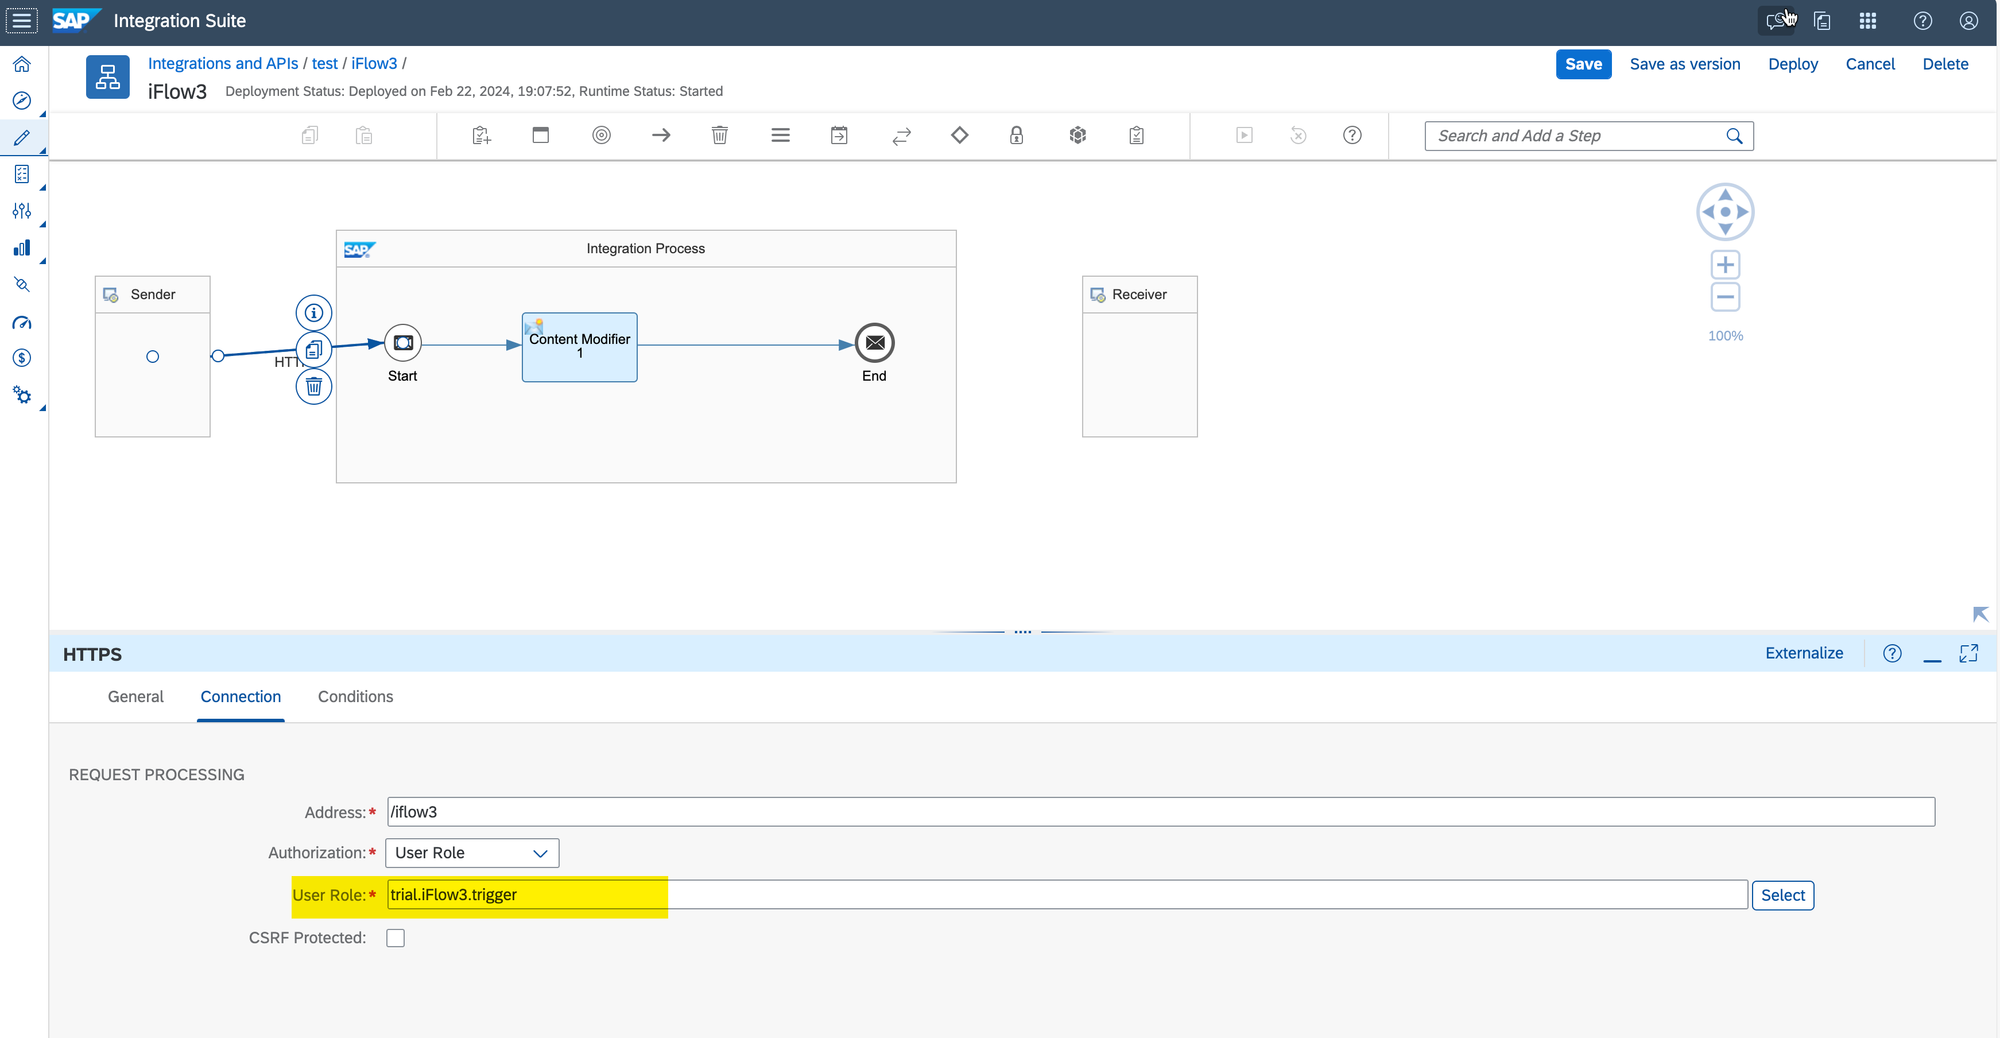
Deploy the changes.
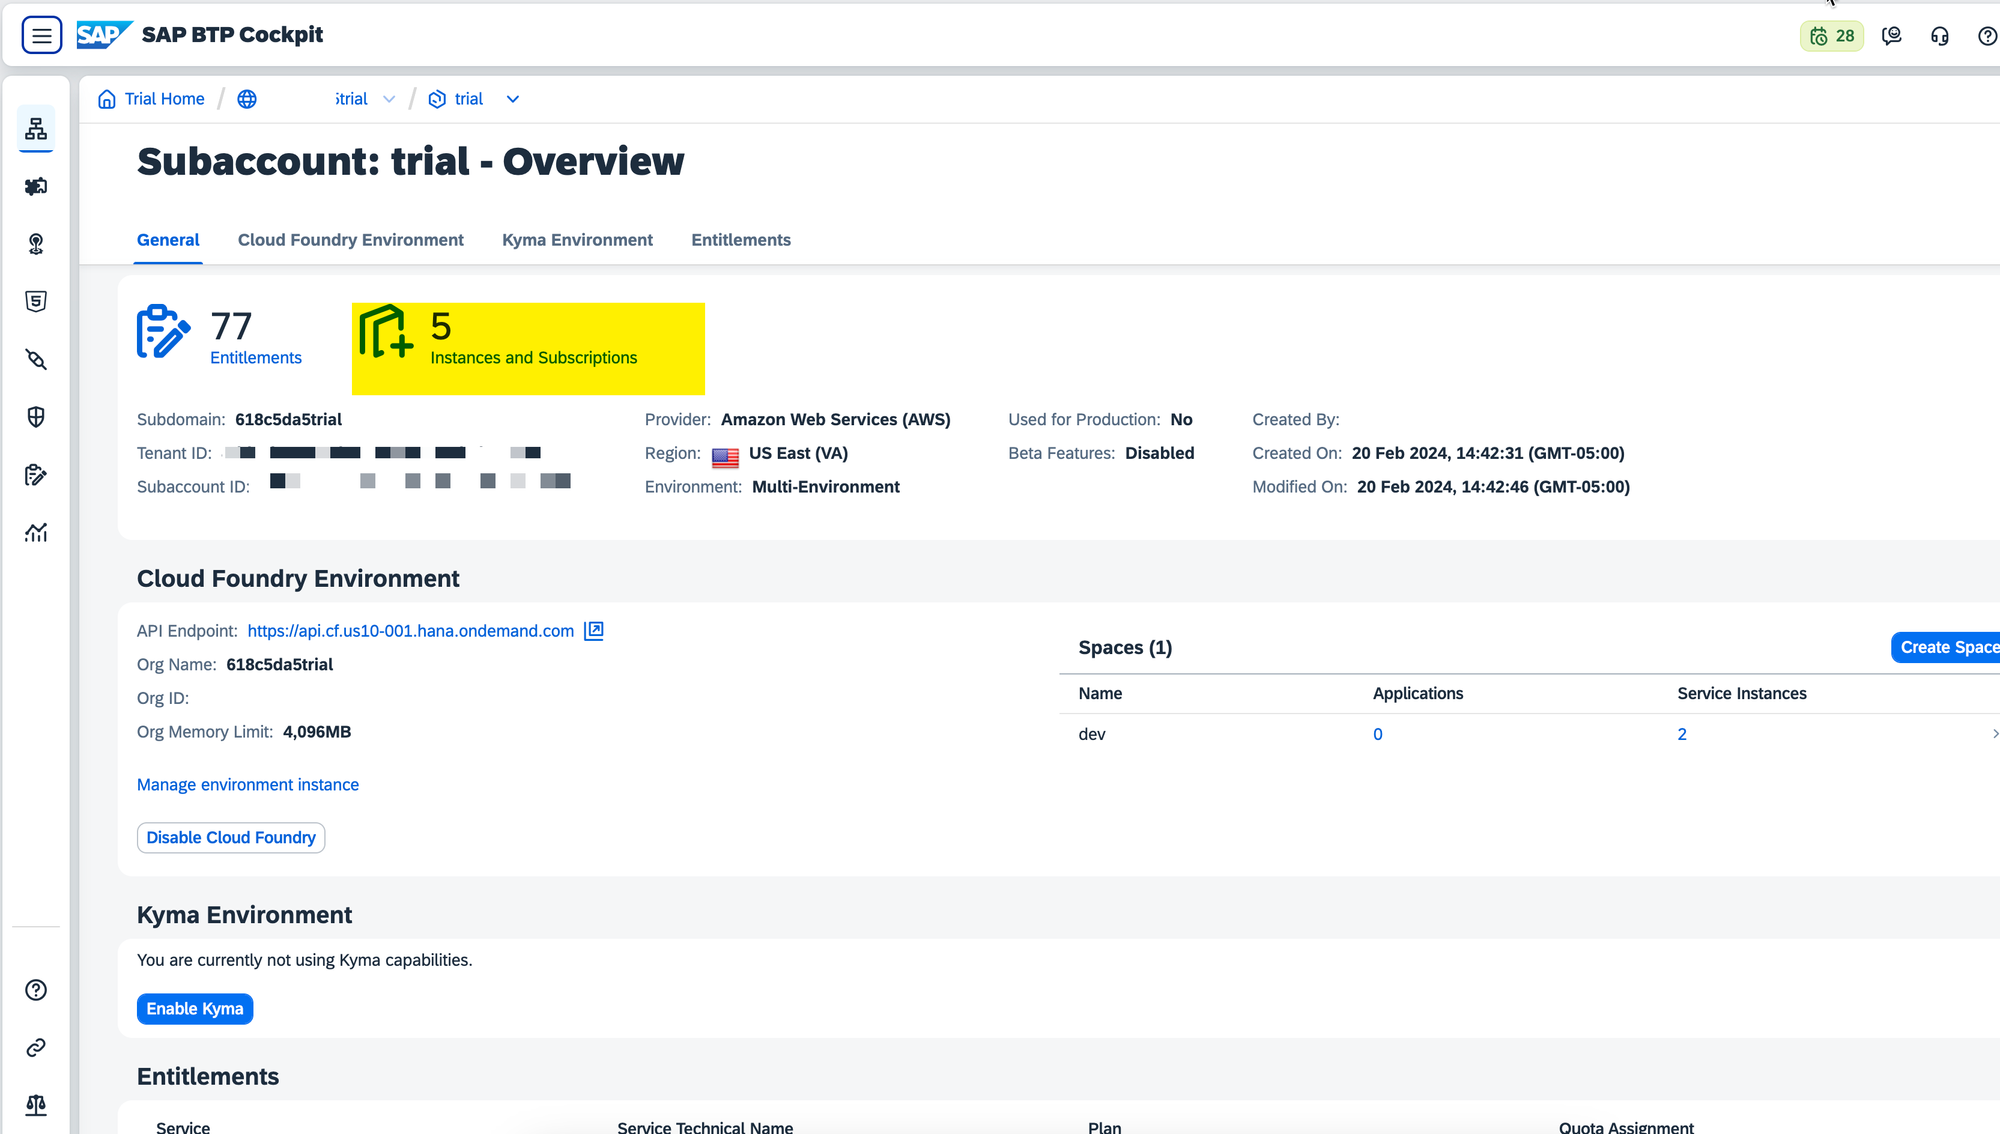
#5. The new service instance and the service key
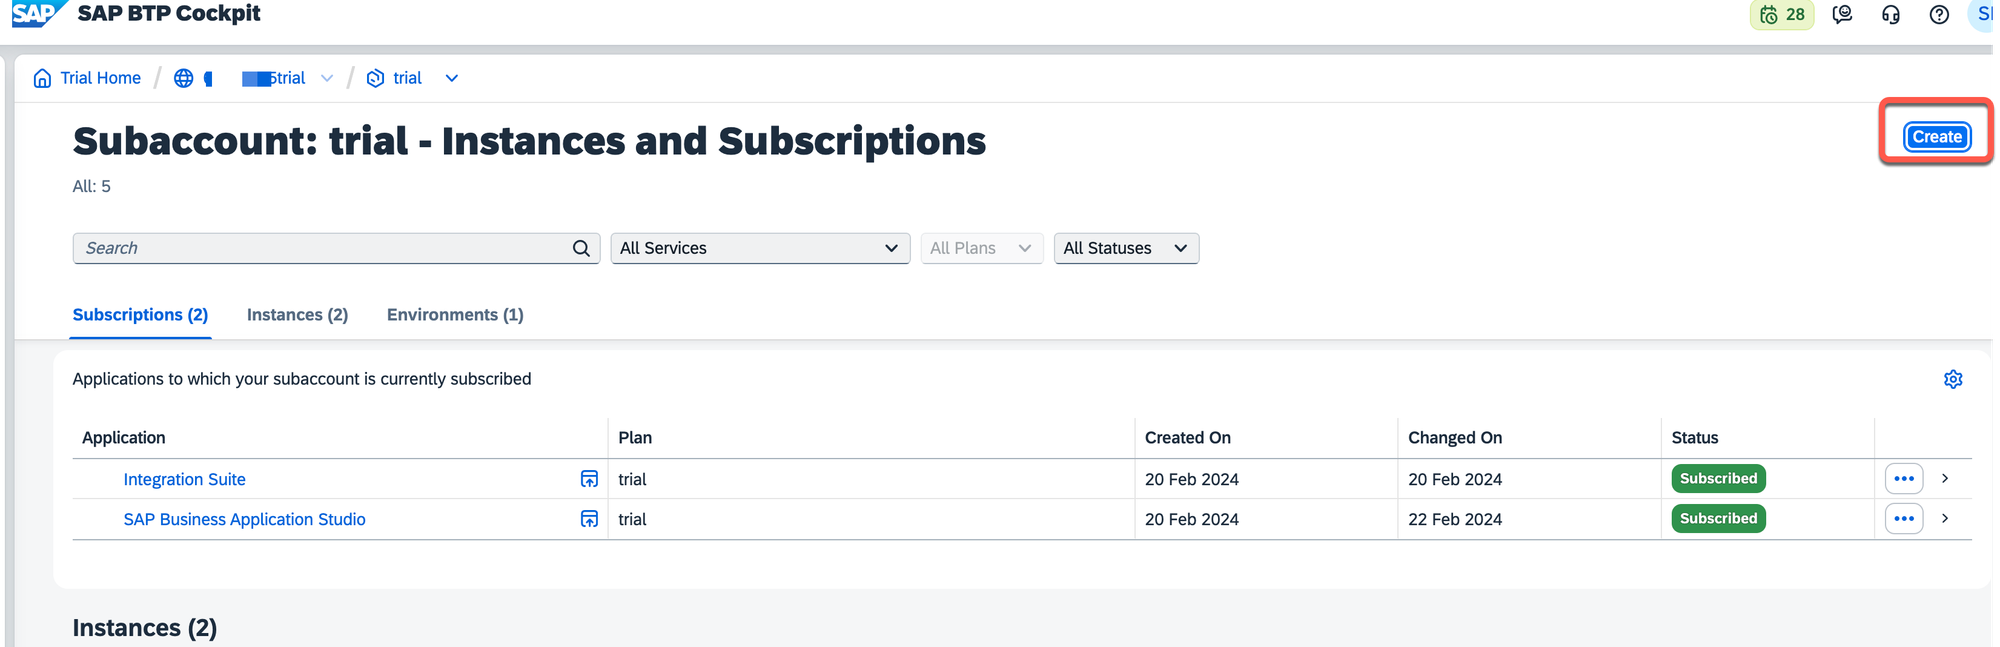
The remaining part is crucial. Now, it is required to create the new service instance for the Process Integration Runtime and generate the new service key for the role we created several steps earlier. Open the BTP subaccount dashboard and select 'Instances and Subscriptions.'
Click the 'Create' button
Select the Process Integration Runtime from the list of available services, Integration-flow as a 'Plan', and create a unique name for the newly created 'Instance name.'
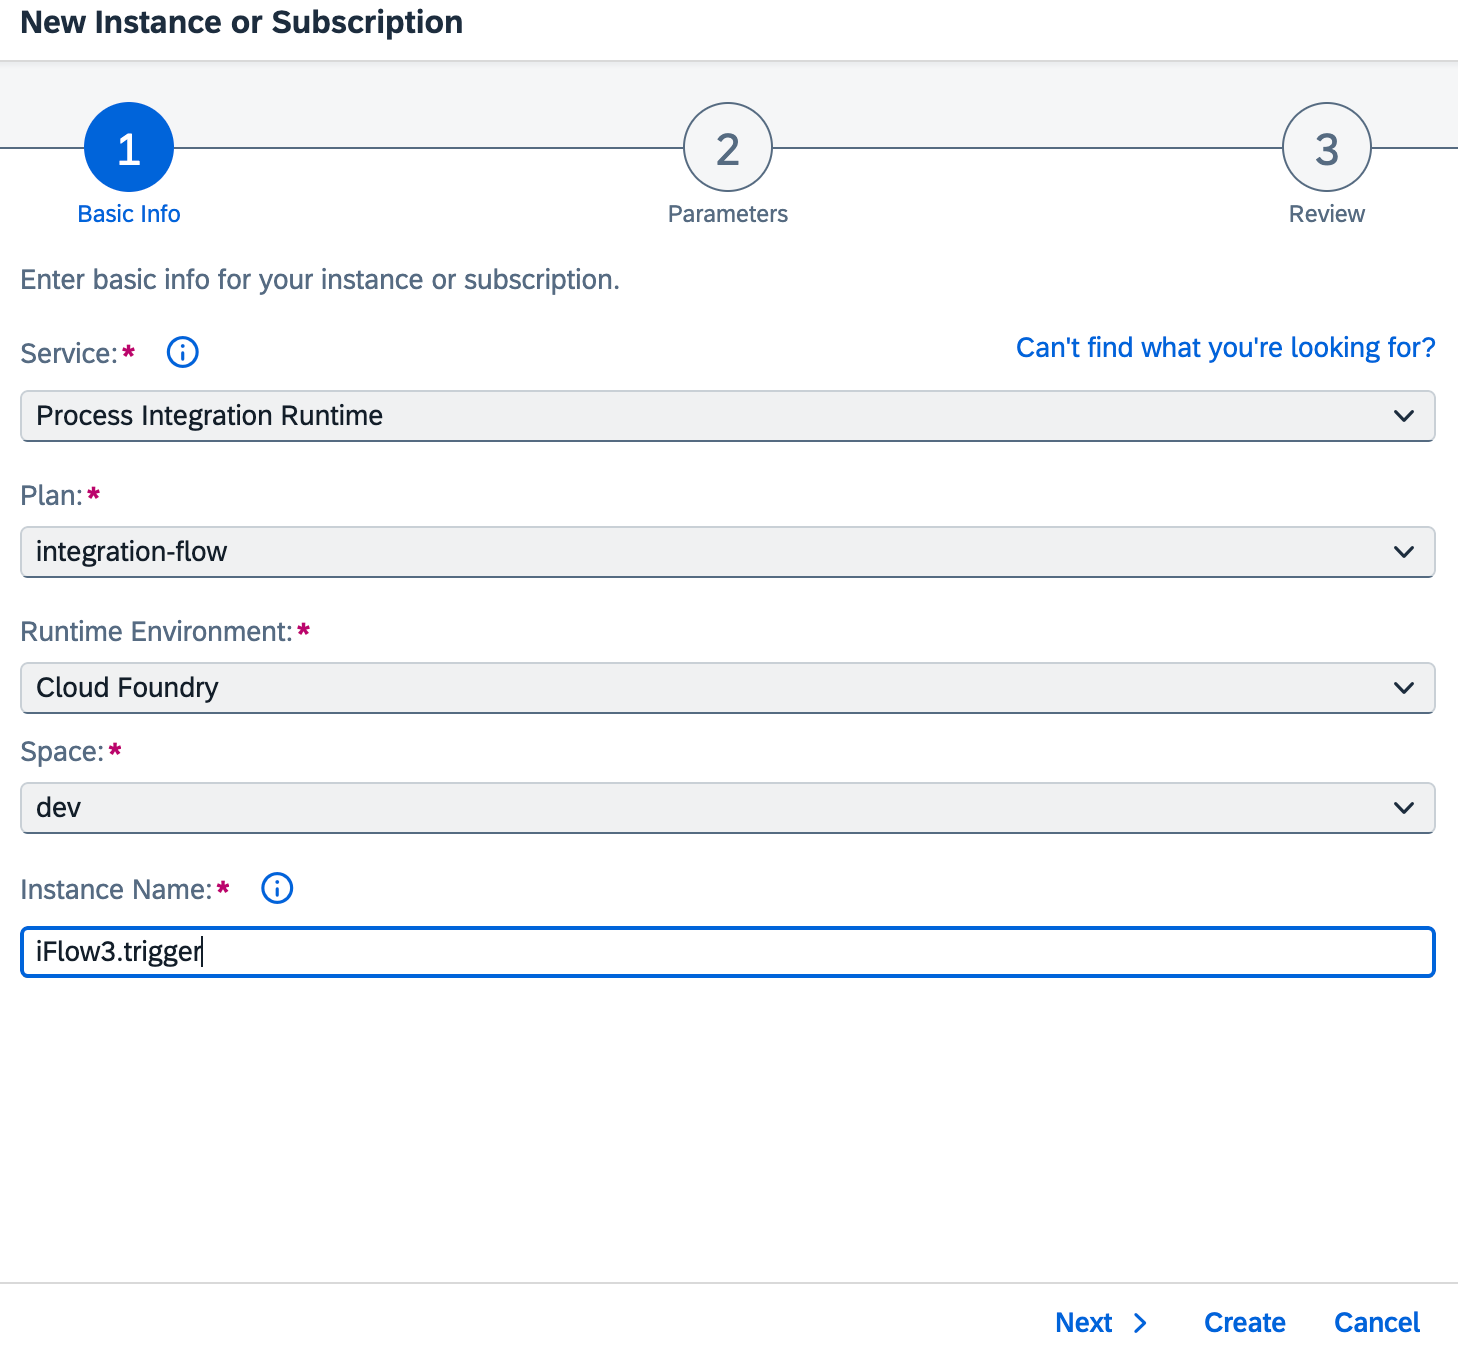
Click 'Next' and select the 'JSON' button.
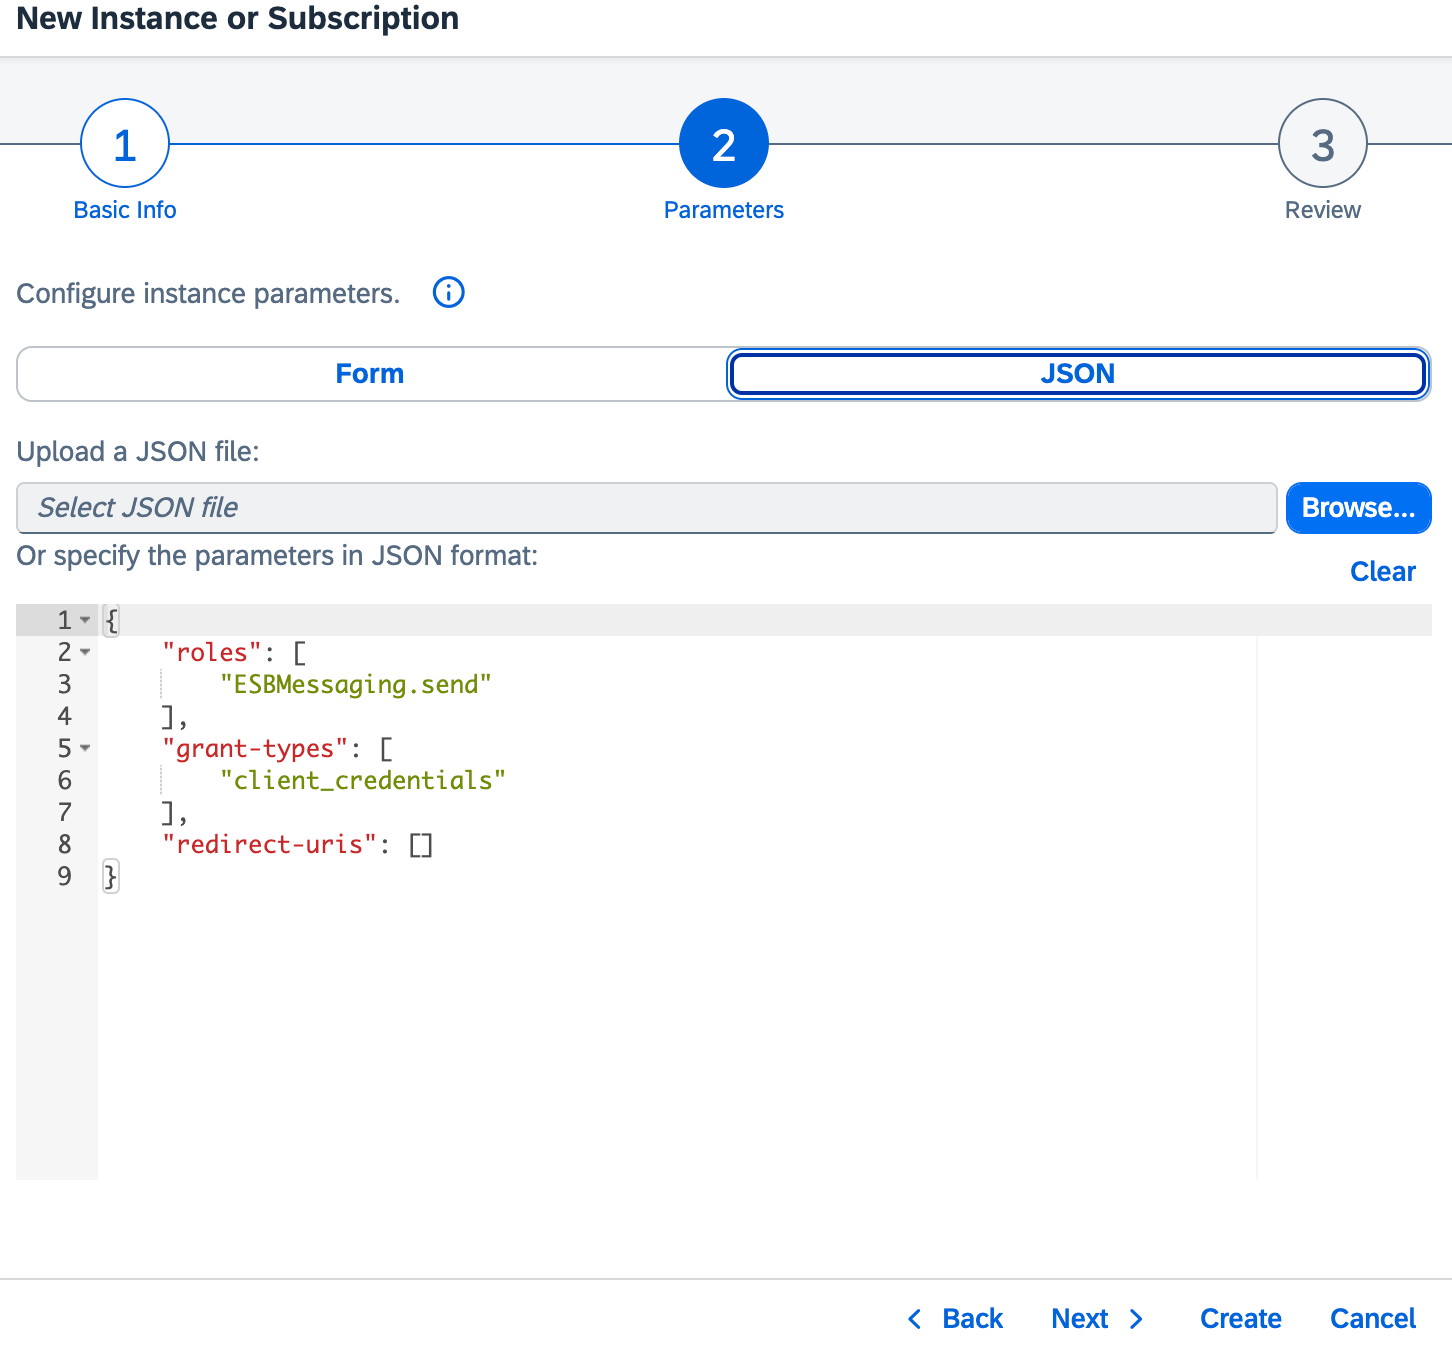
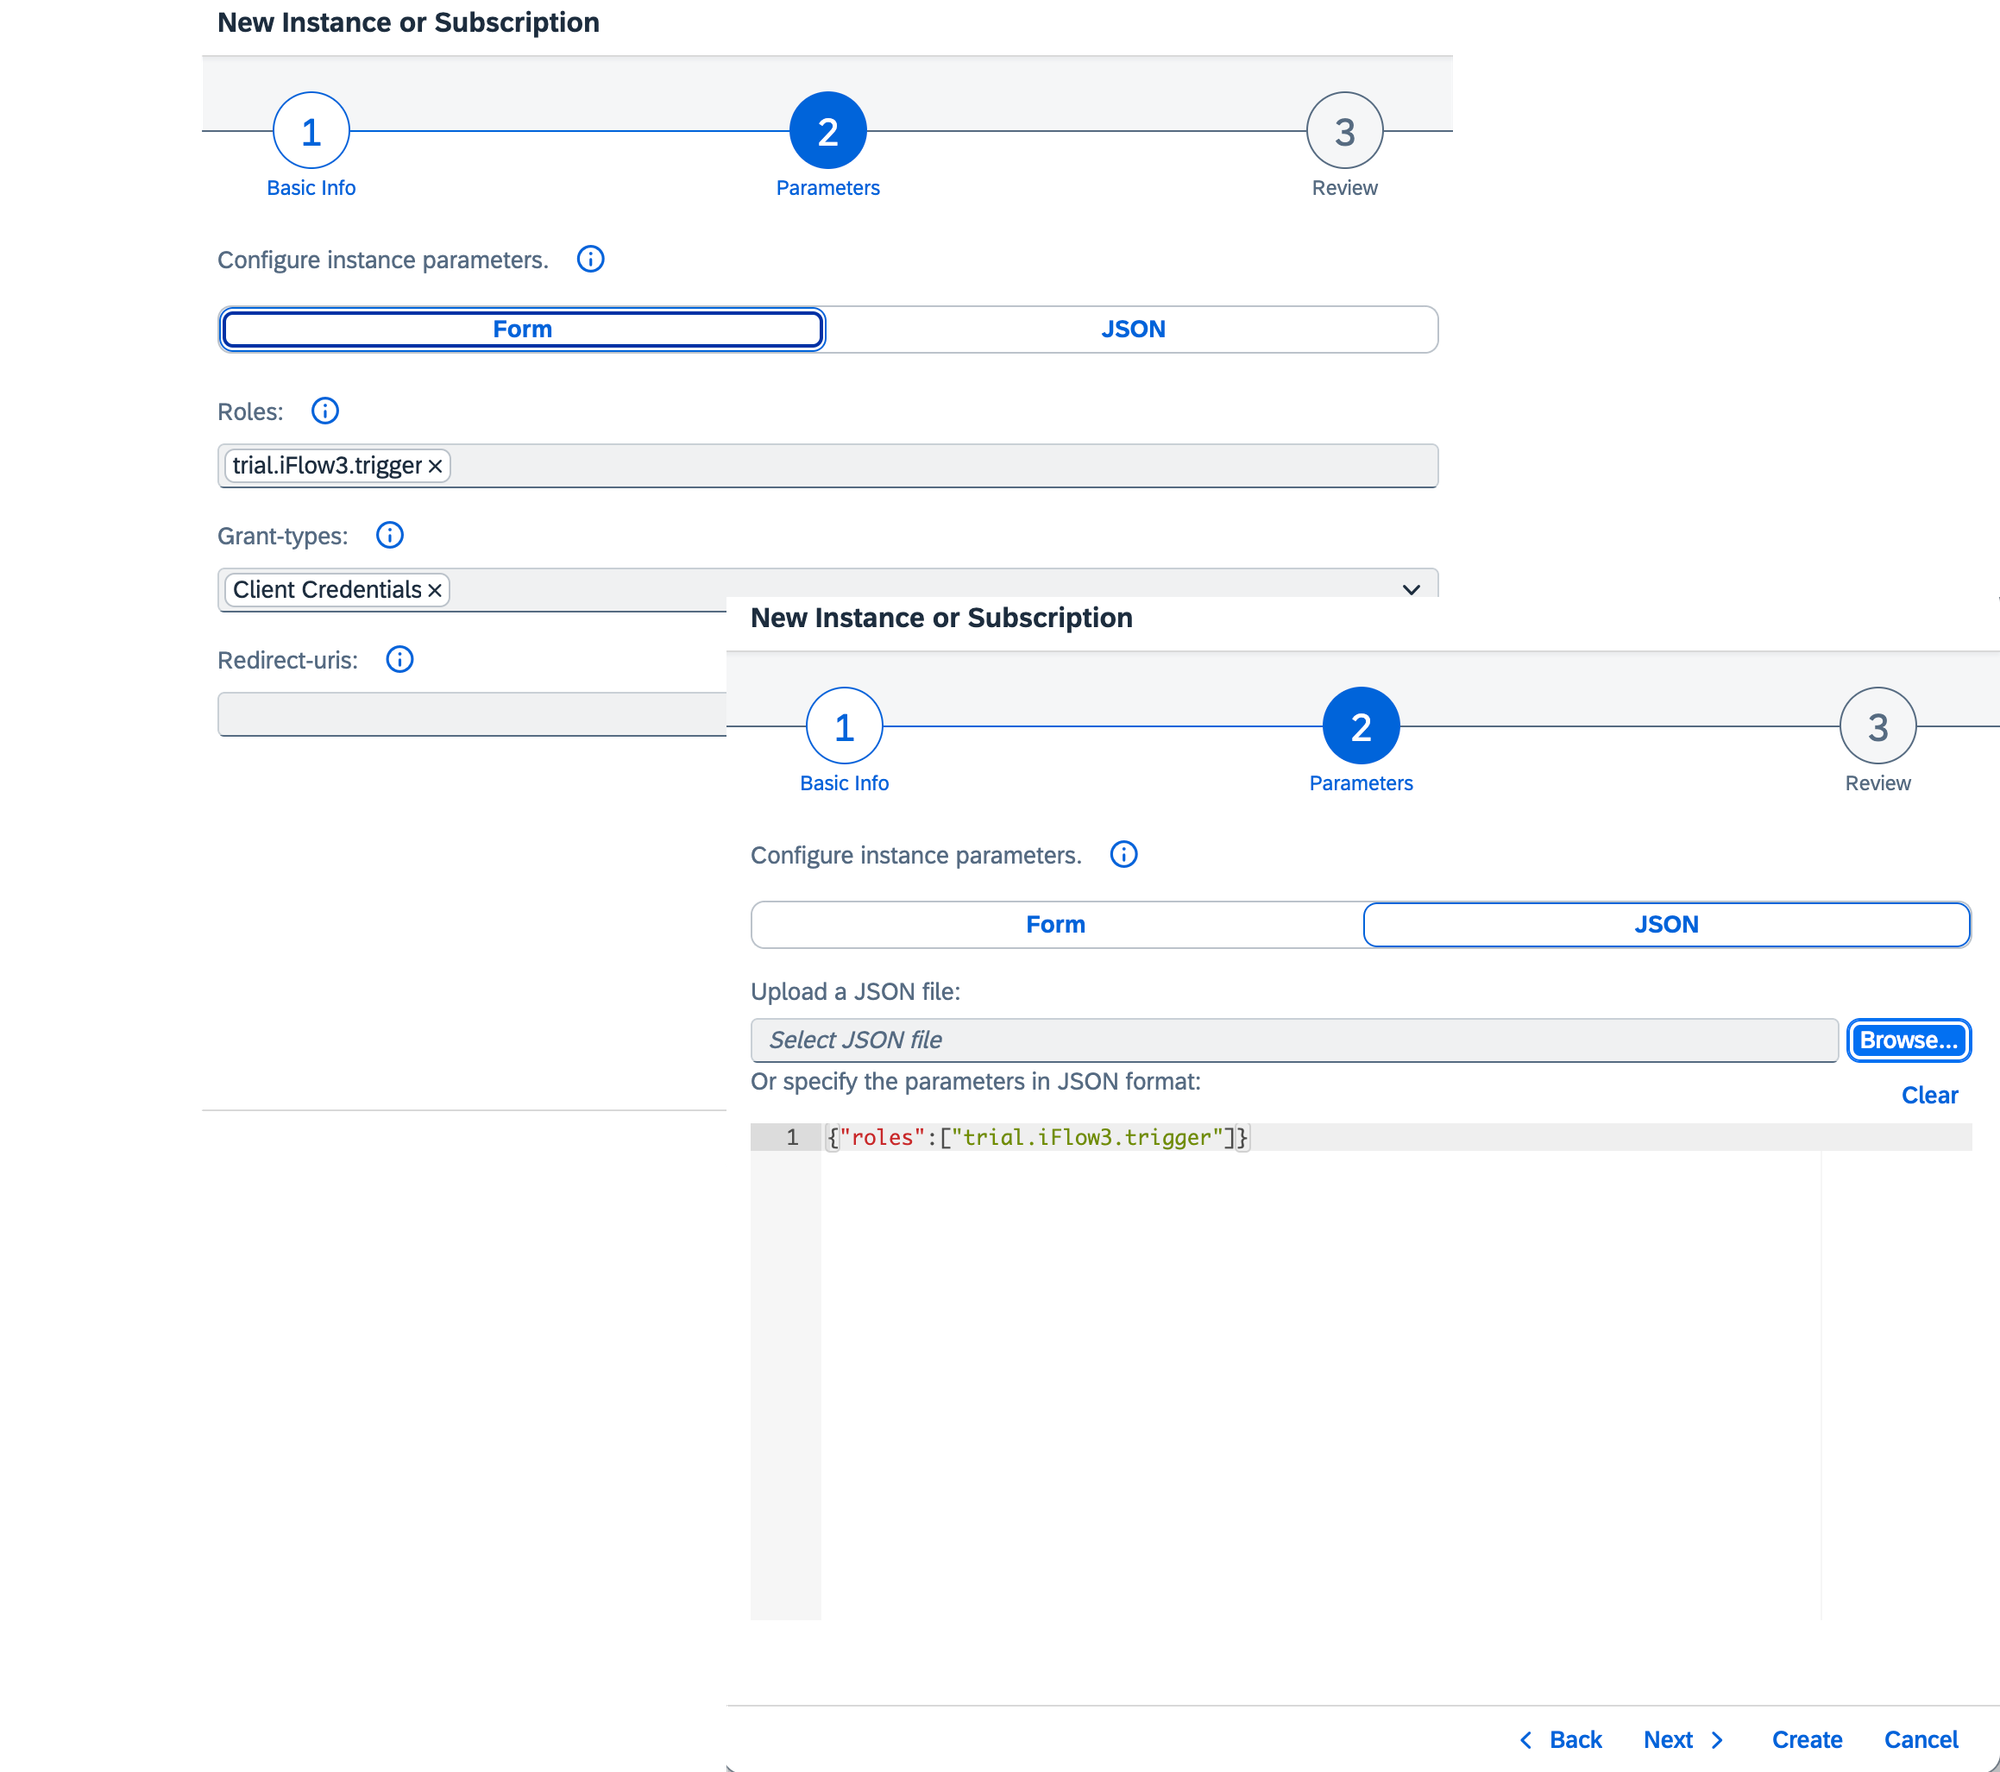
Upload the JSON file you downloaded in Step #3. Create a role.

Ensure that 'Client Credentials' is checked for the 'Grant-Types' field and click 'Next.'
and click 'Next'
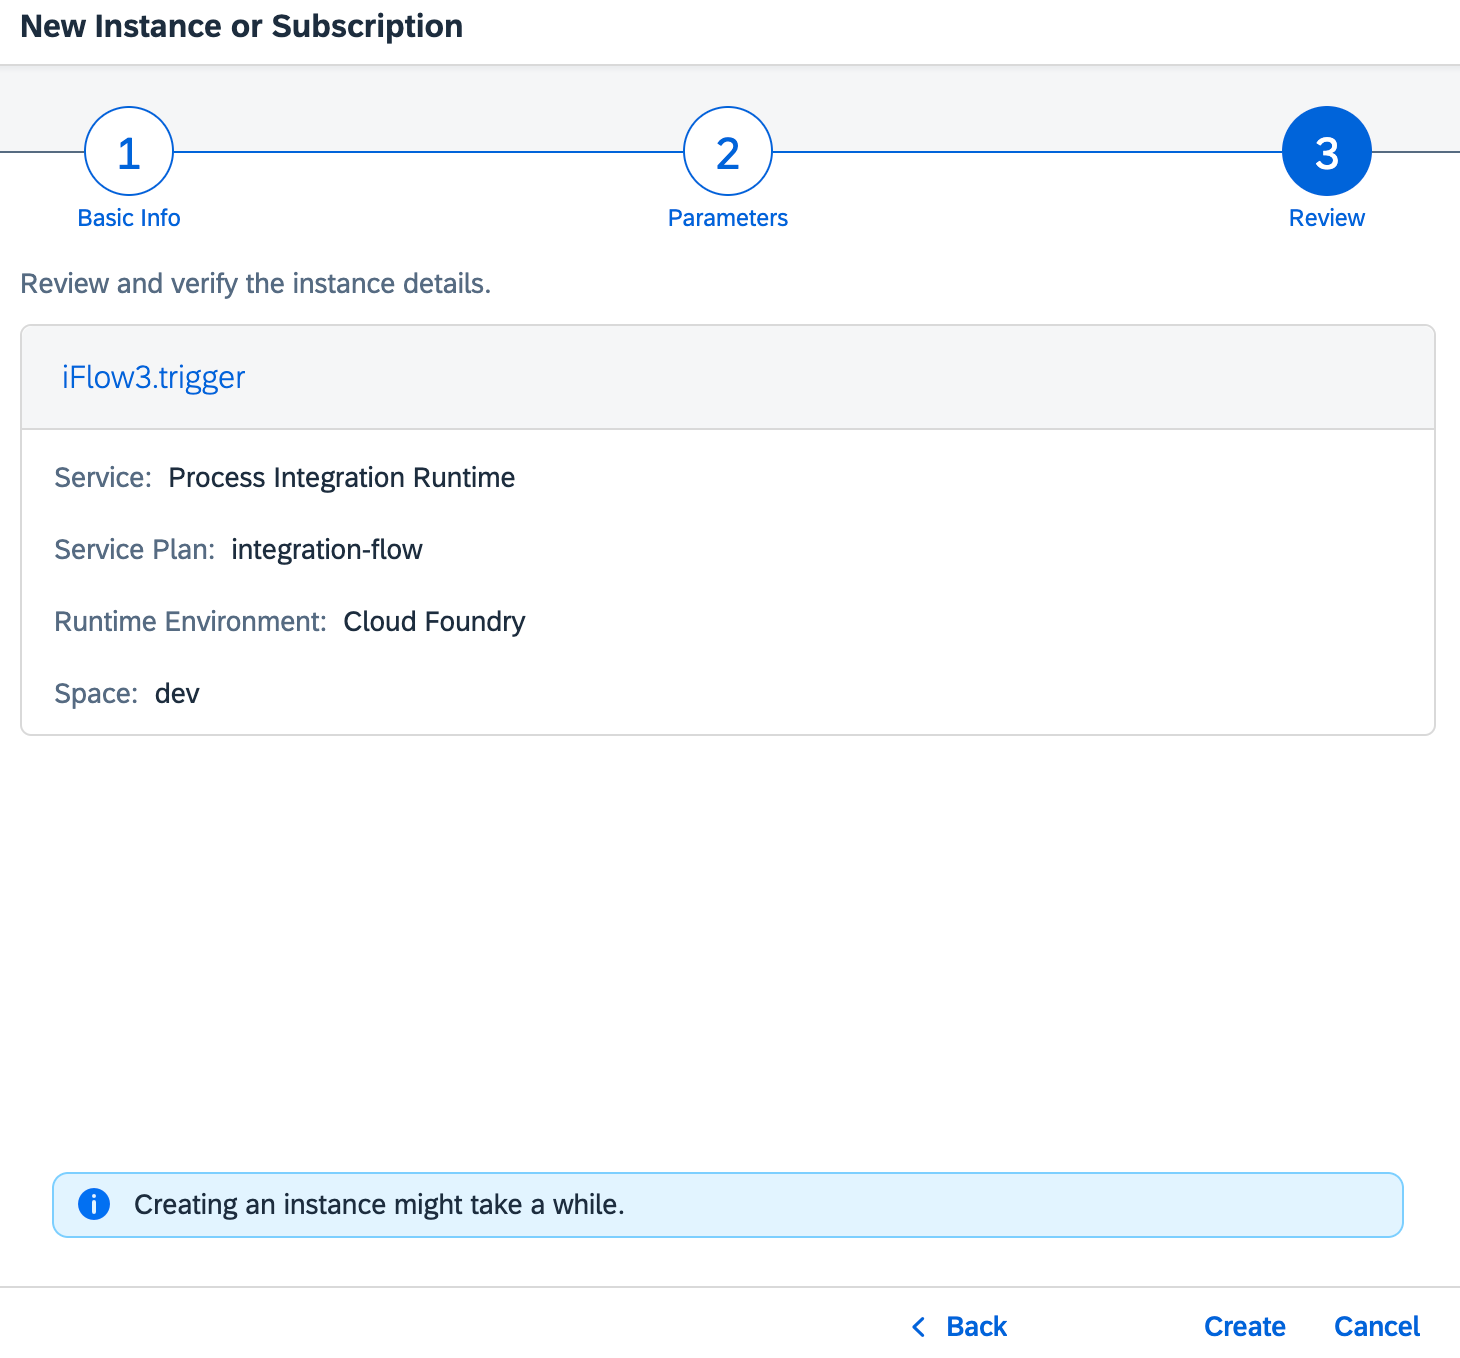
If everything looks good, just hit the 'Create' button. The new instance will be available in a few moments.
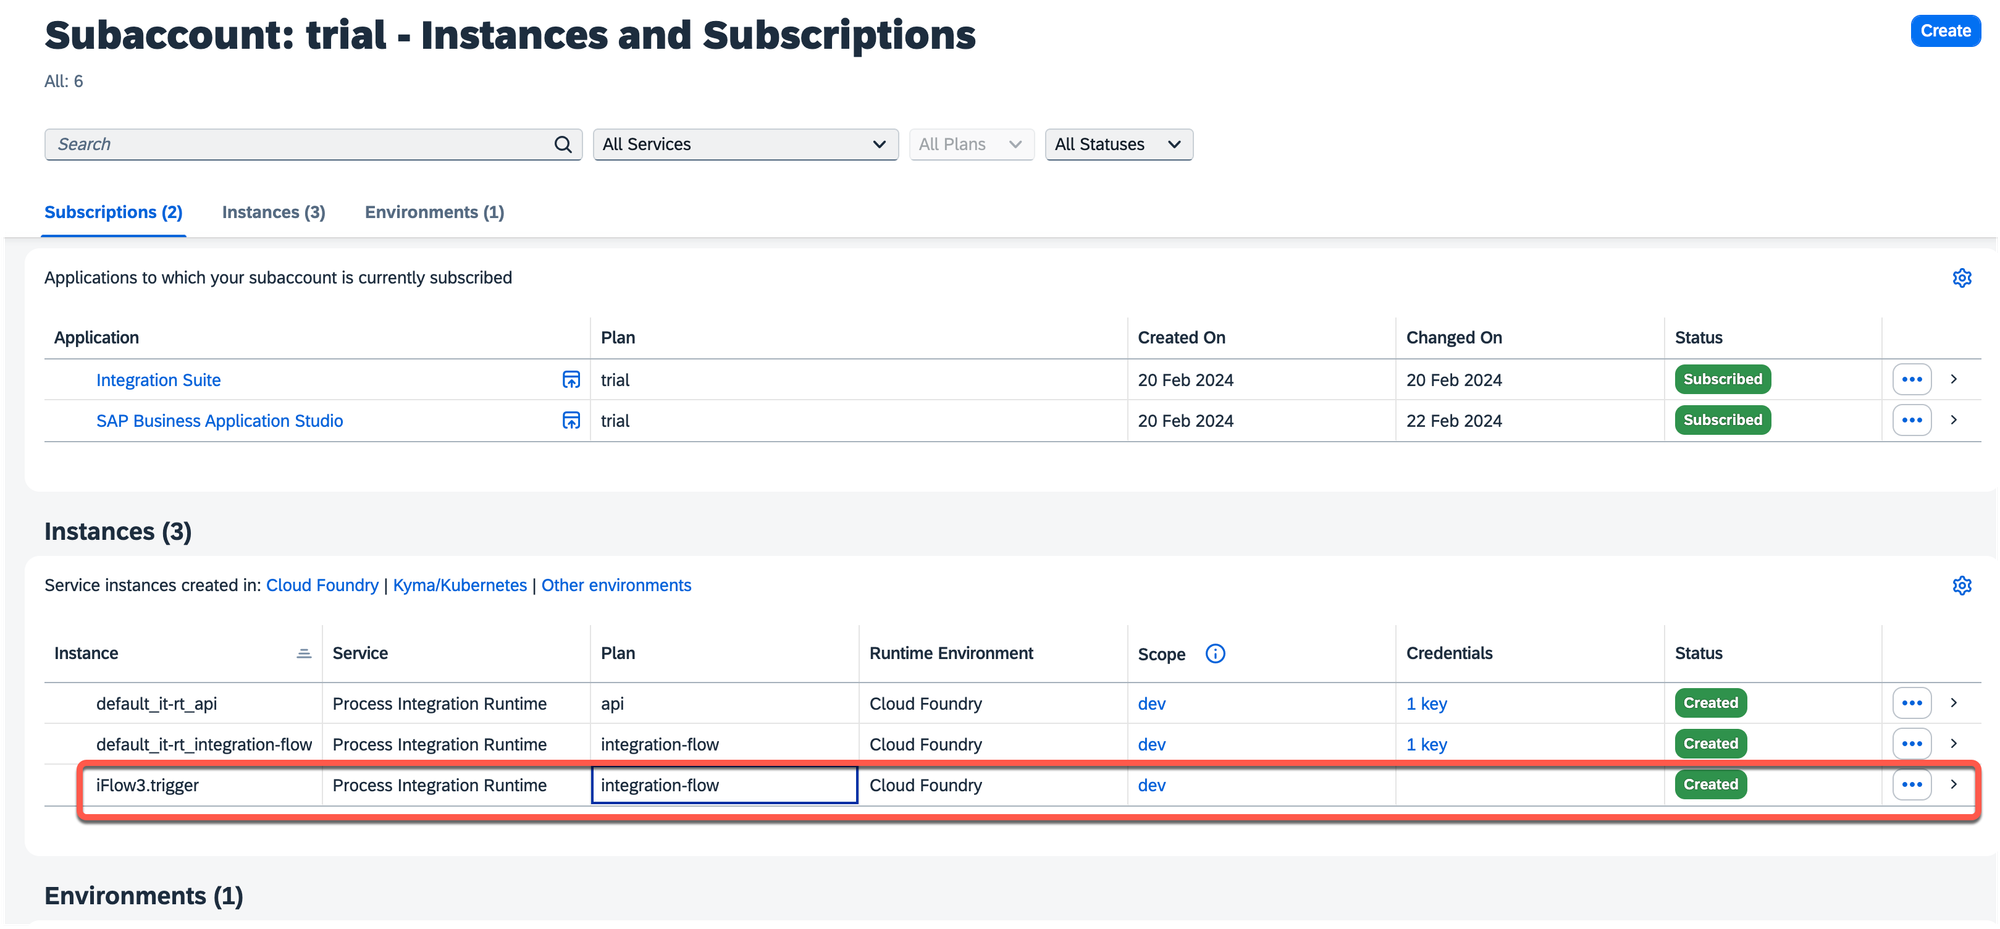
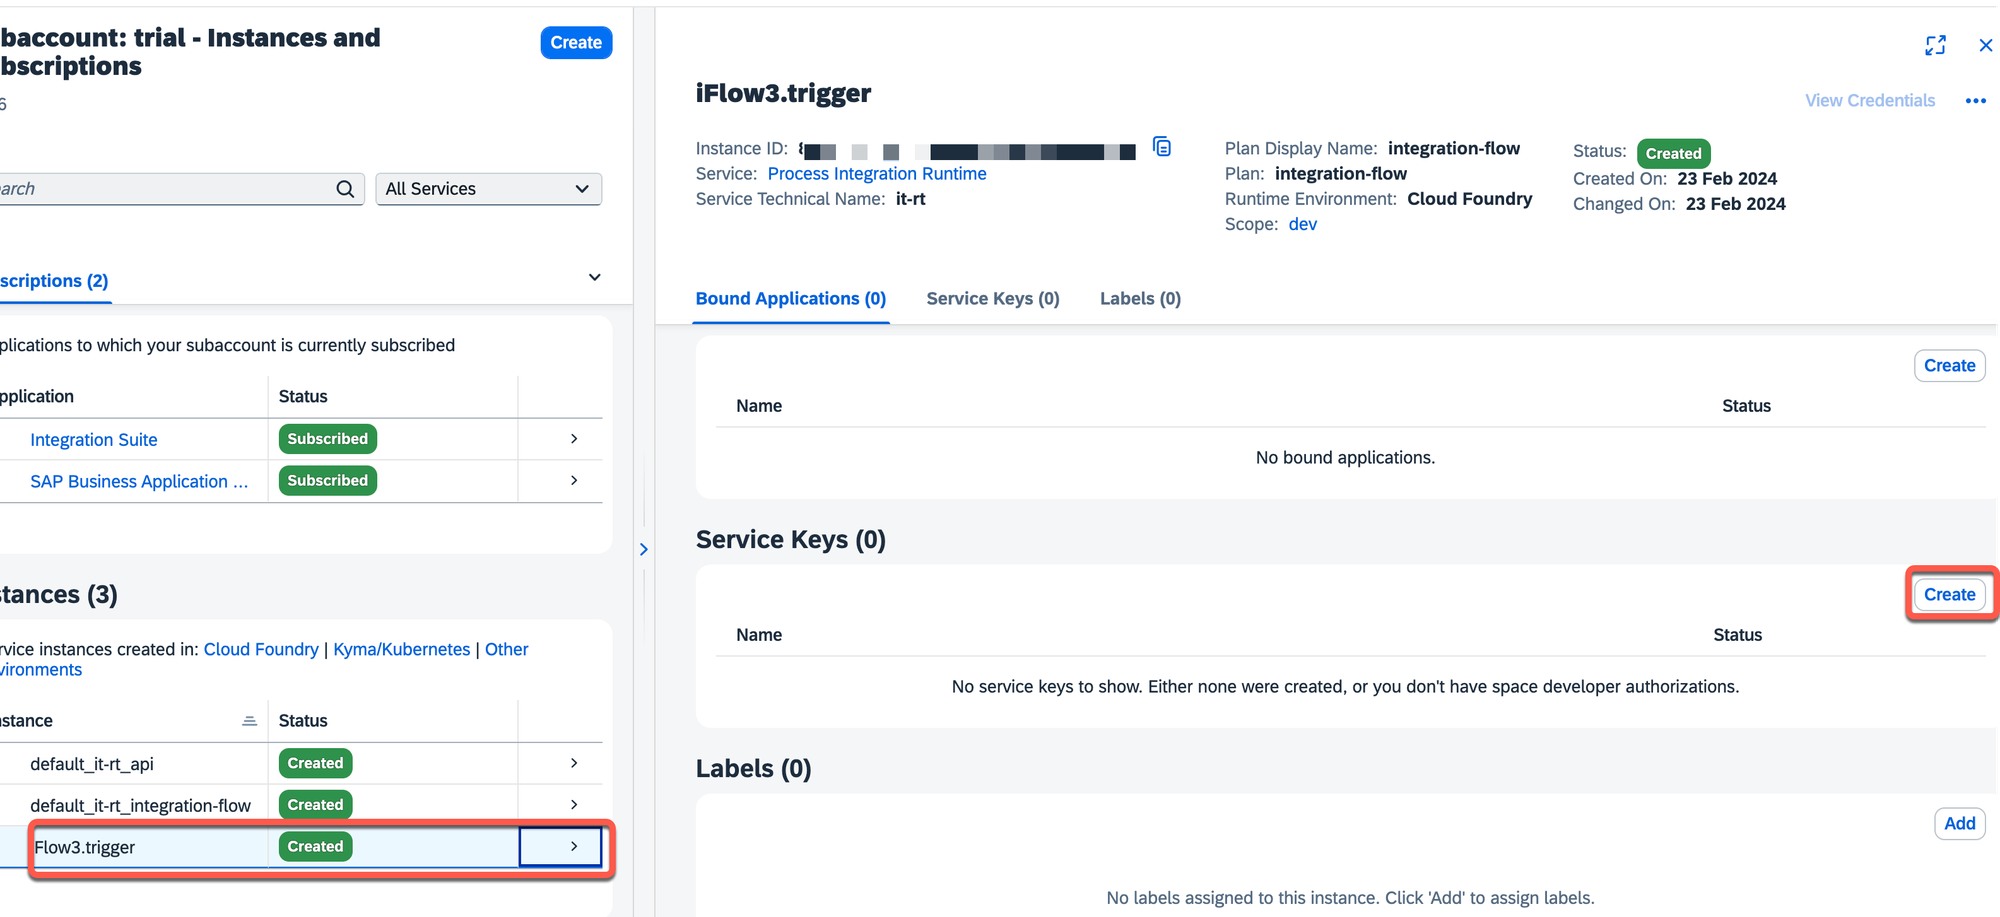
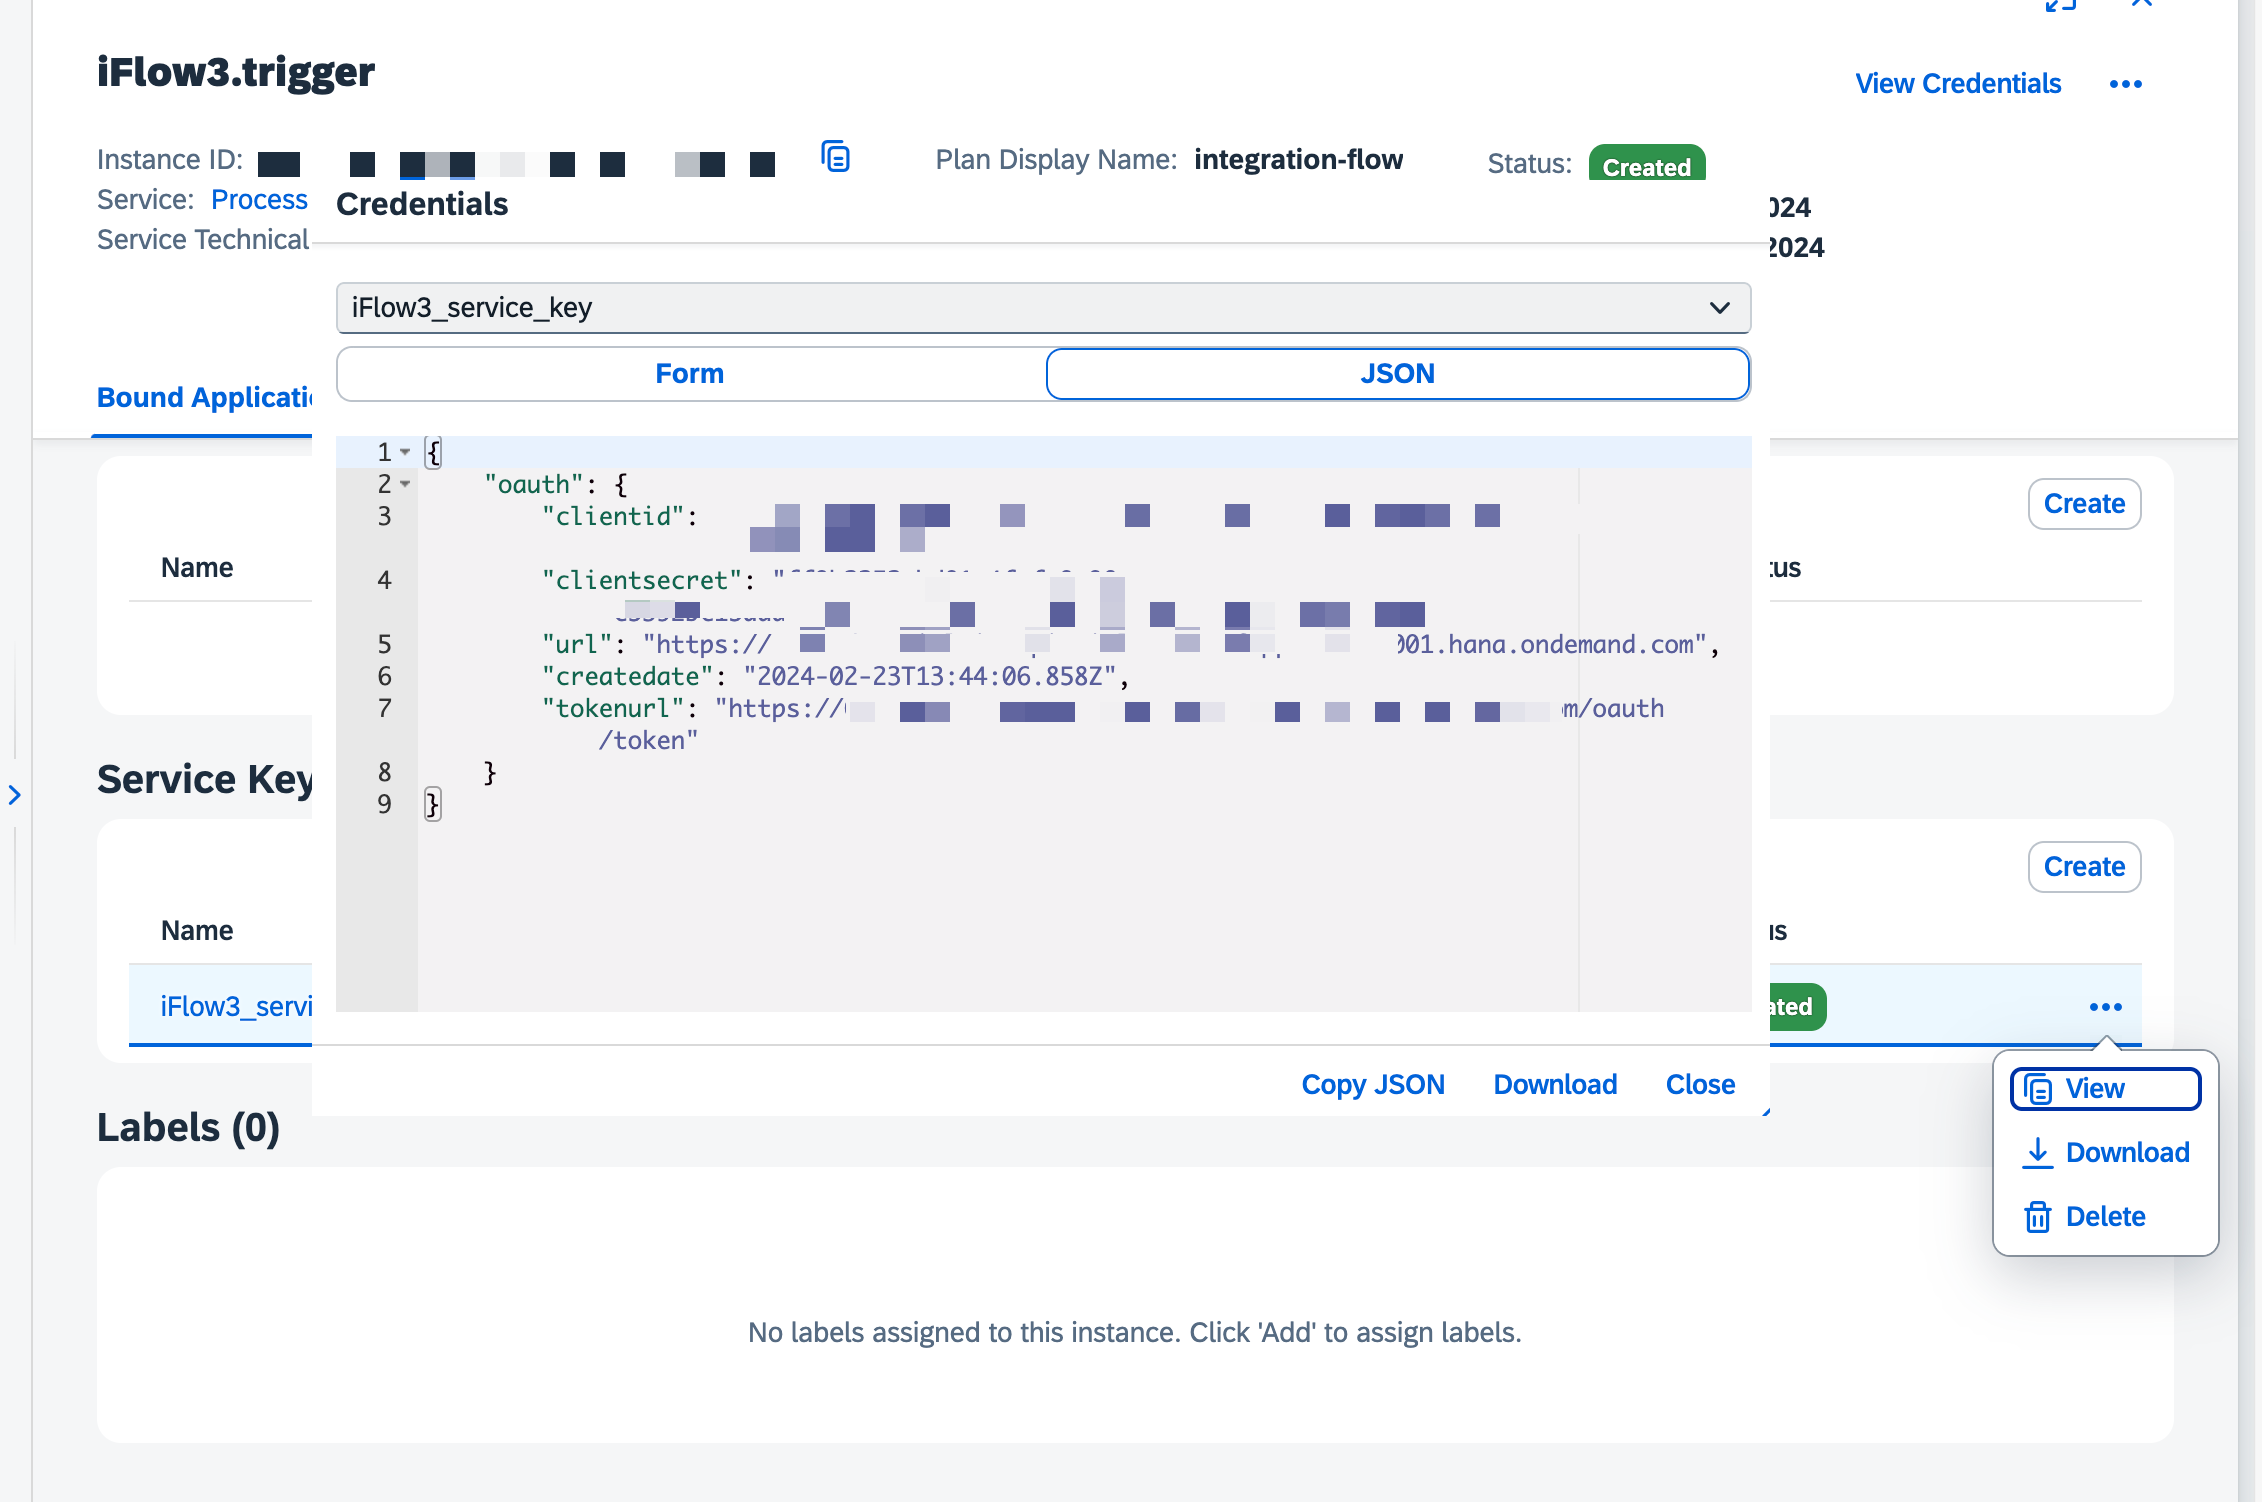
Click on it when it is created and hit the 'Create' button in the 'Service keys' section.
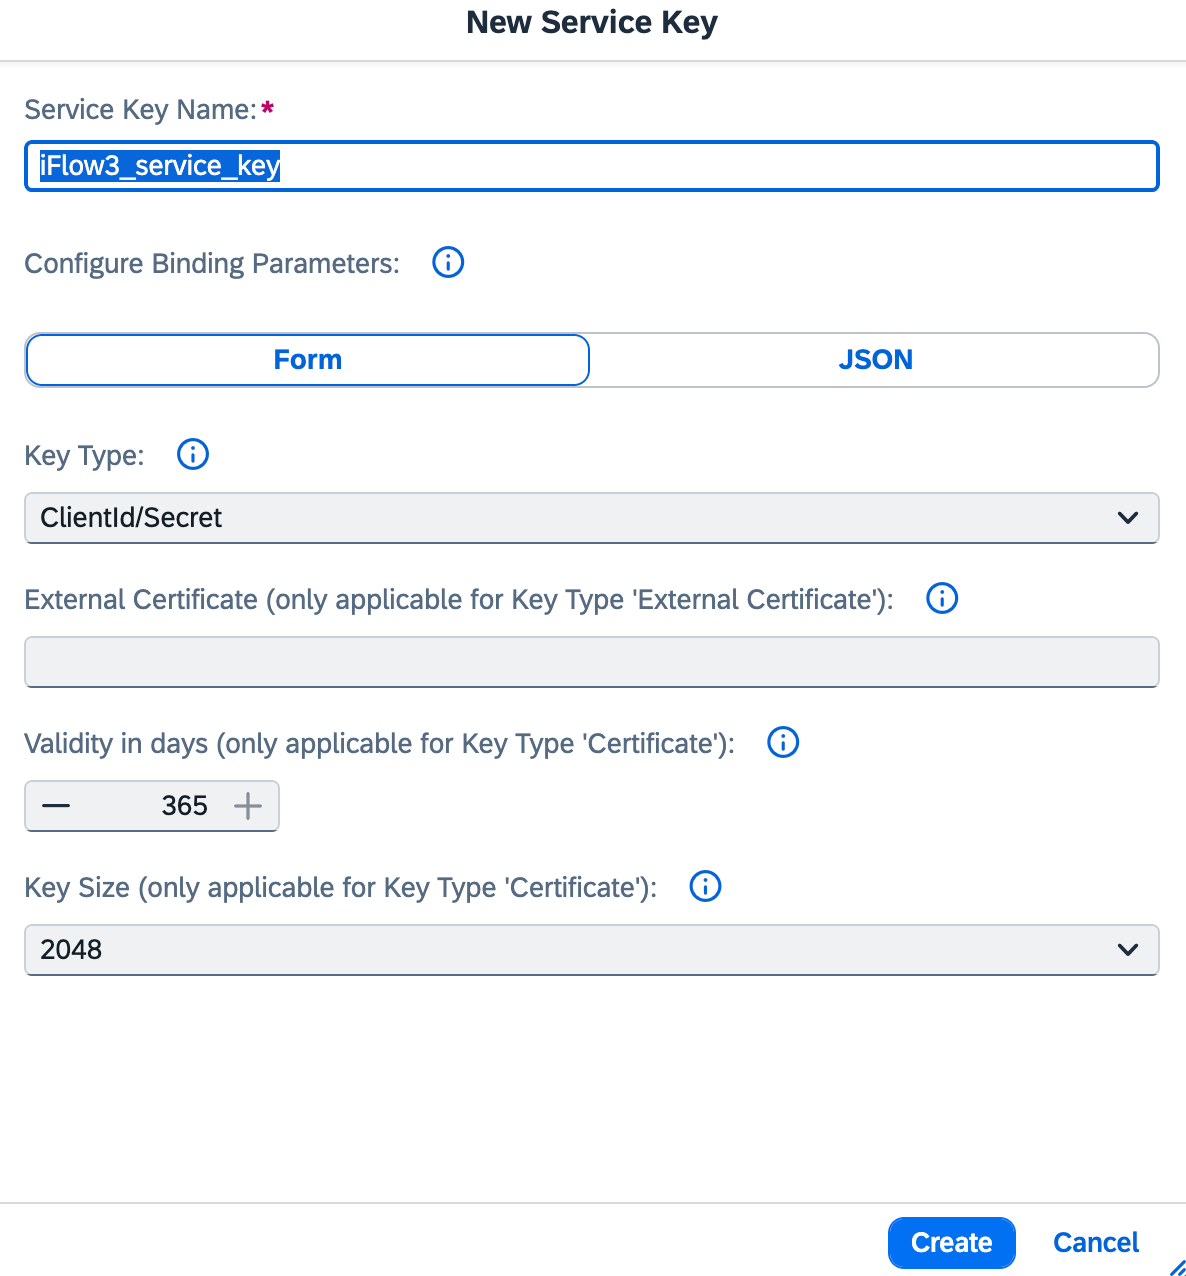
Provide the name for the service key and press the 'Create' button.
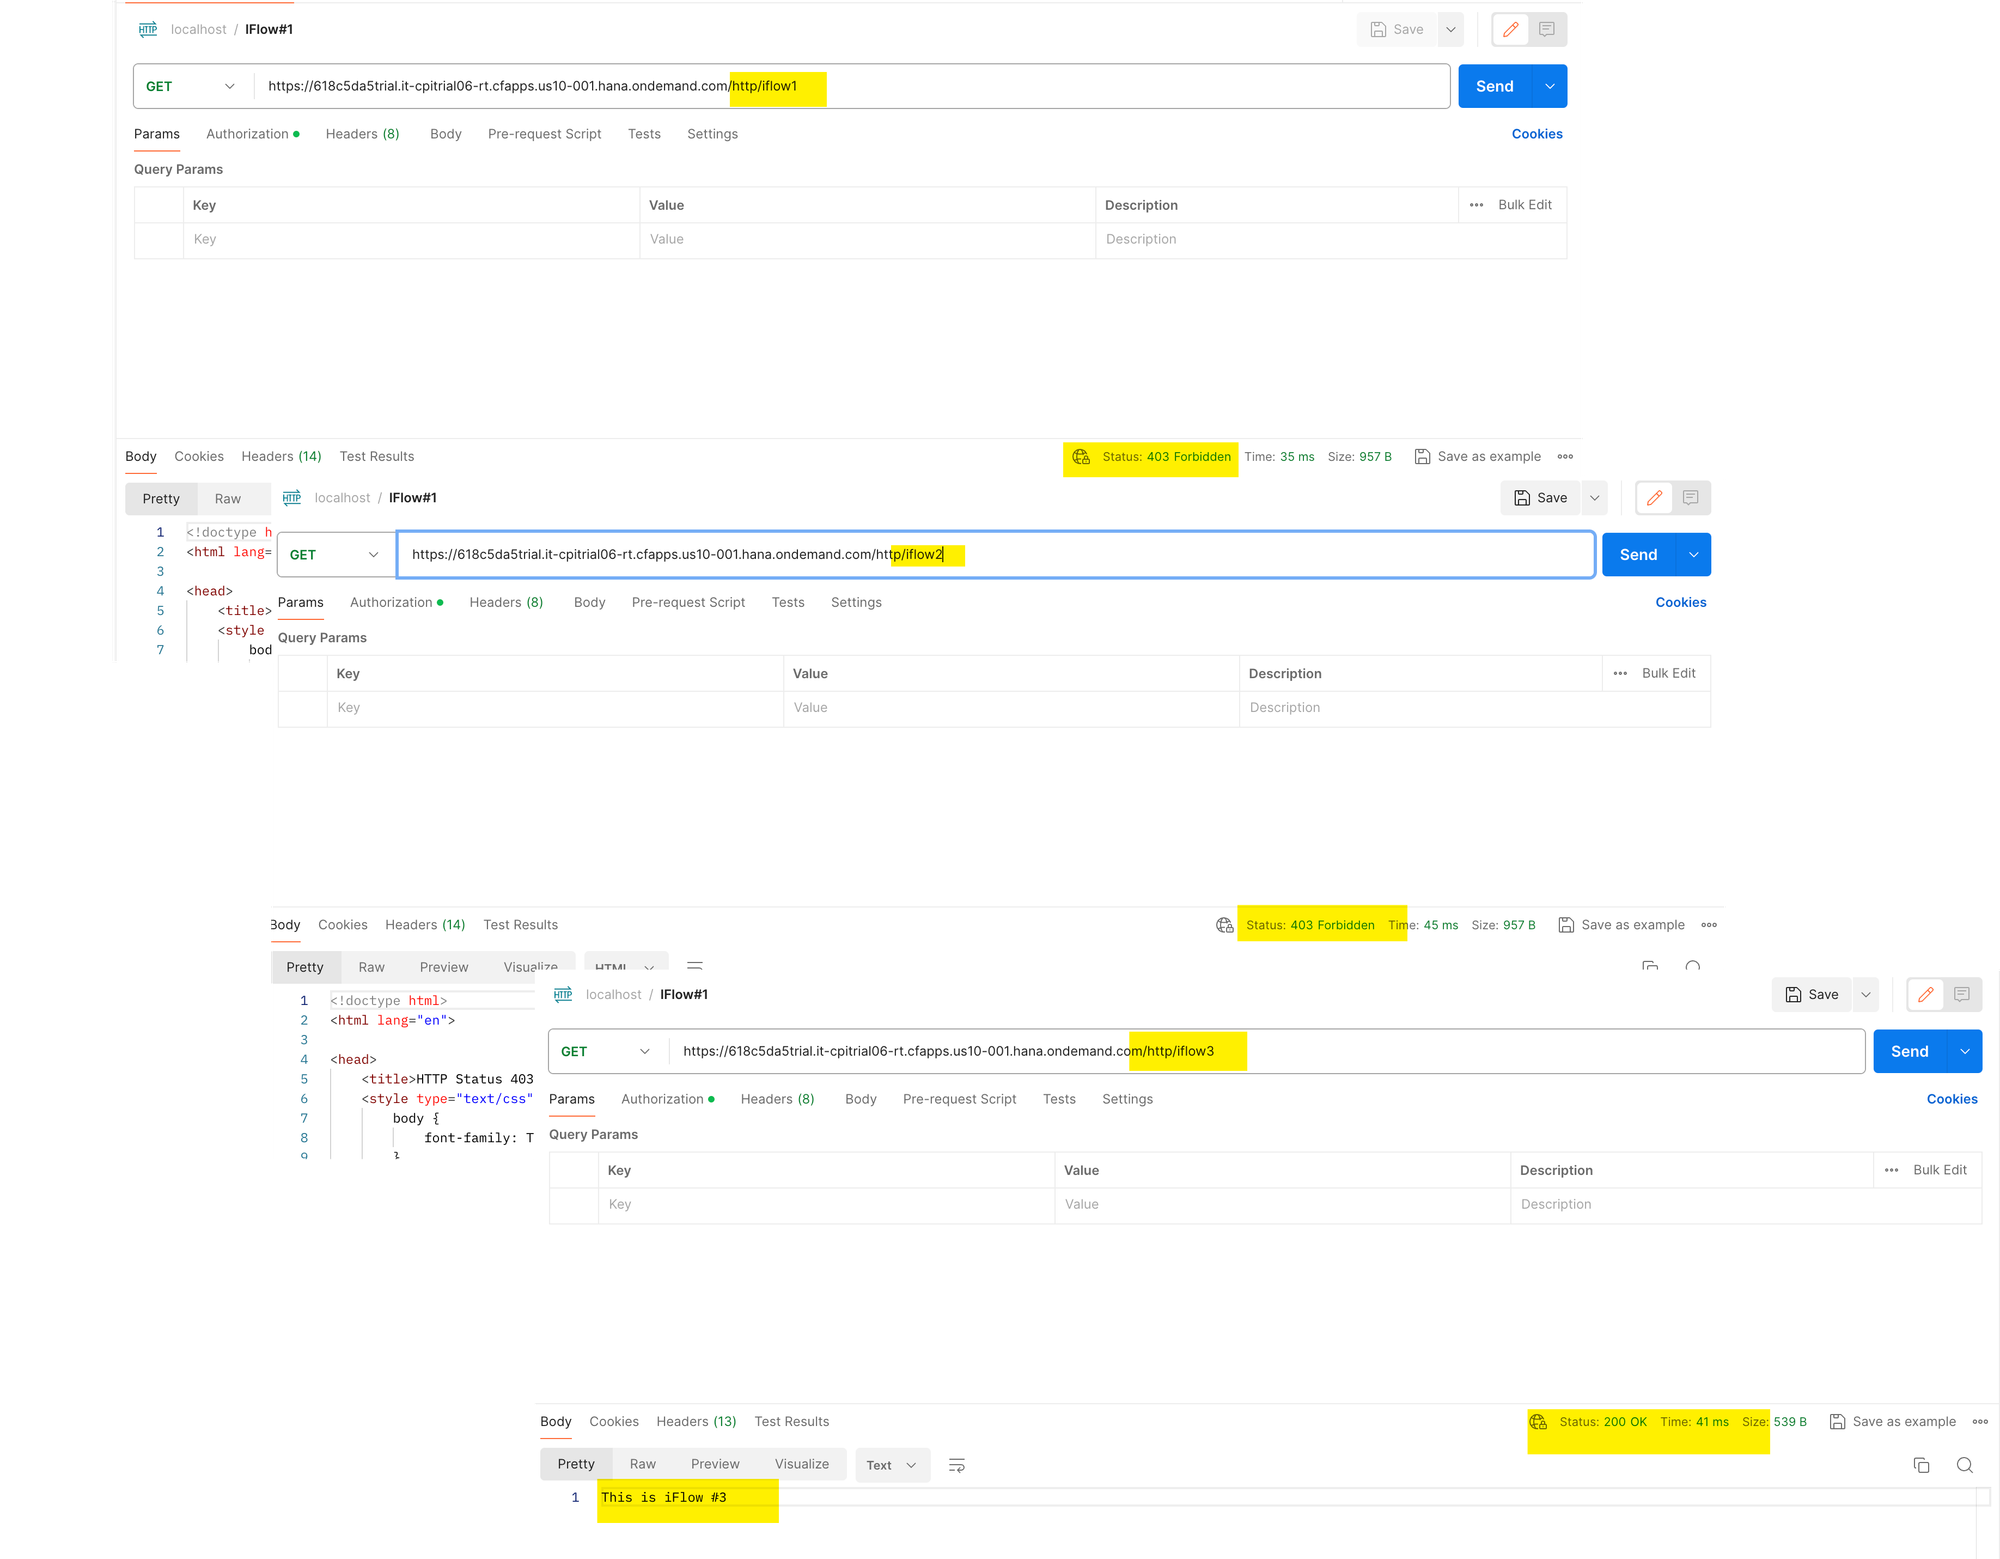
#6. Testing
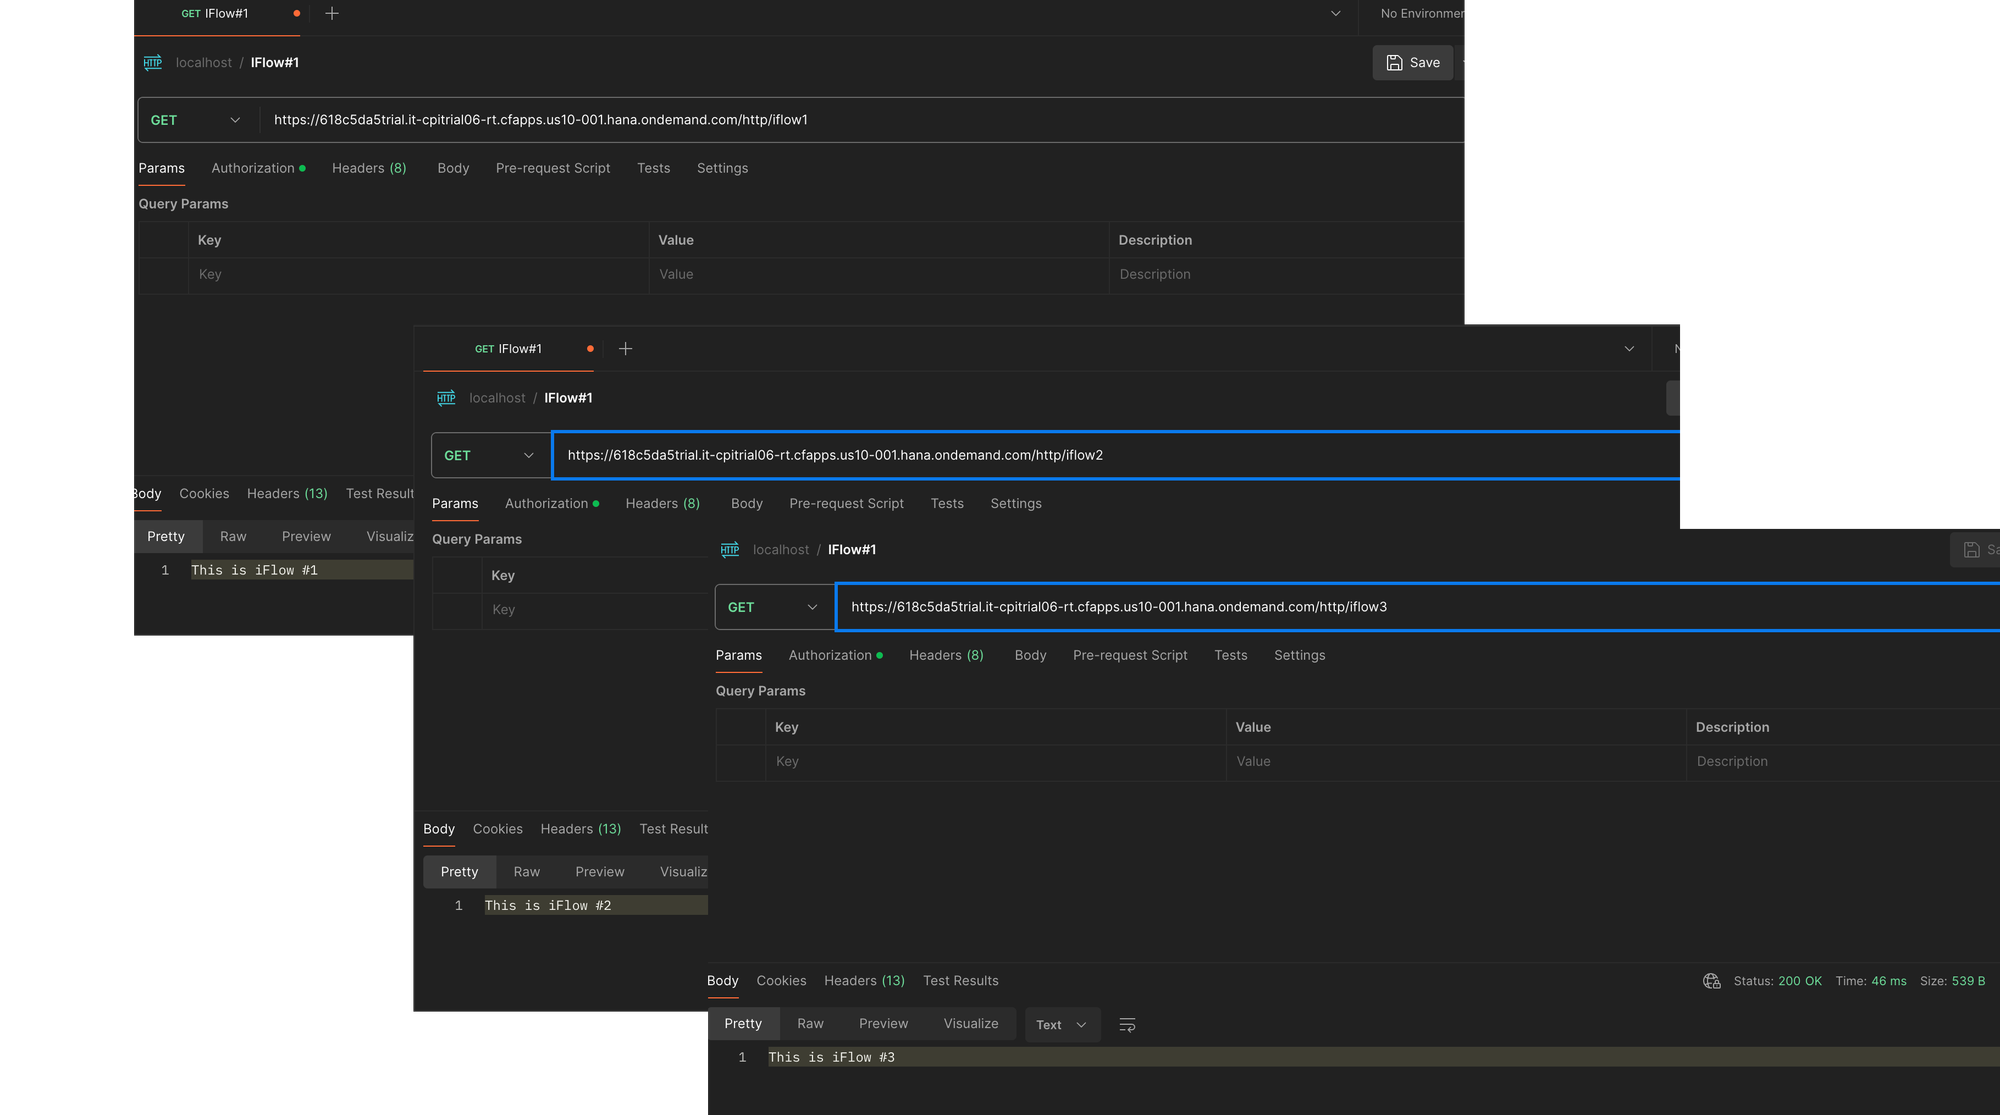
Using the newly generated client ID and the client secret, I would be able to run only iFlow3.
Thank you for your attention.