SAP UI5. Installation and Use of SAP WebIDE
SAP UI5. Installation and Use of SAP WebIDE
Introduction
In the earlier posts of the UI5 series, I discussed how to prepare your workstation to begin working with this framework.
See: SAP UI5. Installing Eclipse, Apache Tomcat
Continuing the previously introduced topic, I suggest considering a few more paragraphs about another development environment — SAP WebIDE. Yes, it’s a tool favored by the majority of developers.
Distribution
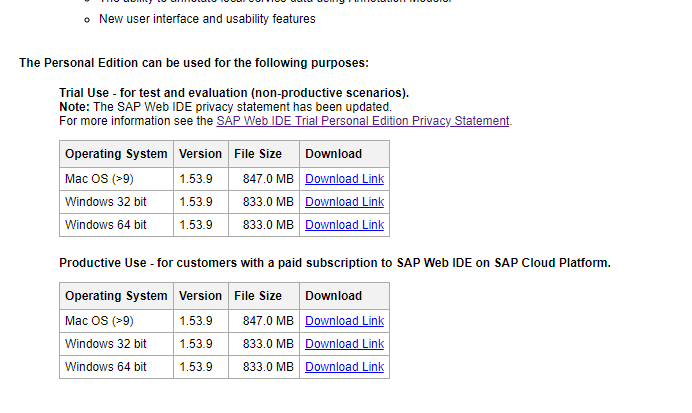
In what follows, we will look at the SAP WebIDE Personal Edition distribution.
See: SAP Web IDE Personal Edition
Download the version of SAP WebIDE appropriate for your operating system by searching for it on the page: https://tools.hana.ondemand.com/#sapui5
Once the download is complete, create a directory for SAPWebIDE on a local drive of your workstation (in my case, it’s Windows OS and local disk C:).
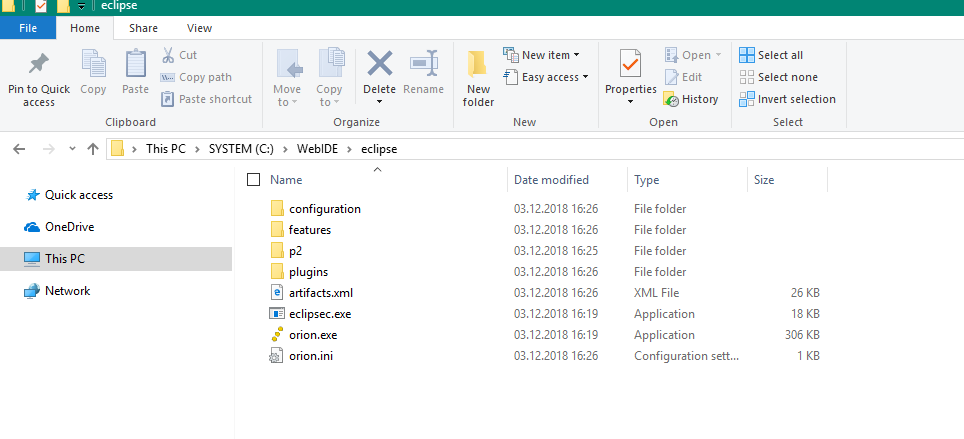
Editing the Configuration File
Open the orion.ini file located in the root folder of the SAP WebIDE distribution for editing.
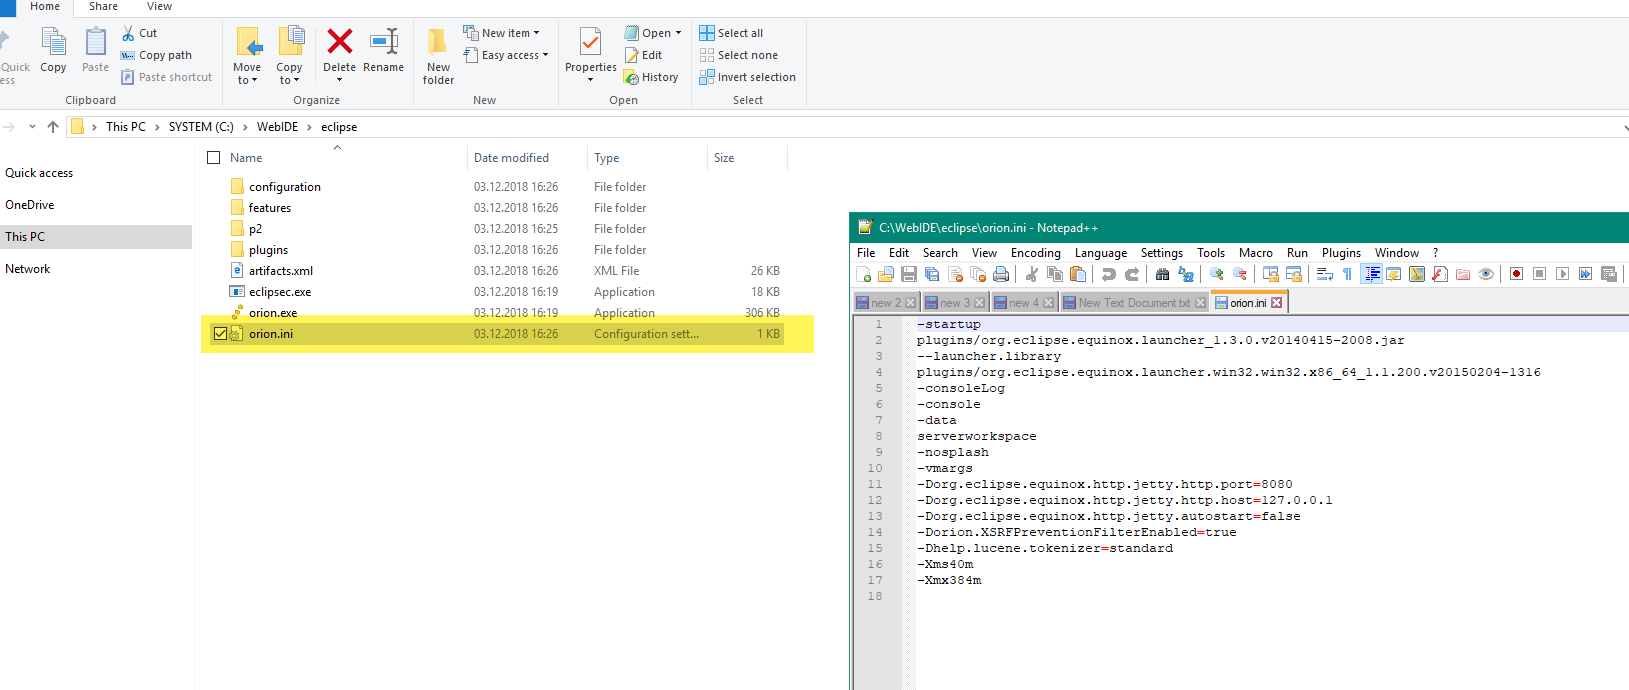
Change the value of the parameter:-Dorg.eclipse.equinox.http.jetty.http.port
from 8080 to 8090.

Save the changes.
Launching SAP WebIDE
To launch SAP WebIDE, run the executable file orion.exe. The Orion server command shell will open.
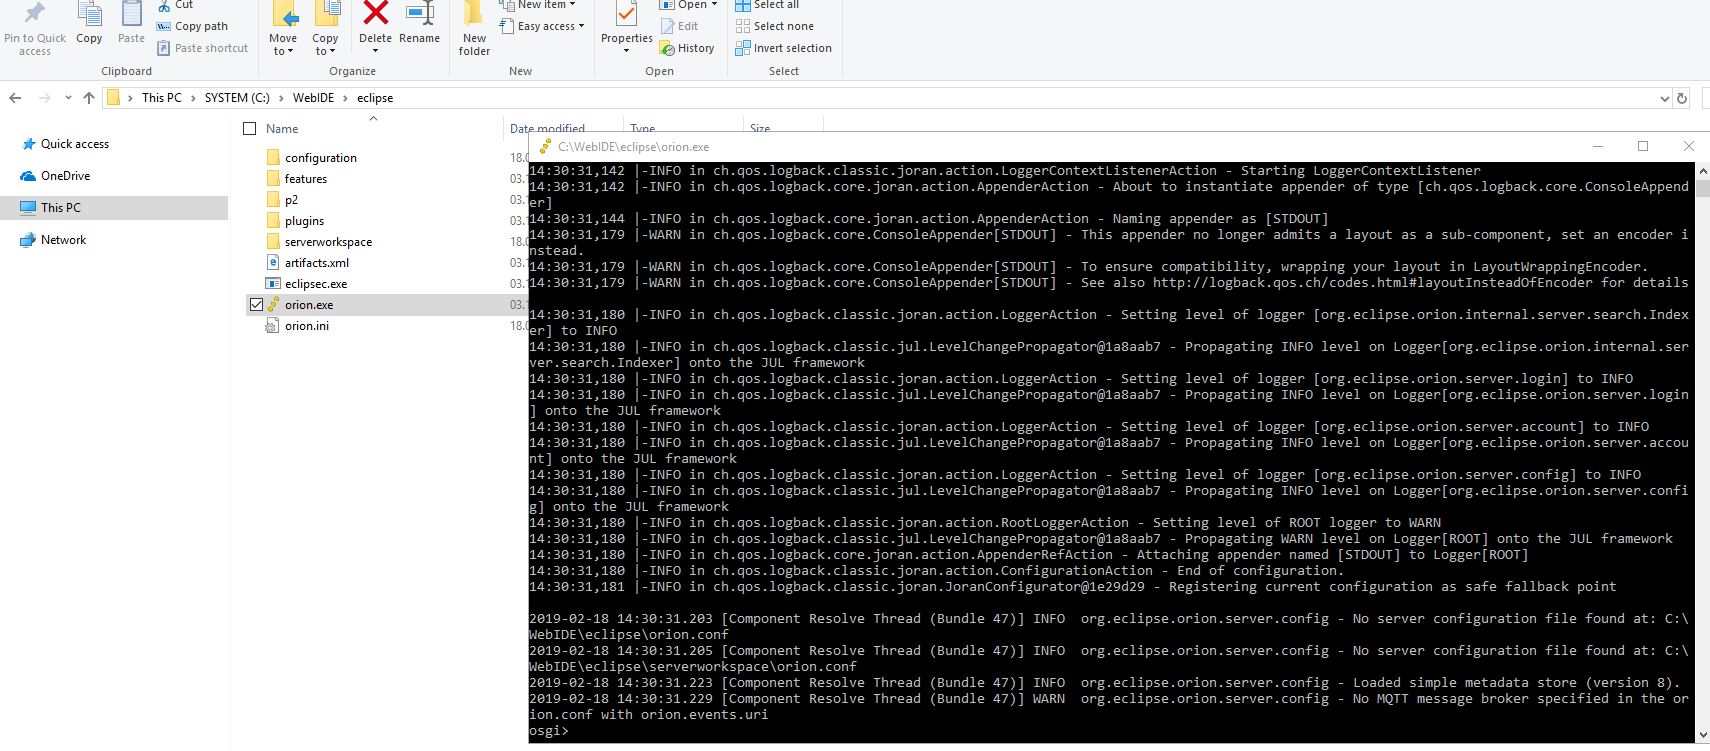
Then launch a browser and go to the following URL: http://localhost:8090/webide/index.html
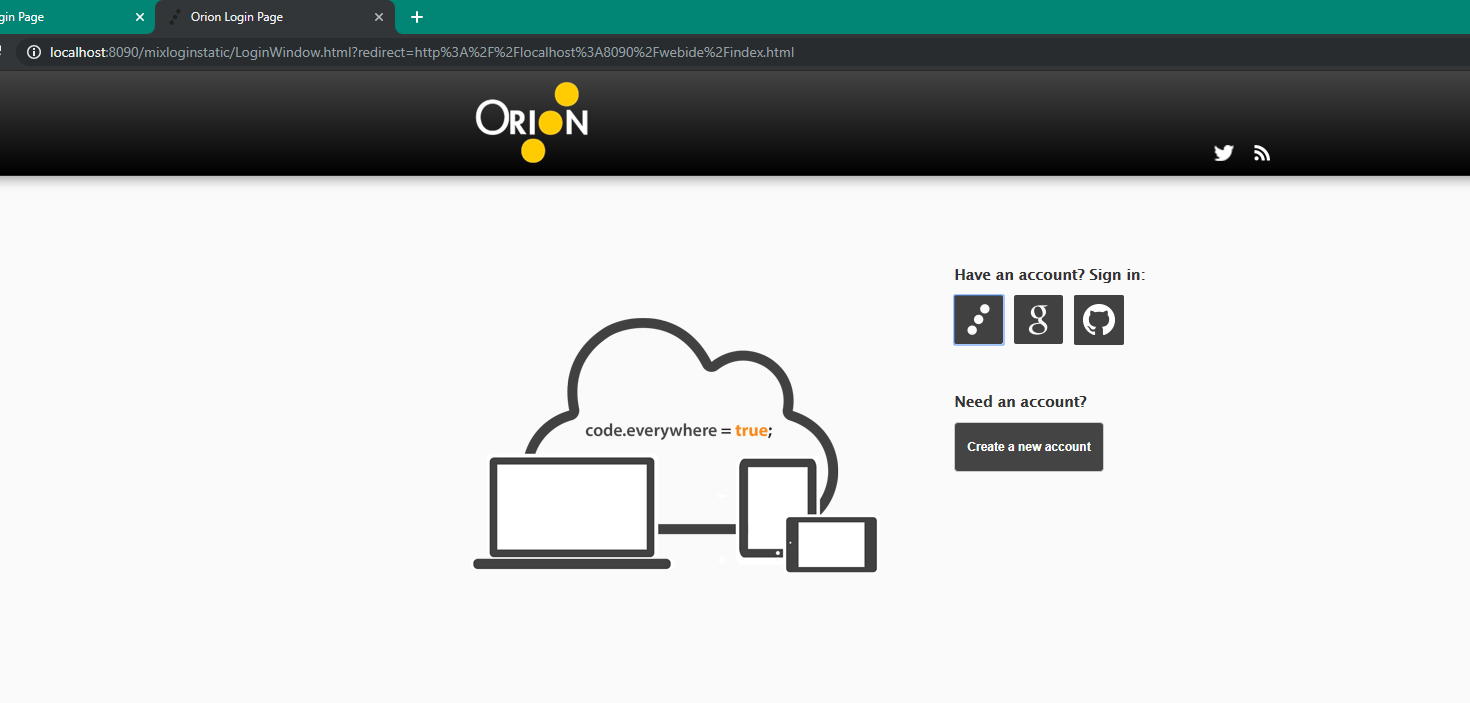
To continue working with SAP Web IDE, you will need a developer account.
See: Start SAP Web IDE Personal Edition
When you start the Orion Application server for the first time (after initial installation or upgrade), you have to create a new account for it. (In the future this might be done automatically.)
- Choose Create a new account.
- Enter a user name and password.
SAP Web IDE personal edition does not support more than one account.
Connecting to an ABAP System
See: Connect Remote Systems in SAP Web IDE Personal Edition
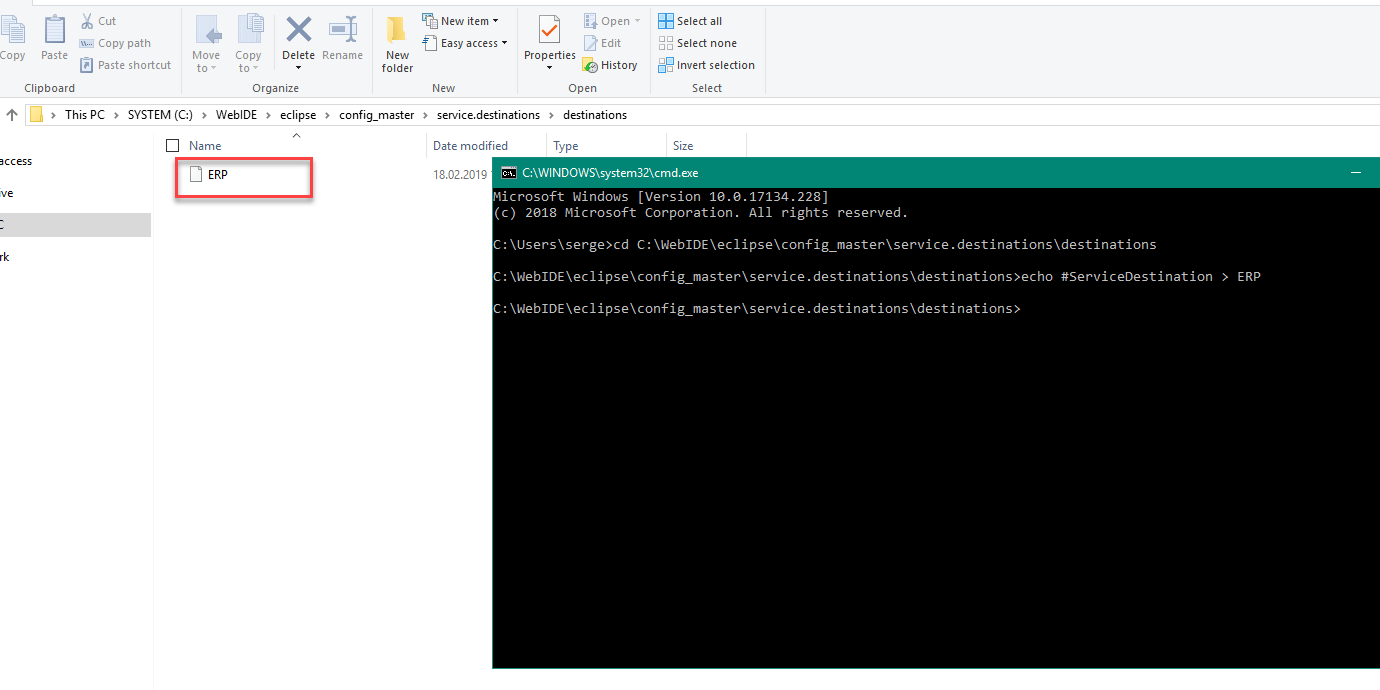
Using the command prompt (cmd.exe in Windows), navigate to the directory:[your_local_hard_drive]:\WebIDE\eclipse\config_master\service.destinations\destinations
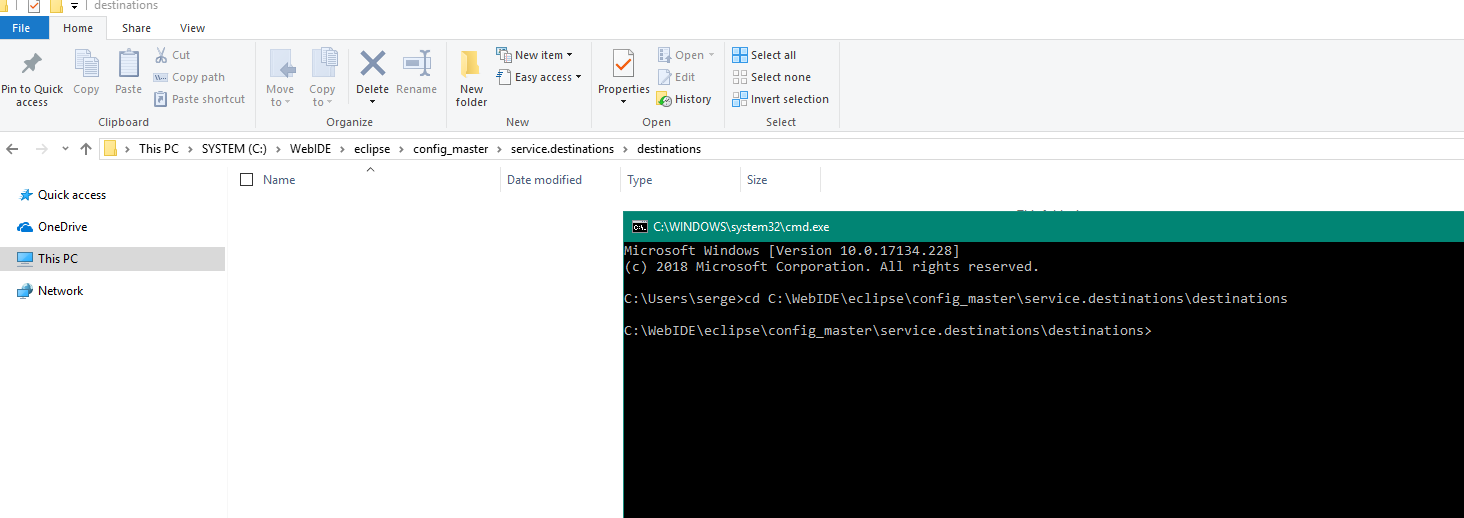
Next, I’ll configure a connection to an ABAP system with the SID ERP. To do this, run the following command:echo #ServiceDestination > ERP.
As a result, a file named ERP will be created in the destinations directory for entering system data where new applications will be deployed.
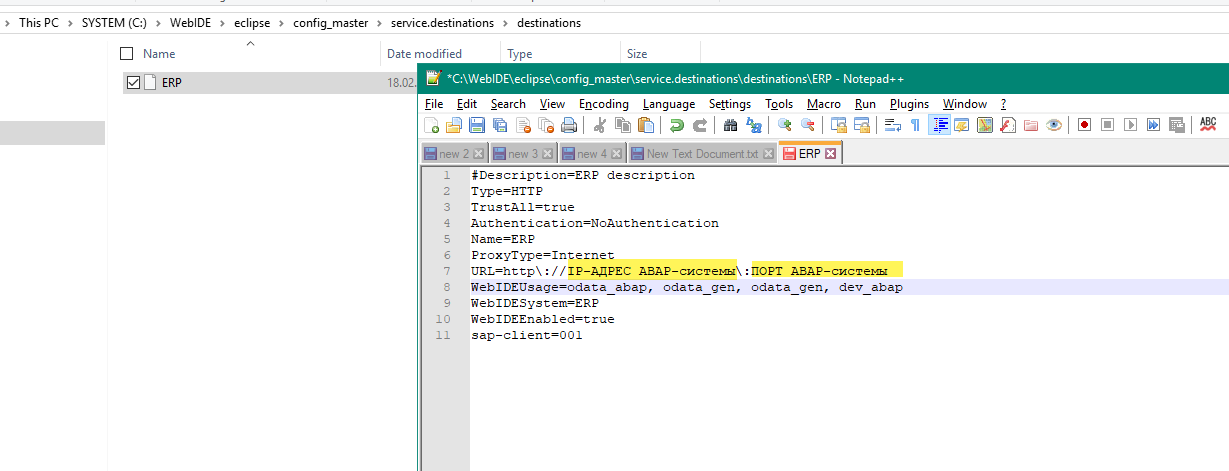
Define ABAP System Connection Parameters:
See: Connect Remote Systems in SAP Web IDE Personal Edition
Key <WebIDEUsage>
Enter one or more of the following possible values:
- odata_abap:
For the OData functionality of Gateway (corresponds to URL path /sap/opu/odata)
- odata_gen:
For generic OData functionality (service URL must be provided manually in the New Project wizard)
- ui5_execute_abap:
For executing SAPUI5 applications from the SAPUI5 ABAP repository (corresponds to URL path /sap/bc/ui5_ui5)
- dev_abap:
For extensibility scenarios and developing or deploying to the SAPUI5 ABAP repository (corresponds to URL path /sap/bc/adt)
- bsp_execute_abap:
For working with fact sheets (corresponds to URL path /sap/bc/bsp)
- odata_xs:
For SAP HANA XS OData services (corresponds to URL path/sap/hba)
Restart SAP WebIDE.
Deploy
The following video snippet demonstrates the sequence of steps for creating a new SAP UI5 application in the WebIDE environment, followed by its upload to an ABAP system.
And finally — the long-awaited deployment and launch of the BSP application from the ABAP system.