SAP Workflow. Debugging Background Tasks
As of today, we do have a small stockpile of knowledge on the topic of Workflow. Well, maybe not a stockpile — more like a small bin you can open when needed. Nonetheless, let’s keep adding to this bin with knowledge based on real-world tasks encountered during project work. And tell me, what project experience doesn’t involve ABAP? Exactly — it’s everywhere, and workflows are no exception.
Here are a few examples where a consultant needs to configure a workflow in which:
- it’s necessary to determine approvers based on the organizational structure (using custom Z* connections between objects). This must be done at the moment the workflow starts;
- it’s necessary to retrieve personnel numbers of employees involved in the workflow to later determine their email addresses.
Launching such workflows using configuration alone is, unfortunately, not possible — so only hardcore ABAP can help.
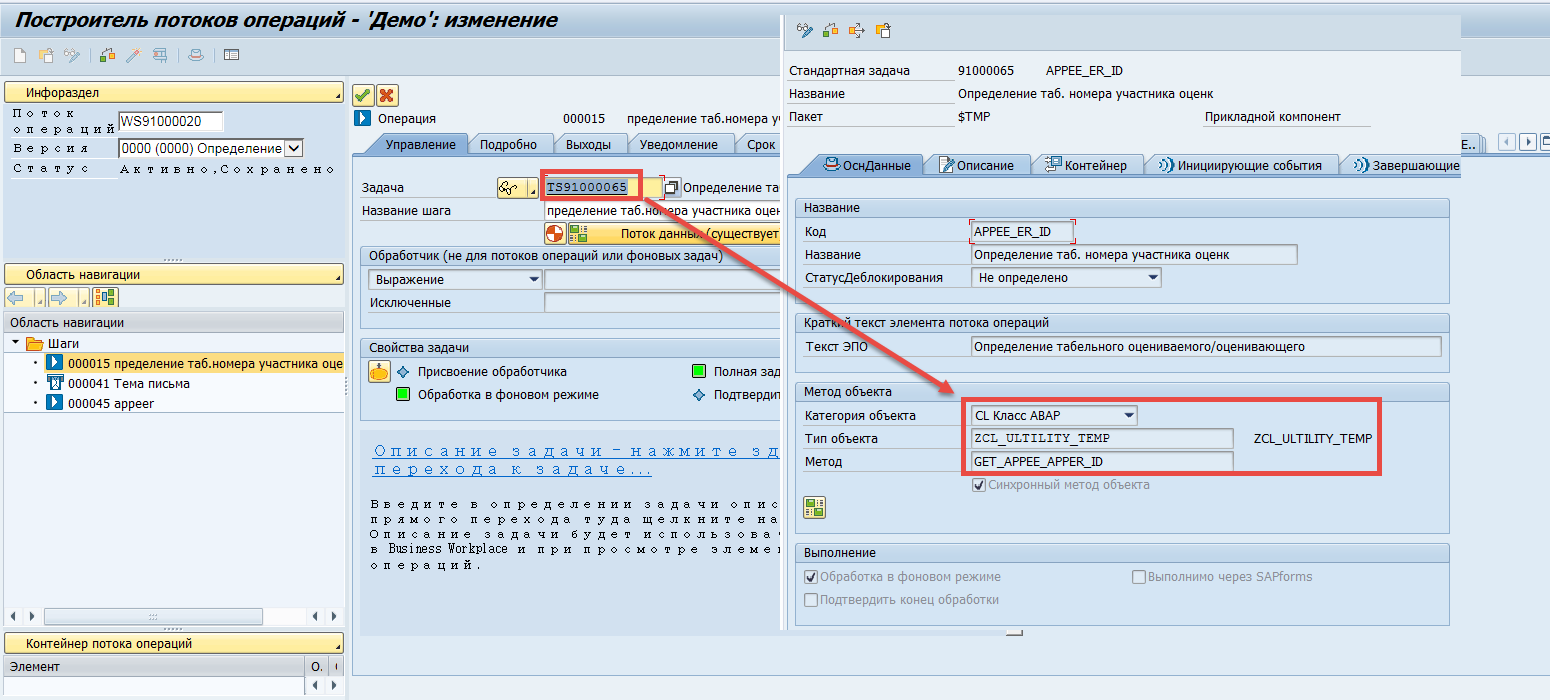
A workflow consists of so-called steps. Each, or almost each, step is controlled via a task. A task is a system object whose properties define either a business object and its method or a class and one of its methods.
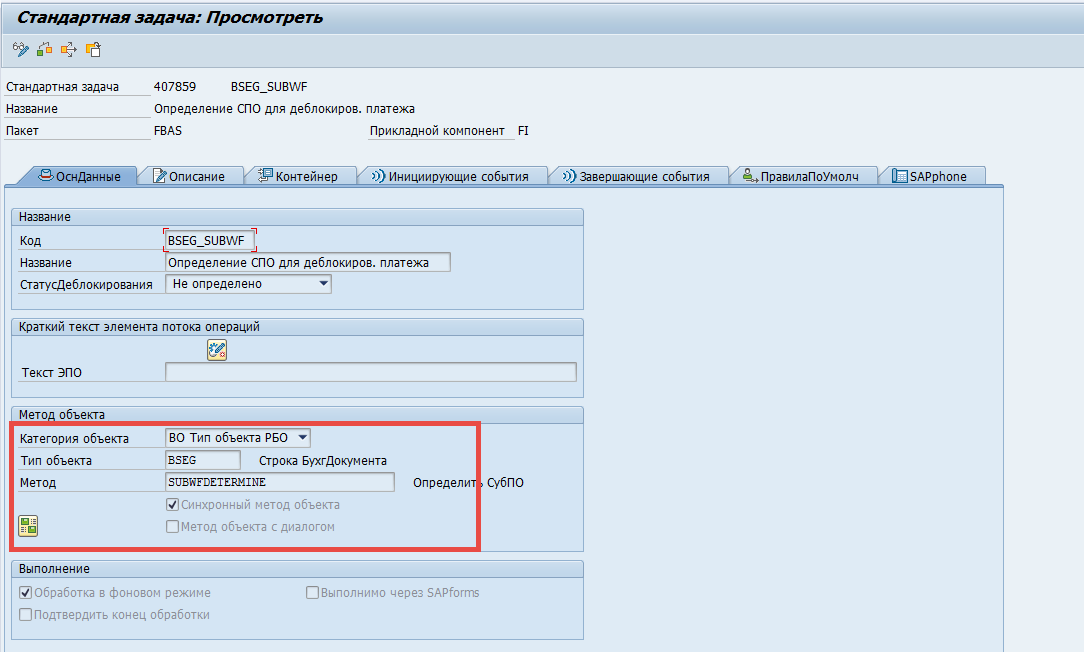
Any “additional” logic used in workflows is implemented via utility classes (see more here). Accordingly, to make the “additional” logic work within a workflow, you need to add the class and the necessary method to the task’s properties.
As you may know, rarely does a workflow run successfully on the first attempt — especially one with ABAP "add-ons". The question then arises: how can you debug a task? Believe me — it’s incredibly simple. We’ll be focusing on tasks that are executed in the background.
1. Preparation
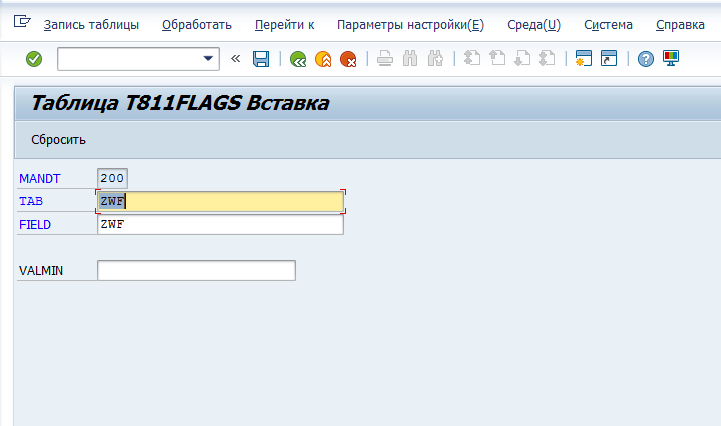
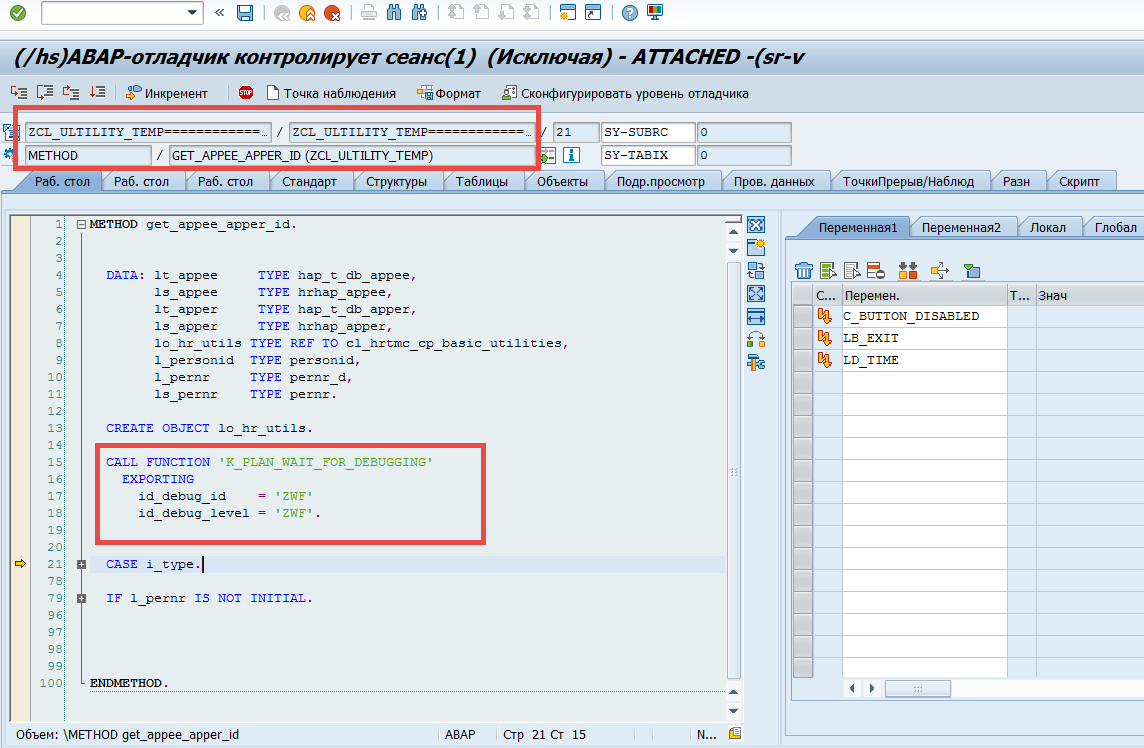
Open table T811FLAGS in transaction SE16, and create a record similar to the one shown in the screenshot below.
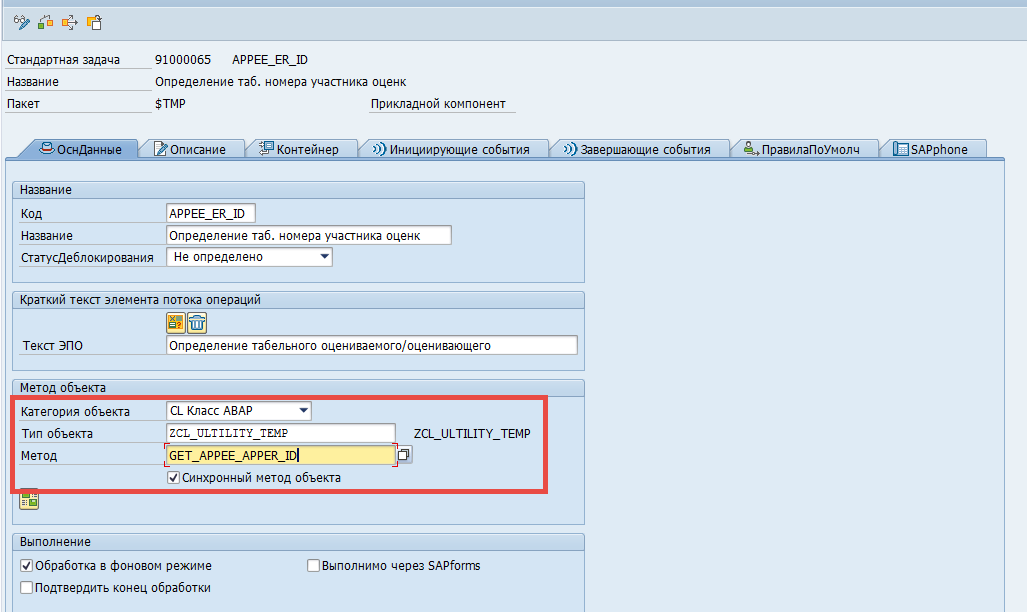
Then, change the source code of the class method you want to debug in the background by adding a call to FM K_PLAN_WAIT_FOR_DEBUGGING, using the id_debug_id and id_debug_level parameters from the T811FLAGS table record you just created.
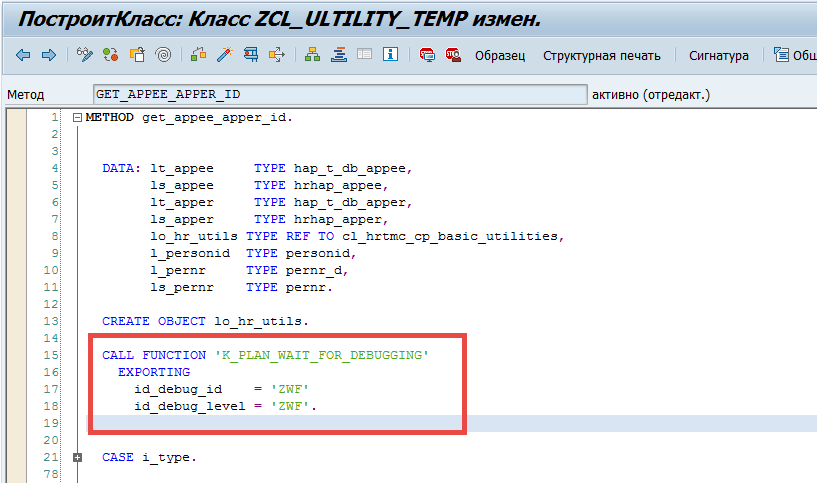
Don’t forget to activate the method. Also, make sure this class method is defined in the workflow.
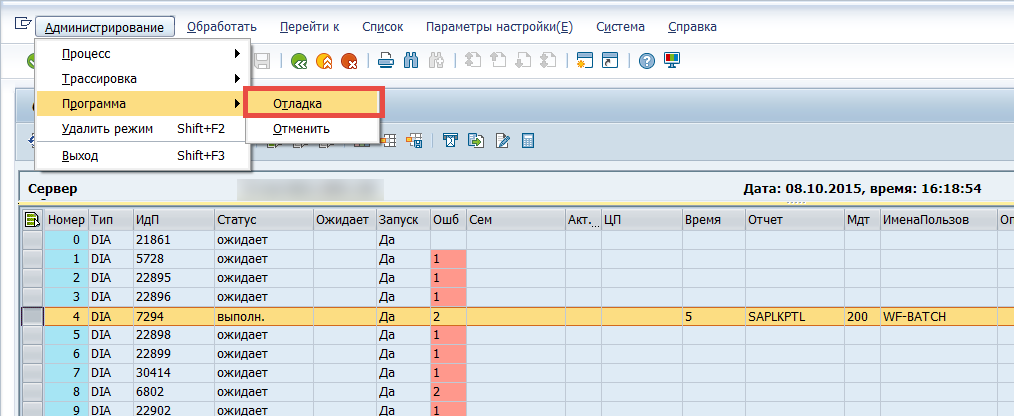
2. Starting the Debugger
Start the workflow. It should stop at the step whose task you modified (see step 1 – Preparation). You can check this via transaction SWIA. The workflow status should be STARTED.

Open transaction SM50, and confirm that there's a process running under user WF-BATCH.

In the menu, choose: Administration → Program → Debugging, after selecting the line with that process.
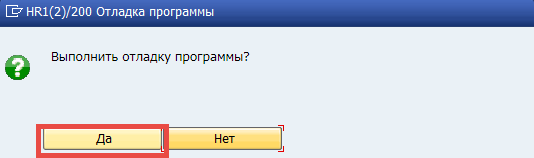
In the popup window, choose Yes.
In the opened debugger window, go to the line with the condition:
IF lb_exit = 'X'.and change the variable LB_EXIT value to X.
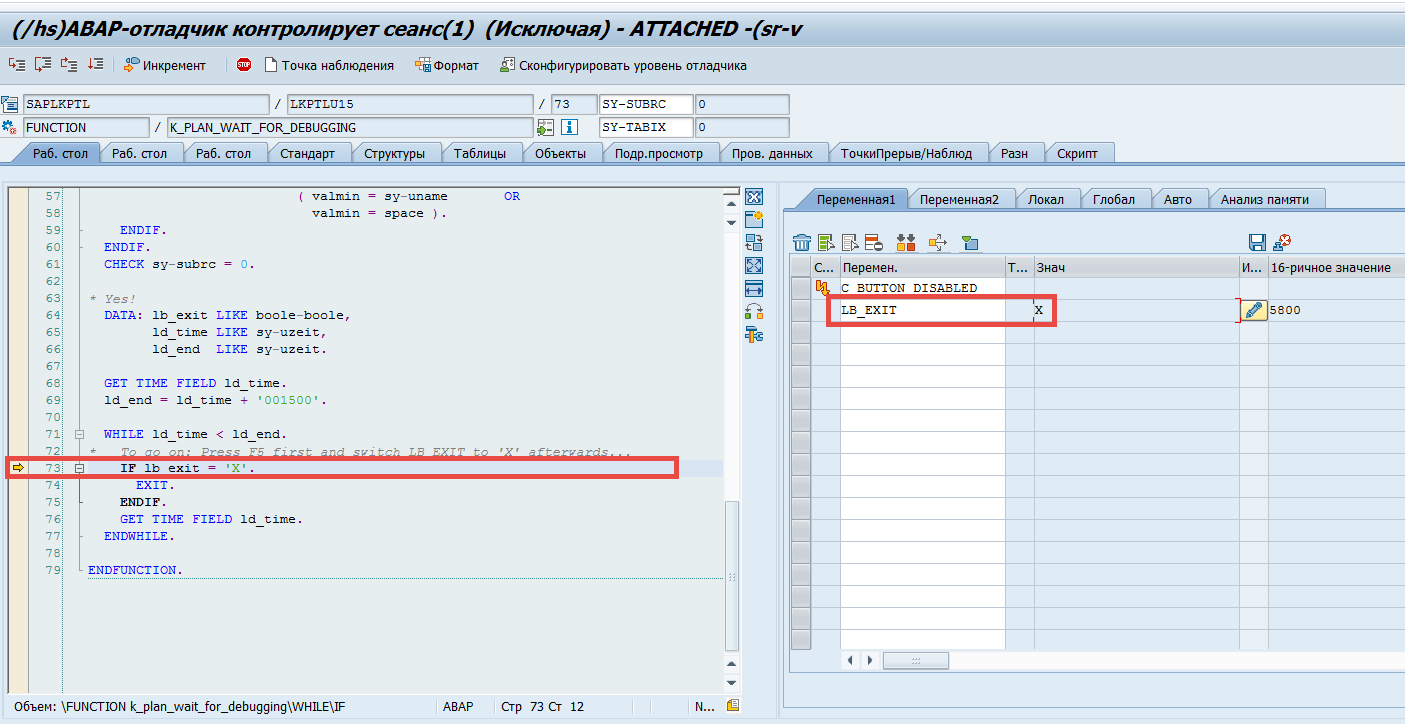
Then keep pressing F6 until you reach the custom Z* class where the FM K_PLAN_WAIT_FOR_DEBUGGING was called.
And there you are — inside the method that needs debugging. What to do next should be self-explanatory.
N.B. (1): After finishing your debugging, don’t forget to comment out the call to FM K_PLAN_WAIT_FOR_DEBUGGING, and also delete the entry from table T811FLAGS.
N.B. (2): If the system you are working in has multiple servers, after starting the workflow (see step 2: Starting the Debugger), open transaction SM51, click on one of the servers to find the process running under WF-BATCH.
Update
See the SAP Note: Workflow. Отладка фоновых задач. Транзакция SWW_BREAKPOINT