How to Create a New Node in SPRO?
How to Create a New Node in SPRO?
Background
Your project has accumulated so many custom developments and configuration settings that you’re starting to consider grouping them under a separate SPRO node. At this point, you’re likely looking for reasons why this might be a good idea. Here are a few clear benefits:
- First, it makes accessing the full range of settings more convenient for all project team members or anyone working with the implemented functionality after you.
- Second, by moving the settings into a SPRO section, the vendor gives you a tool to document them.
- Third, you should leverage as much as possible from the system!
Objective:
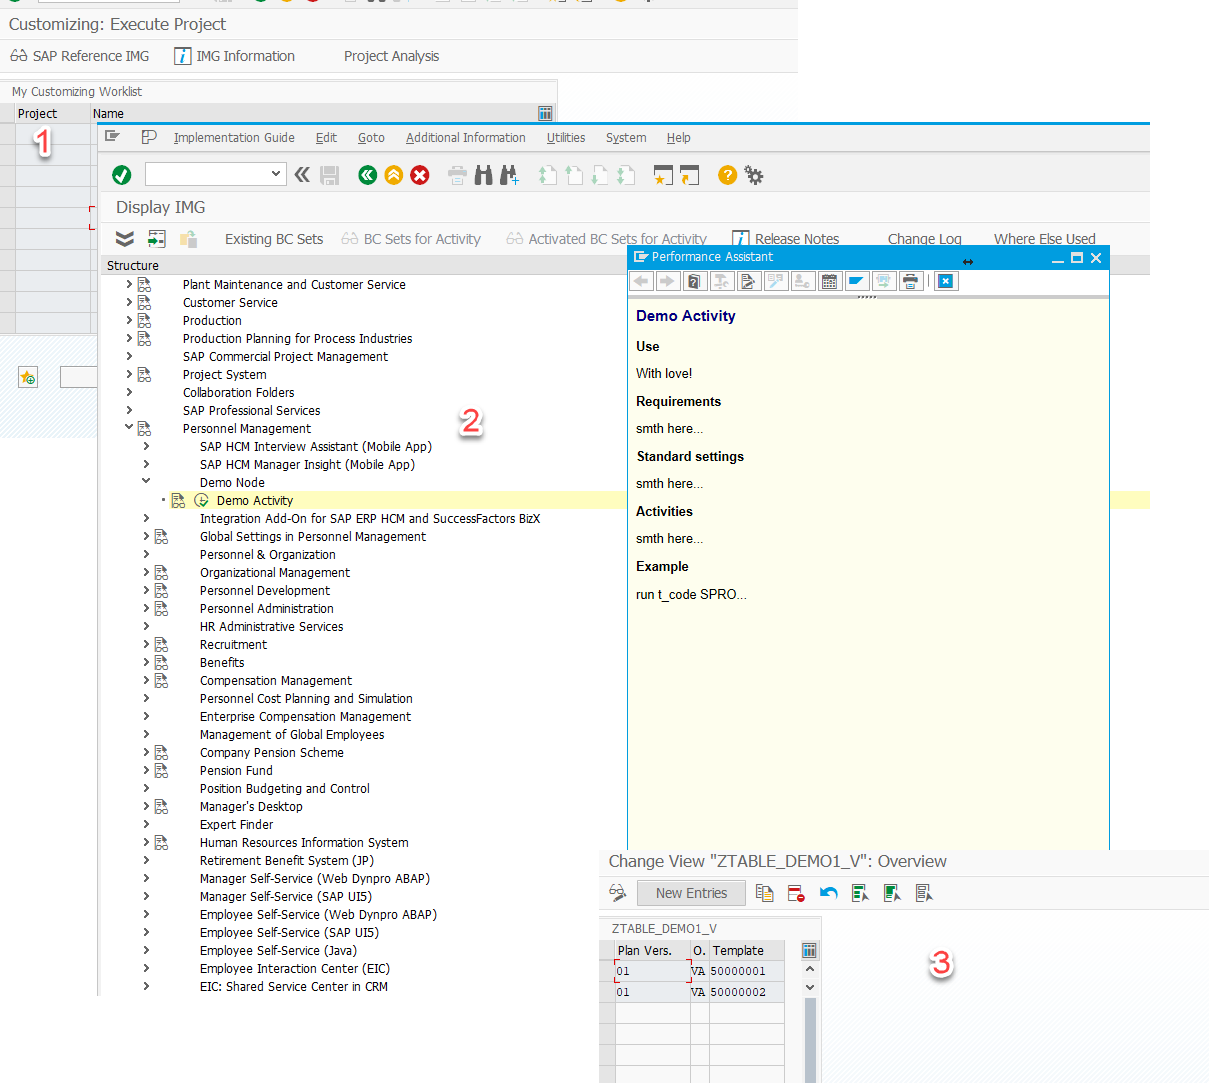
Add a new node in SPRO that contains some custom configuration.
Solution
To solve this, we will use transaction S_IMG_EXTENSION.
See also: Enhancing IMGs
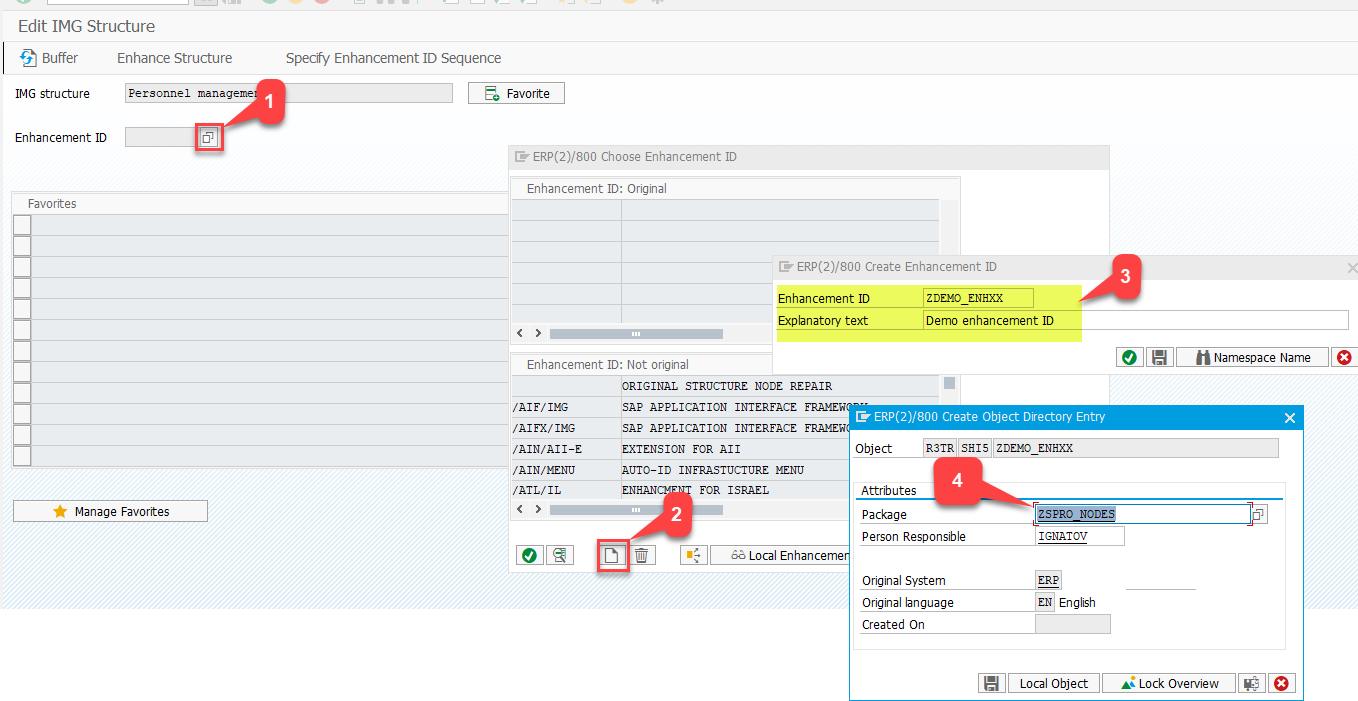
Step 1: Create a New Enhancement ID
The new Enhancement ID will appear in the Enhancement ID: Original window area.
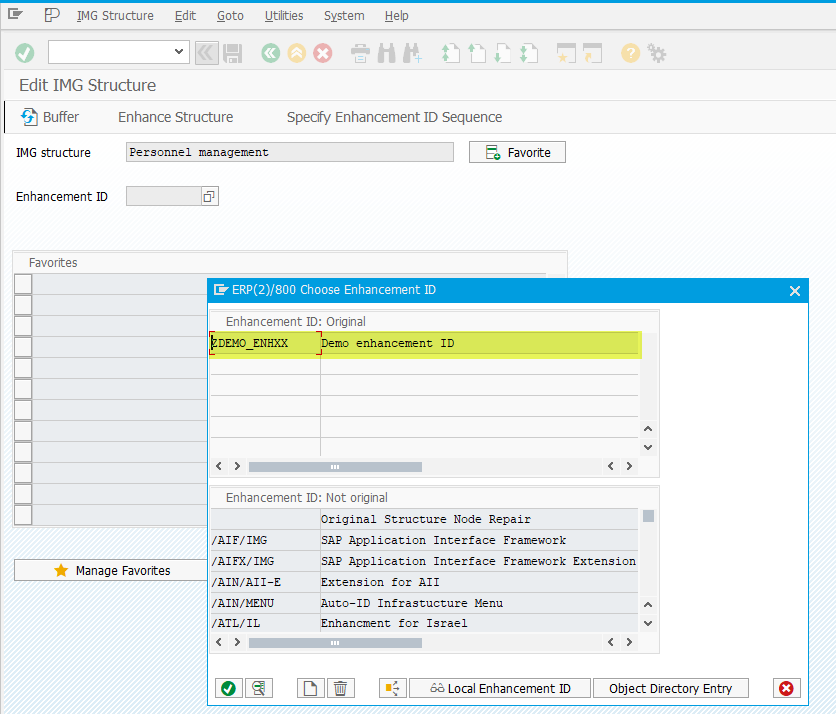
Double-click it and open the search tool for the IMG Structure field.
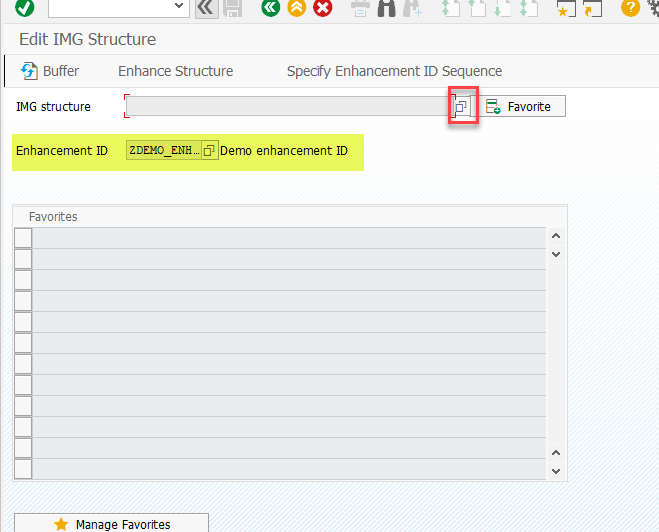
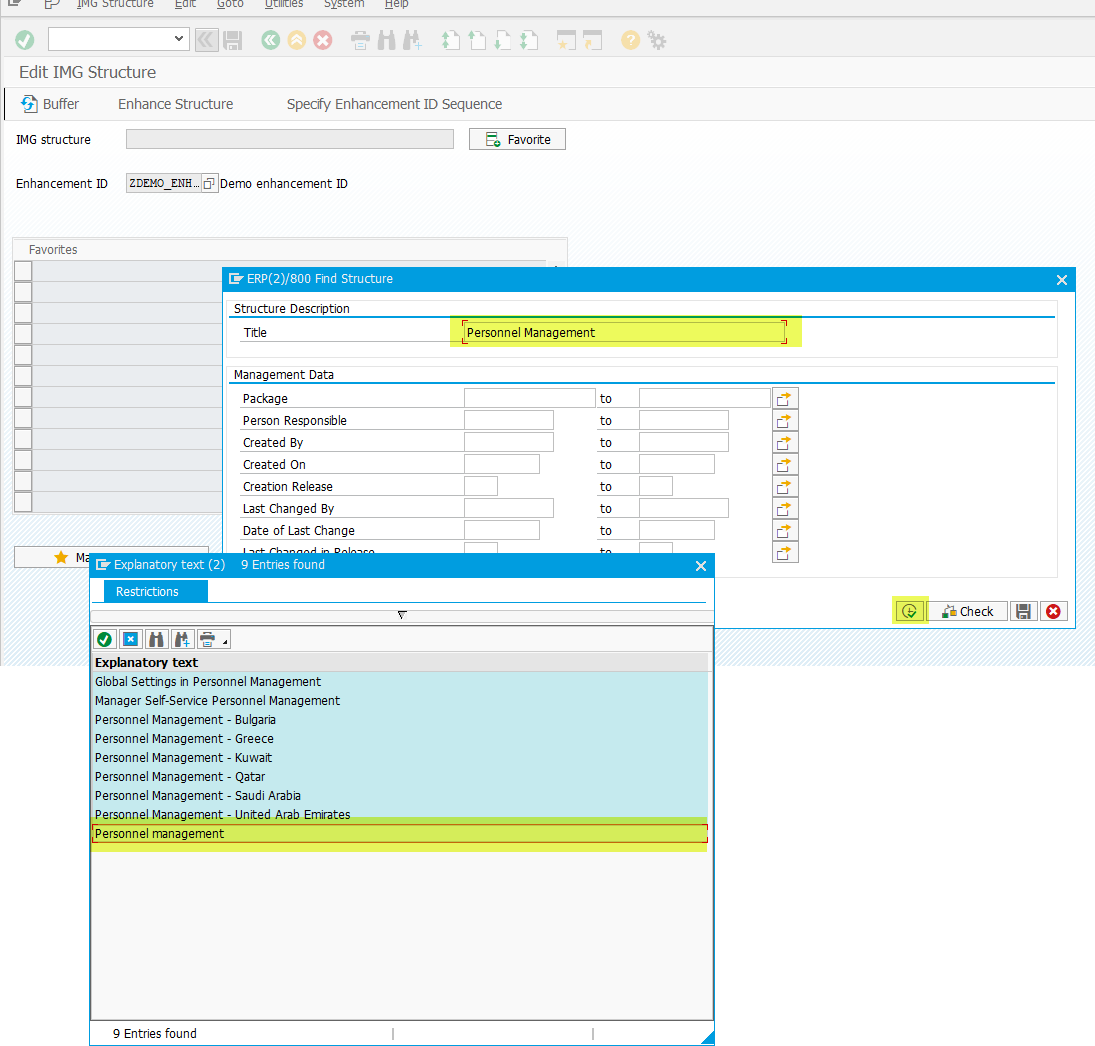
Step 2: Find the SPRO Section
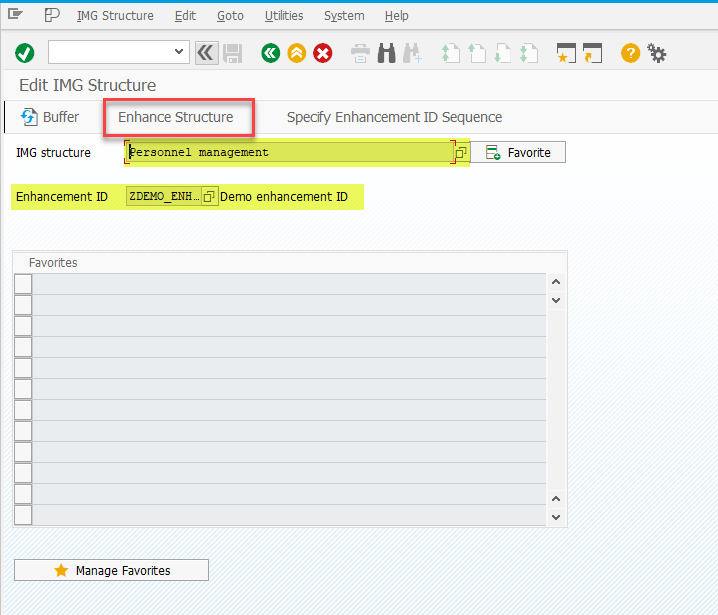
Locate the SPRO section where you plan to add the new node. In this example, I’ll use the Personnel Management section.
Click the button Enhance Strcuture
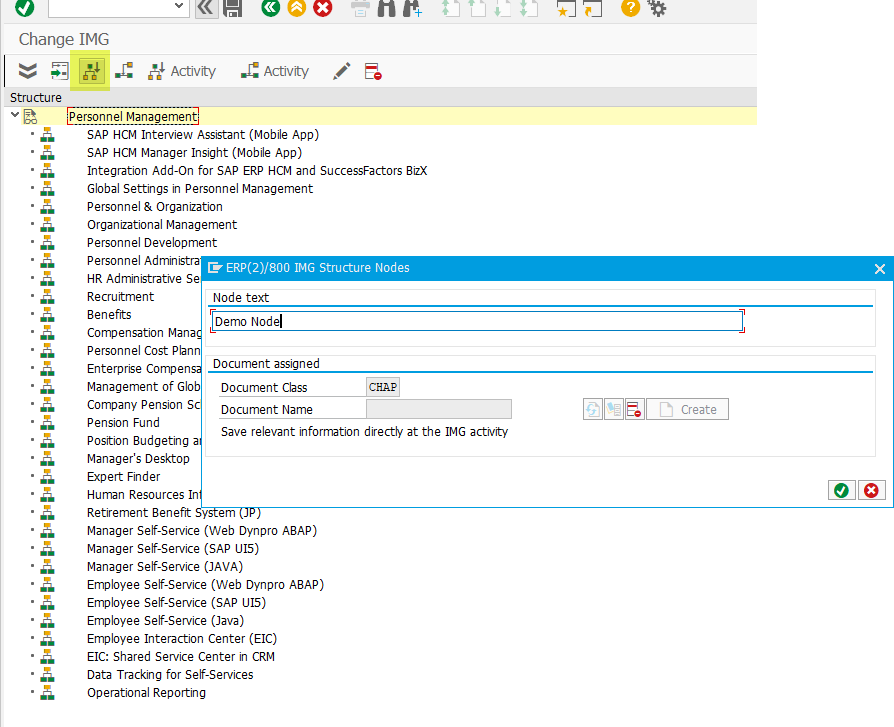
Step 3: Add the New Node
On the next screen, add a new node.
See: Create IMG Activity
Step 4: Define a New Activity for the Node
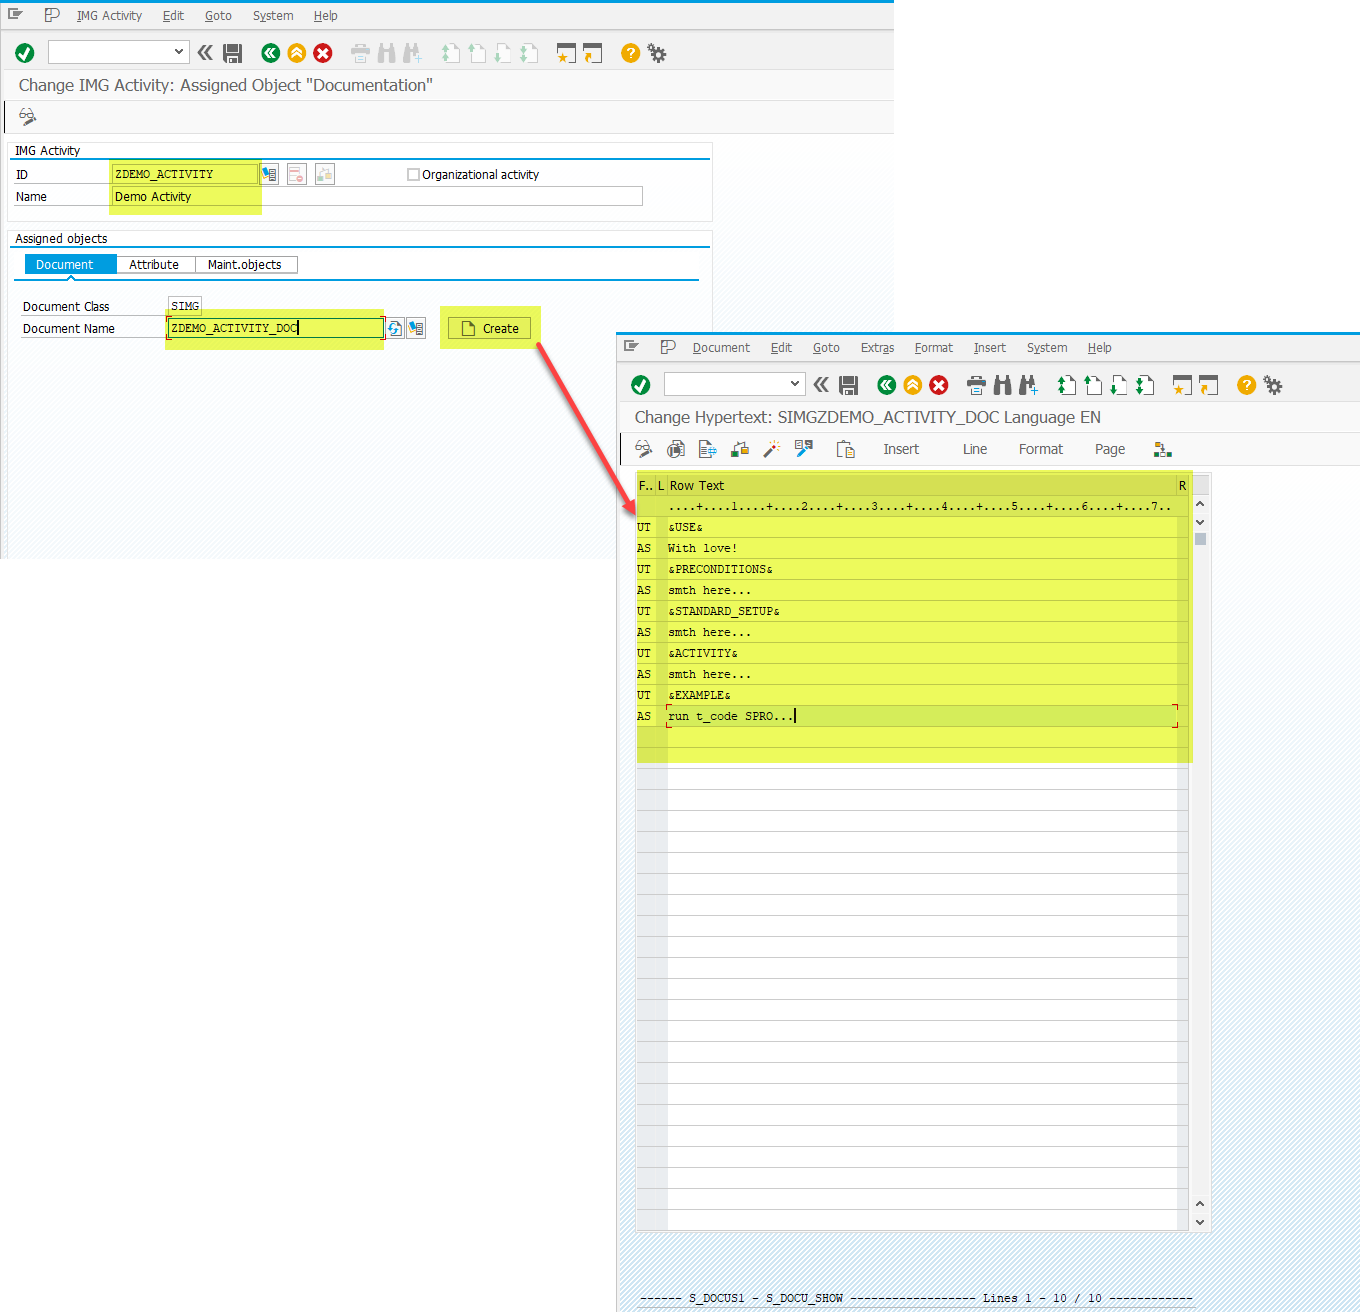
On the following screen, assign an ID, name, and optionally a help description to the new activity.
See also: Assign IMG Documentation
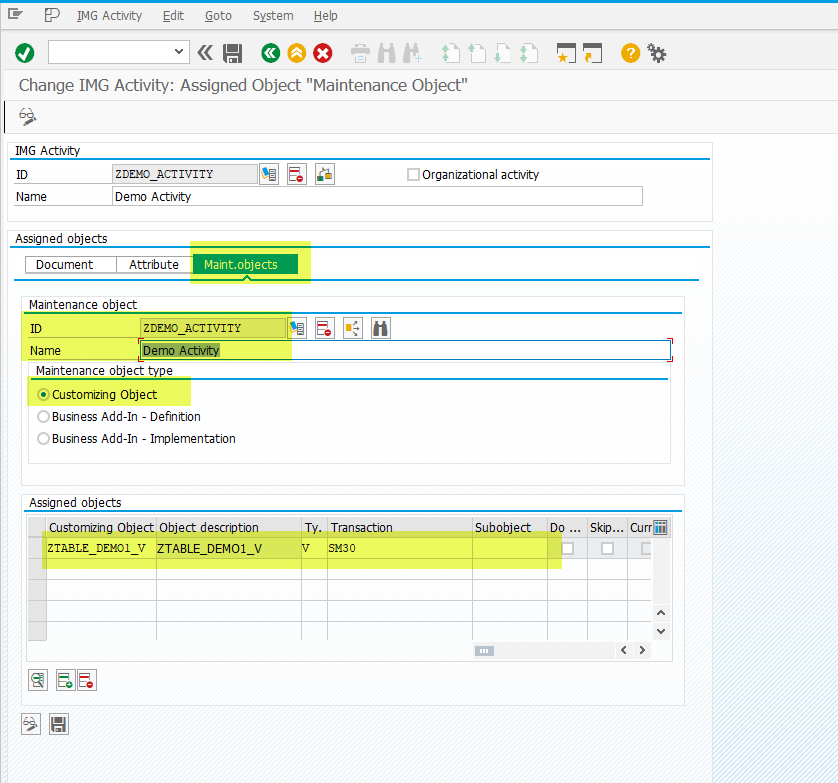
On the Maint.Objects tab, define the ID and name of the new maintenance object, its type, and the name of the table/view that should open when the activity is executed in SPRO.
See also: Create Maintenance Objects
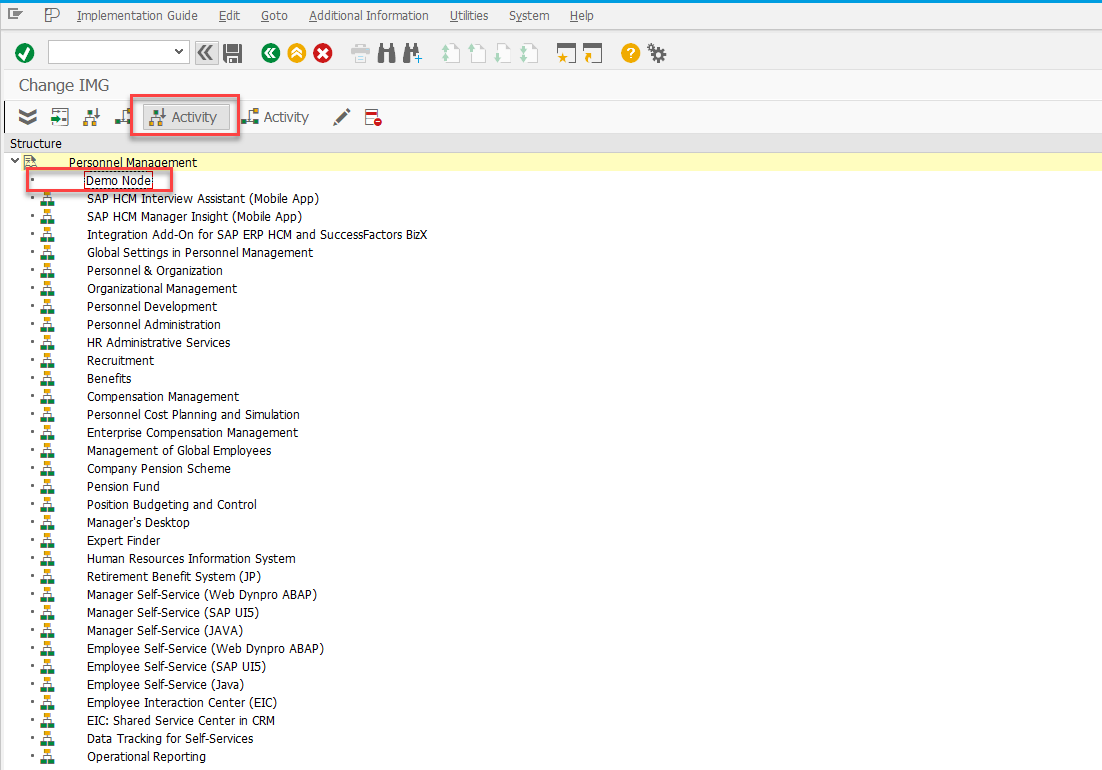
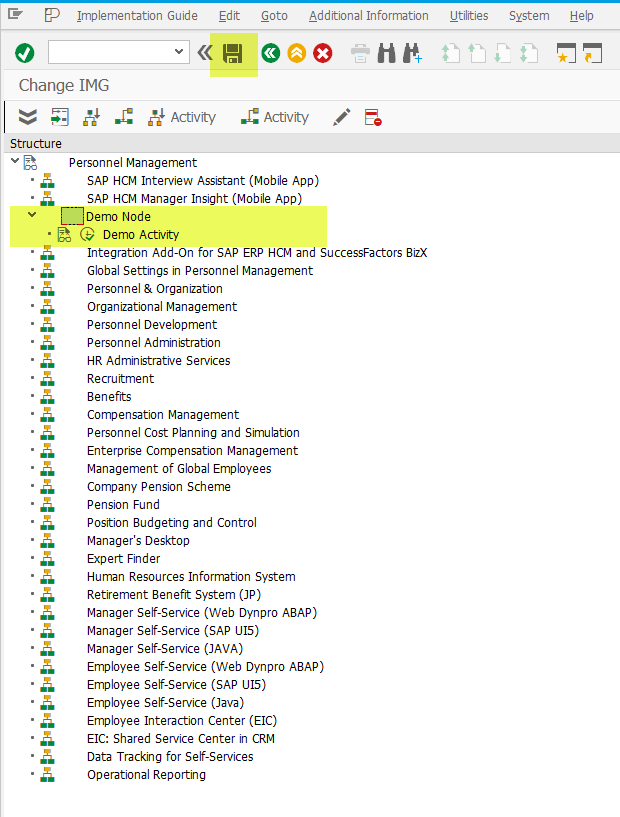
Save your changes. Return to the previous screen, ensure that your changes appear in the IMG structure, and save again.
Testing